WELCOME TO MY KITCHEN


WELCOME TO MY KITCHEN!!
I hope you enjoy the food!!!
Showing posts with label Chocolate. Show all posts

Friday, June 10, 2011

3 Minute Chocolate Cake in a Cup

Sometimes it is the things that seem the easiest that are the hardest.


The case in point is this fortnight's Cook Book Challenge.  The theme is "Cup".  Now you would not think that this would be particularly hard would you.  Well for me it was.  I naturally assumed that everybody would come up with simply stunning cupcakes.  They are not my forte - so I didn't even want to go there - so where else do you go?

I could make one of those "5 cup" cakes - but they are actually pretty boring.  I used to make a lemon chicken many, many years ago that the ingredients equalled up to a cup - but for the life of me I could not remember all three ingredients - I know 3 ingredients!!!

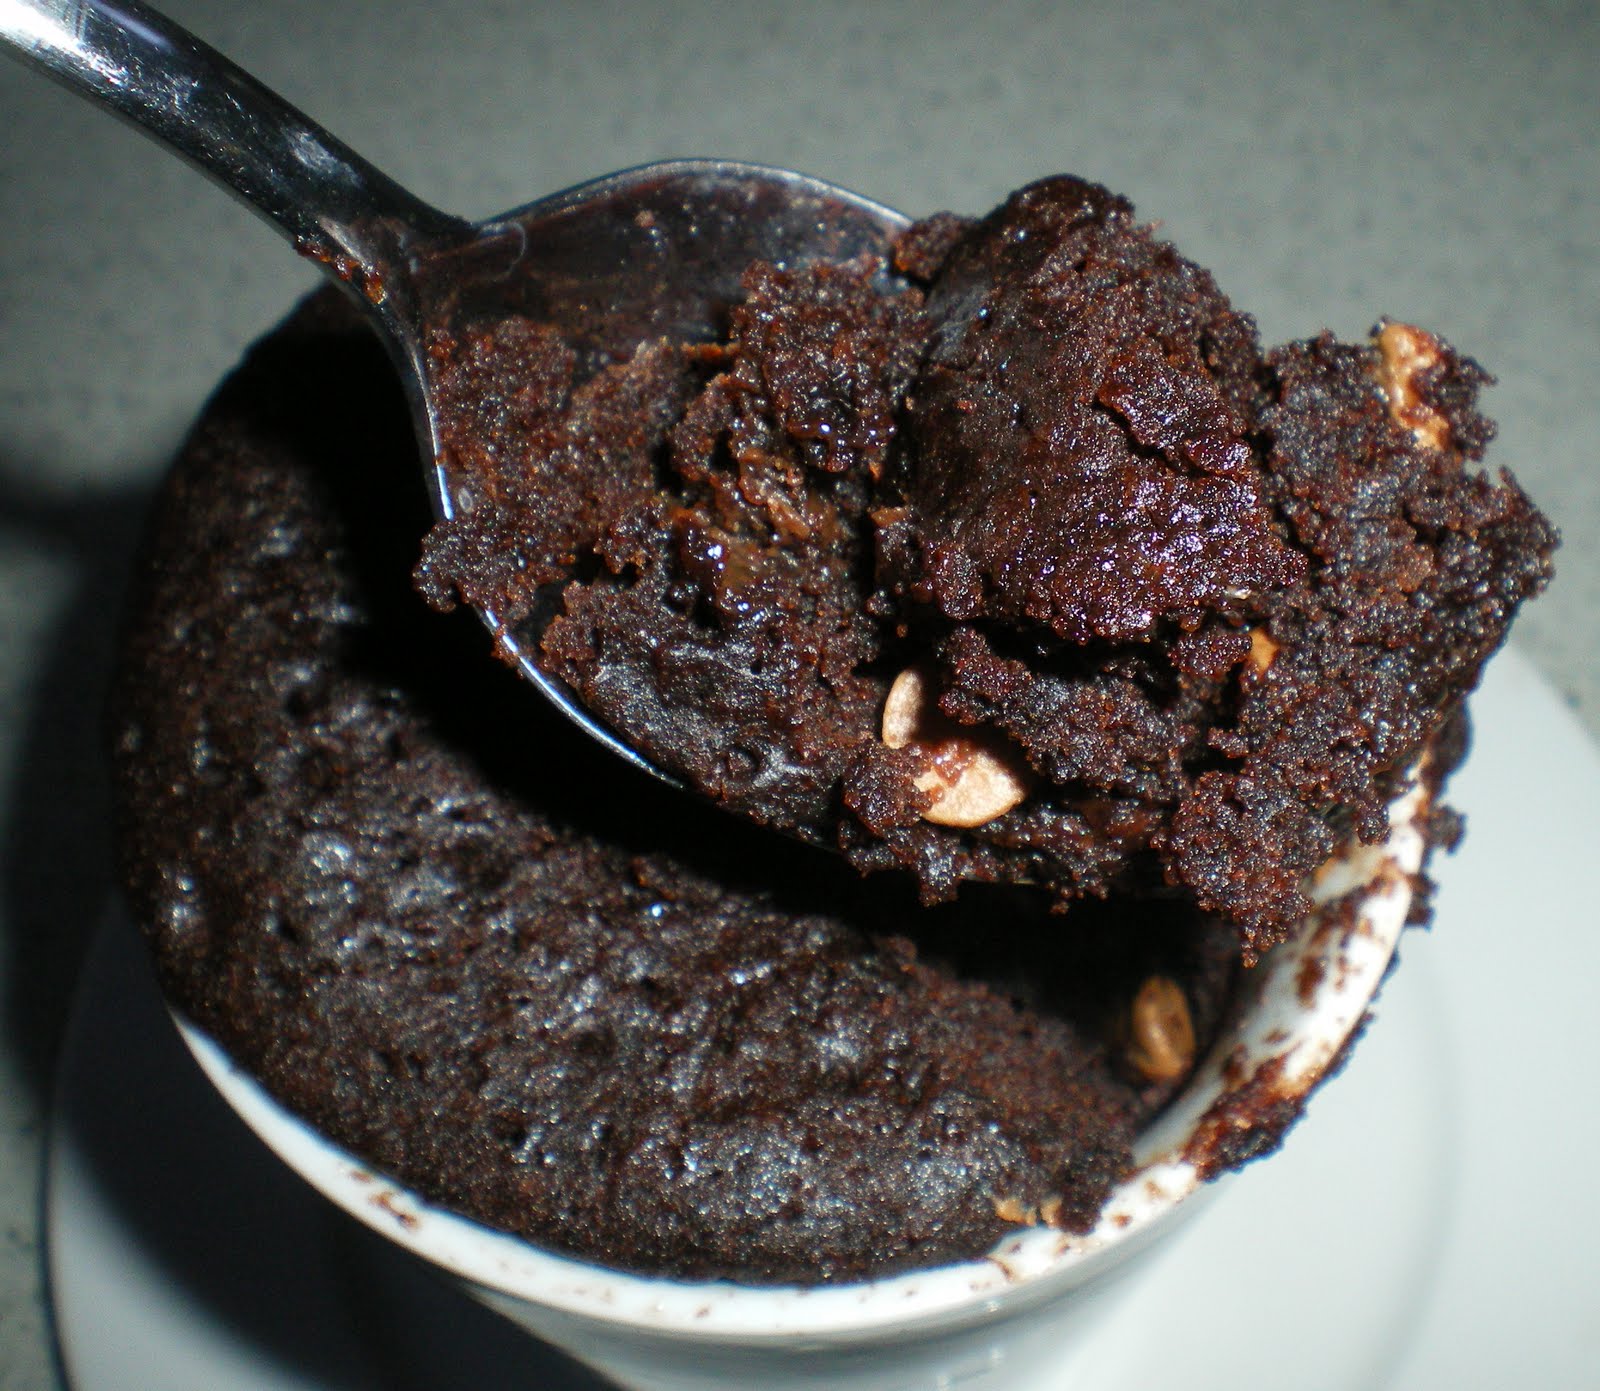
So..... I decided to go the incredibly boring, but oh, so tasty option of the 3 minute microwave Chocolate Cake in a cup!!!  Having made this now I must say this is a lethal weapon in your arsenal.  I wasn't going to try the cake - I was simply going to hand it on to "The Darlings" - but in the name of honesty in cooking I thought I better give it just a little taste test.  This cake was good!!!  Warm, and chocolatey and oh so sinful.  This could be the death of many a person when they get the late night munchies..... you know who you are!!!!!


3 Minute Chocolate Cake in a Cup
Makes 1

Recipe from - many and various places on the internet!!!! but I got this one from here

4 tbs plain flour
4 tbs sugar
2 tbs cocoa powder
1 egg
3 tbs milk
3 tbs oil
dash vanilla
1-2 tbs chocolate chips (optional)
dash salt
dash baking powder


Place all ingredients in a bowl and mix well.

Put mixture in a large coffee mug (I advise putting on a plate as it does overflow!!)

Microwave for 3 minutes, or until cooked (this will depend on the wattage of your microwave!)

The cake will rise, but then fall after you take it out of the microwave.


PLEASE, have some restraint and do not try and eat it immediately!!!! (I have warned you - if you cannot wait - you will pay the price - a burnt mouth!!!)

Yes, I know, not gourmet, not particularly exciting - but it is in a CUP!!!!


Thursday, April 7, 2011

Torta Caprese (Flourless Chocolate Cake)


The theme for this fortnight's Cookbook Challenge was "Celebration".  So what defines a celebration?  Does it have to be an actual event?  Can it simply be the Celebration of Food?  Can it be the Celebration that it is Friday?

Well I pondered on this one for quite some time - and really didn't come up with an answer.  I am therefore going to enter two entries as my Celebration theme.  One is the recipe that I made last week Barramundi with Asian Broth and Sweet Potato Mash - as that simply was a Celebration of Tastes!! The other recipe is for Torta Caprese as I made this for a friend's Birthday - so that is an actual Celebration!!

This is the first time that I have made a flourless Chocolate cake in the Thermomix - let me tell you it was so easy.


Torta Caprese
(Flourless Almond Cake)
From Thermomix EDC Cookbook

250g dark chocolate, broken into pieces
250g almonds
250g sugar (I used caster)
150g butter, at room temperature
6 eggs
1 tbs baking powder
1 tbs cocoa powder

Topping

100g dark chocolate, broken into pieces
80g cream

Preheat oven to 180C (non fan)

Grease, and line the base of a 22-24cm springform pan with baking paper.

Place the chocolate into the TM bowl and grate for 5-10 seconds on speed 8.  Set aside

Place the almonds in the TM bowl and mill for 4-6 seconds on speed 6.  Add to the chocolate.

Place the remaining ingredients into the TM bowl and mix for 20 seconds on speed 7.

Add the chocolate and almonds and continue to mix for 30 seconds on speed 6.

Place the mixture into the prepared pan.  Bake for approximately 1 hour.

Allow to site in baking pan for 5-10 minutes, then remove, and place on a rack to cool.

Once the cake has cooled it is time to make the frosting.

Place the chocolate into the TM bowl and grate for 5 seconds on speed 8.

Add the cream and cook for 2 minutes at 50 degrees on speed 3.

Cover the cake with the topping, allowing it to run down the sides.


Serve with whipped cream that has had a small amount of caste sugar and vanilla added to it.


There you have a cake worthy of a 50th Birthday Celebration!!!!  Happy Birthday Jan!!!


As I had to take this somewhere I had a hard time trying to keep a piece from the marauding hordes so I could take a photo - sorry!!!


Tuesday, March 1, 2011

Rainbow Slice

You know there is only so much they can do with recipes!! Don't you find that often times when you look over the list of ingredients they look suspiciously like other recipes that you have seen before!  When I was checking out the chocolate slices that were featured in the March edition of Super Food Ideas I was hit with a sense of deja vu.  The ingredients in the Rainbow slice were almost the same as the Chocolate Weet Bix slice that my mum has been making for more than 40 years!!!  The only difference was that there was no flour in this recipe, more weet bix - oh and they added an egg!  As the original recipe is still a huge hit with my kids I thought I would "road test" this new version!


Rainbow Slice
From Super Food Ideas - March edition

12 weet bix, finely crushed
1/4 cup cocoa powder, sifted
3/4 cup brown sugar
200g butter, melted
1/2 cup coconut - I used shredded
1 egg, lightly beaten
150g tub rainbow choc chips

Chocolate Icing
3 cups icing sugar mix
2 tbs cocoa powder, sifted
50g butter, melted
milk

Preheat oven to 180 degrees.  Grease an 18cm x 28cm slice pan.  Line base and sides with baking paper, allowing a 3cm overhang on all sides.

Combine the weet bix, cocoa powder, sugar, butter, coconut and egg in a bowl.  Press the mixture over the base of the prepared pan.  Bake for 15-20 minutes, or until firm to touch.

As the slice is cooling, make the icing by combining the icing sugar, cocoa and melted butter in a bowl.  Add just enough milk to make the icing a spreading consistency.  Using a hot knife spread the icing over the top of the slice.  Sprinkle with the choc chips, pressing them into the icing to make sure they are secure.

Set the slice aside for 2 hours to cool completely, then cut into squares.


This slice is a sure fire lunch box winner!!! (If it lasts that long!)

The verdict on the "new" version.  "Was a little too oily for my liking!" (To be read in Manu Feildel's accent please!)

Monday, November 8, 2010

Chocolate Cornflake Slice & Cornflake Cookies

Joy, oh joy, I have my oven back in action!!  I have all my appendages back in action!!!

A rainy weekend, what is a girl to do (particularly when her oven has been out of action) - BAKE of course!!!

In the interests of school lunches I set to to make a few treats!!

I had purchased a packet of corn flakes at some point to make something - don't actually remember what now, so I thought I must make something to use these up - pulled out the ancient Women's Weekly Beautiful Biscuits Cookbook (circa .... well let's not admit!!!) went to the cornflake section - and there they were - they were called Weekender Biscuits - but I say into the new millenium - they are now Cornflake Cookies!!!!


Cornflake Cookies


Makes approx 24

125g butter
1/3 cup sugar
1 egg
2/3 cup sultanas
1 cup self raising flour
2 cups lightly crushed cornflakes


Preheat oven to 180C.

Cream the butter and sugar until light and fluffy.  Add the egg, beat well.  Fold in the sifted flour and sultanas . mix well.  Drop teaspoonfuls of mixture into the cornflakes, roll lightly.


Place onto a baking tray that has been lined with baking paper (make sure you allow room for spreading).


Bake for approximately 20 minutes, or until golden.

Allow to cool on trays for 5 minutes, then transfer to wire rack to cool completely.


Now, I did not use all of the crushed cornflake crumbs - and there was still a lot left in the box, so I decided to convert an old favourite - Weet Bix Slice - into Corn Flake Slice!!


Corn Flake Slice

1 cup self  raising flour
1 cup crushed corn flakes
1 dessertspoon cocoa powder
1 cup brown sugar (firmly packed)
3/4 coconut (I used shredded)
125g butter, melted

Mix all ingredients in a large bowl.  Press mixture into a slice (lamington tin).


Bake in oven (180C) for 10 minutes.

Remove from oven - allow to cool slightly - then ice with chocolate icing.


Chocolate Icing
1 cup icing sugar
2 tbs cocoa
few drops vanilla essence
20g butter, melted
1 tbs milk (plus extra if needed)

Coconut, extra


Place the icing sugar, cocoa, vanilla, and butter in a bowl.  Mix together, then add 1 tablespoon of milk, adding more if necessary to form a smooth paste.

The end result - I think Cornflakes make the slice even better - more crunch - this is now my new favourite!!

Now all is balanced in the world - when your oven works -you feel so much better!!  Plus I have been to the movies this afternoon - I saw Eat Pray Love - I think an odyssey of my own is in the cards!!!!

So Dear Readers what do you do when the weather turns bad - do you bake up a storm??? Or do you go to the movies and "escape" for a while??

Monday, October 25, 2010

Nutella using the Thermomix and Nutella Fudge Brownies

Do you have 10 minutes?

Do you have any Nutella on hand?

Well if the answer to to both of the above questions is yes - then you are well on the way to making this yummy little treat for yourself.


Thanks to Liss from www.frillsinthehills I jumped on the Nutella bandwagon last week.  Liss shared a recipe that she had for home made Nutella - and when I had the Thermomix here last week I gave it a go.  If you want the regular Nutella recipe you will find it on her blog.  I will give you the Thermomix version here.

Homemade Nutella

120g whole hazelnuts
380g raw sugar
60g cocoa powder
1/4 cup canola oil

Preheat the oven to 200C.

Place the hazlenuts on a baking tray lined with baking paper and roast for approximately 7 minutes, move the hazlenuts around and return to the oven for another 5 minutes.

Place the hazlenuts on a tea towel, cover, and roll the hazlenuts between hour hands to remove the skins.  You don't have to get all of the skins off - just do the best you can.

In the Thermomix bowl (TM) place the raw sugar - process for 20 seconds on speed 9 - this will give you icing sugar.

Place the hazlenuts in the TM bowl blend for 10 seconds on speed 8.  This will turn the hazlenuts into hazlenut meal, and the oil will begin to emerge.

Add the cocoa and icing sugar, process for 10 seconds on speed 8.  Add the oil and process for 3 minutes on speed 3.

The nutella will last up to a month in the fridge.


After we had made the nutella we attempted to make home made Ferrero Rocher - but they were not a huge success - I know where we went wrong now, and I will attempt the recipe again and share it with you.

However, now I had a stash of nutella, and when I stumbled across this little beauty of a recipe I was ready to rock and roll!!!

Nutella Fudge Brownies


Makes 12 mini muffin size brownies

1/2 cup nutella
1 large egg
5 tbs plain flour

Preheat oven to 180C.

Line a 12 cup mini muffin pan with paper liners.

In a medium bowl, whisk together the nutella and the egg until smooth.  Add the flour and whisk until combined.

Divide the mixture among the prepared muffin tins.

Bake for 10-12 minutes, or until a skewer inserted in the centre comes out with a few gooey crumbs attached.  Remember - they are brownies - so gooey is good!

Put the muffin pan onto a rack to cool for a few minutes, then remove the muffins from the pan to cool completely.

Dust with icing sugar.


These WILL NOT LAST LONG - make a double batch!!!!

What a wonderful little treat to whip up!!

Can you believe only 3 ingredients!!  And they take only 10 minutes!!!

So Dear Readers do you have a quick little treat that you like to whip up, and if so what is it?

Wednesday, October 13, 2010

Chocolate Banana Bread

You know you have serious food issues when you just bake for the sake of a blog!!

Well not exactly - but I haven't had much to blog about lately, and I was feeling particularly inspired by Liss from www.frillsinthehils.com - she had had a bit of a baking session on Monday.  That coupled with the fact that I was shackled to the house with a sick child meant that I had nothing to do (well nothing enjoyable that was!!)  So I made a couple of baked items (ostensibly to add to the children's lunch boxes - if, and when they all returned to school!!)  Here is item number one that I baked.


Chocolate Banana Bread
From bills food by Bill Granger


250g (2 cups) plain flour
2 tsp baking powder
125g unsalted butter, softened (I used salted)
250g (1 cup) caster sugar
4 ripe bananas, mashed (I used 2 - they were massive)
2 eggs, lightly beaten
1 tsp vanilla extract
175g (1 cup) chocolate chips (I used 1 bag which was 230g - little over a cup)

Preheat the oven to 180C.

Lightly grease and flour a 19x11cm loaf tin.

Sift the flour and baking powder into a large bowl.

Mix the butter, sugar, banana, eggs, vanilla and chocolate chips in a separate bowl.  Add to the dry ingredients and stir to combine, being careful not to overmix. *

Pour the batter into the prepared pan and bake for 1 hour and 15 minutes, or until the bread is cooked when tested with a skewer. **

Leave to cool in the tin for 5 minutes before turning out onto a wire rack to cool.

Serve in thick slices with butter. (If you are feeling particularly decadent!)

* When mixing the wet ingredients into the dry ingredients it is important not to overmix as this works the gluten and the end result is a tough and dry bread.  A loose (just mixed) mixture ensures a moist delicious result.

** I baked mine for 1 hour - then checked - mine was done at this stage - so I suggest you check at the 1 hour mark - and go from there.

As I had a lot of baked goods in the house I decided to take this along to tennis this morning - and it was given the thumbs up by all the ladies there - they even asked for the recipe as they thought their kids would love it!!

Wednesday, September 15, 2010

Chocolate Zucchini Cake

I've got a secret, please don't tell!!

I made a chocolate cake for "The Darlings" yesterday - they loved it!!  The secret is that is has a vegetable in it!!!!  I hid the recipe, so they have no idea that the lovely moist chocolate cake they loved so much has zucchini in it (and no, it is not the recycled zucchini that I took out of their gnocchi the night before!!!)

I was at a loss yesterday afternoon, it was raining, I had cleaned the kitchen (and didn't feel like tackling any more cleaning projects) - so what else was there to do but bake!!  Trouble was Mr. CCC had taken my car, and the rain was coming down pretty hard, didn't want to venture out in it - so I had to make do with what I had in the pantry!!!  Scoured the recipe books and the internet, and finally decided on a chocolate zucchini cake - I've never made one before!!!  I looked at several recipes, and in my usual style (or should I say based on what ingredients I had on hand) I made up my own version.


Chocolate Zucchini Cake


2 1/2 cups plain flour
1/2 cup cocoa
2 1/2 tsp baking powder
1 1/2 tsp bi carb soda
1 tsp salt
1 tsp cinnamon
170g butter, softened
2 cups sugar
3 eggs
2 tsp vanilla extract
1 large zucchini, grated (you need approx. 2 cups)
1/2 cup milk


Glaze


1 1/2 - 2 cups icing sugar
3 tbs milk (approx)
1 tbs cocoa


Preheat oven to 180 C (non fan).


Lightly grease and flour a bundt pan.  


Sift the flour, cocoa, baking powder, bi carb soda, salt, and cinnamon into a bowl.  Set aside.


With an electric mixer, beat together the butter and the sugar until they are well blended.  Add the eggs to the butter mixture, beating well after each addition.  


With a spoon, add the vanilla, and zucchini to the mixture.


Mix well.  Now alternately add the sifted dry ingredients and the milk, until all the the ingredients are combined.


Spoon the batter into the prepared cake tin.


Bake in the oven for approximately 50 minutes, or until a skewer inserted into the centre comes out clean.

Cool in the pan for 15 minutes, then turn out onto a wire rack to cool completely.

To make the glaze, mix together the icing sugar and cocoa, then add the milk gradually until you have a thick, pouring consistency.  Drizzle the icing over the cake. When the icing is dry sift a little icing sugar over the cake for decoration.


Now whatever you do, do not, I repeat DO NOT tell "The Darlings" there is zucchini in there!!  It could scar them for life and they may never eat chocolate cake again!!! (as if!!!)


Tuesday, August 31, 2010

Chocolate Wheat Bix Slice

I remember my Mum making this slice for us when we were kids.  It was always a favourite.  Forty odd years on, and it is still a favourite.  As I write about it today, I will be lucky if there is any left over by the end of today!!!  (I only made it on Sunday!!)  Thanks goodness the little convection oven can make slices!!!  This slice is just so easy to make - and you usually have all the ingredients on hand too!!

Chocolate Wheat Bix Slice


1 cup self raising flour
4 wheat bix (crushed)
1 1/2 tbs cocoa
1 cup brown sugar, firmly packed
3/4 cup coconut
125g butter, melted


Chocolate Icing
1 cup icing sugar
2 tbs cocoa
few drops vanilla essence
20g butter, melted
1 tbs milk (plus extra if needed)


Coconut, extra


Preheat oven to 180C.


Mix all ingredients, including the melted butter, in a bowl.


Press the mixture firmly into a slice tin


Bake in the oven for 10 minutes, or until goden around the edges.


Remove from oven and make the icing.  Place the icing sugar, cocoa, vanilla, and butter in a bowl.  Mix together, then add 1 tablespoon of milk, adding more if necessary to form a smooth paste.


While the slice is still hot place the chocolate icing over the top of the slice.  Spread it out so the heat of the slice makes spreading it easier.  Coat the top of the slice with the icing, garnish with extra coconut, then leave to cool completely.


Cut into squares.


See if you can start a family tradition with this slice - let's see if we can keep it going another 40 years!!!

Monday, July 19, 2010

Choc Chip Brownies & BBQ Marinade

Are you addicted to MasterChef the same as me?  If not I apologise, and suggest that you skip the next couple of lines and head straight to the blue text and the recipe!

Yesterday afternoon I was catching up on Friday's Master Class on the internet, while I was waiting for my latest batch from the oven to be ready.  I was watching Gary make his Chocolate Gluttony, and you will never guess what I was waiting on to come out from the oven .... you got it  - Brownies!!!  His recipe was pretty much the same as mine, so I say this is a good base to experiment with.  Even give your own "Chocolate Gluttony" a go using this brownie mix as the base.


Choc Chip Brownies


250g butter
2 cups caster sugar
4 eggs
1 1/2 cups plain flour
3/4 cup cocoa powder
1 tsp vanilla extract
1 1/2 cups chocolate chips


Preheat oven to 180C (non fan).  Line a lamington slab pan with baking paper.


Melt the butter in a large bowl in the microwave.  Stir in the sugar.  Add the eggs, one at a time, and stir until the mixture is thick and glossy.


Sift in the flour and cocoa powder, and stir well until combined.  Stir in the vanilla, and chocolate chips.


Spread in the prepared pan.


Bake for 30 minutes, or until  - and here is Gary's tip - makes sure the edges are firm, there is a nice crispy topping, and the centre is still soft.  This way you will have a lovely gooey brownie.  Of course if you don't want the gooey - simply cook for a minute or two longer.

So Dear Readers what would you include in your Chocolate Gluttony Dessert??  Do tell!

I think I am still a little in holiday mode, and not that organised in the pantry department.  It seems so hard to get the kids to go to the shops to get food.  When I tell them we need to go get food they tell me don't worry Mum - just order pizza!!  Ain't life simple when you are a kid?

So anyway, we decided we wanted a BBQ last night - I rummaged around in the freezer and discovered some long forgotten lamb rump steaks.  They looked a little freezer burnt - but a good marinade would fix that!  Looked in the pantry - nothing ready made there.  Will have to concoct something up!  Here is what I made, and I must say - it tasted pretty good!

BBQ Marinade


1/2 cup tomato paste
1/4 cup red wine
2 tbs brown sugar
2 tsp worcestershire sauce
2 cloves crushed garlic
1 tbs balsamic vinegar
1 tsp honey
1 tsp mustard powder


Combine all the ingredients in a bowl.  


Use to marinade, steak or lamb.

So tomorrow, with a little ambivalence I wave good bye to "The Darlings" as they head back to school.  Happy - because I can do whatever I want without arguing with them about why we need to do it.  Sad - because it's back to all the running around after school with all the sporting activities that are back on again - late night dinners, and the usual hectic schedule.  Oh well - can't have life easy all the time can you??

Saturday, July 17, 2010

Beef Stroganoff & Caramel Slice

I decided to take the MasterChef Pressure test this week and make their version of Beef Stroganoff.

If I had been on the show I think I may have been eliminated - I made the mistake of not reading the recipe properly, and I had to do a "Jonathon" and try and fix it mid way through the recipe and hope for the best!!  Having said that I think the dish turned out OK.  What I didn't do was include the paprika in the flour dusting of the meat - so I added it during the cooking.  The other thing I did that was different from the recipe was I used more meat (we are a family of carnivores!!) and I only used one carton of creme fraiche - the recipe called for 300g and the container I bought was 250g - at $6 per carton I wasn't using 2!!!  Also used slightly more beef stock as the sauce was a little too thick.

This recipe was quite different from the one that I usually make:
- the addition of brandy
- the use of copious amounts of butter and oil
- the use of creme fraiche (when I usually use light sour cream).
- french eschalots, I usually use onion and garlic.
- they also specified using fillet steak - I usually use rump.
- using swiss brown mushrooms - I usually use regular

I really liked the end result - but you certainly couldn't eat like this all the time.  As a special occasion or dinner party dish though it is certainly worth giving it a try.  I didn't make my pasta from scratch - yes I know, it's easy.  Let's just say I was time challenged the day and didn't want to risk it.


So here is the recipe for MasterChef Pressure Test Beef Stroganoff


Serves 4


600g tail piece end of beef fillet
2 tbs sweet paprika
2/3 cup plain flour
1/4 cup olive oil
50g butter
200g swiss brown mushrooms, thinly sliced
3 french eschalots, finely chopped
1 tbs tomato paste
1/3 cup brandy
1/2 cup beef stock
2 tbs worcestershire sauce
300g creme fraiche


Cut the end pieces from the fillet steak (the make a uniform shape). Cut the large piece in half widthwise.  Cut the steak into 5cm long pieces.  Cut each piece into 5mm thick slices, then cut each slice into 7mm wide strips.  Making all the pieces uniform sizes helps with the cooking time.


Combine the paprika, flour and 1 tsp salt in a bowl.  Dust the beef strips, in small batches, with the flour mixture, then shake off the excess and place the beef on a plate.


Heat 2 tbs of oil in a large frying pan over high heat and brown the beef, in batches, turning once, for 1 minute.  Transfer the beef to a plate.  Wipe the pan clean with a paper towel.


Heat 25g butter and remaining 1tbs of oil in the frying pan over medium high heat.  Add the mushrooms and cook turning once for 5 minutes, or until golden.  Reduce the heat to medium, add remaining 25g butter and eschalots, and stir mixture for 3 minutes, or until eschalots are soft.  Add tomato paste, brandy, stock and worcestershire sauce.  Bring to the boil, then reduce heat to medium.  Stir in creme fraiche and return the beef to the pan with any juices.  Season with salt and pepper and cook for a further 5 minutes or until beef and sauce are heated through.


Serve with fettucini, garnish with chopped flat leaf parsley, or slivers of cornichons (tiny pickled gherkins).

MMMMM this was very yummy!!!  The additional investment in the fillet steak and swiss brown mushrooms is definitely worth it.  Using the creme fraiche and all that butter certainly gives the dish a rich creaminess that my dish doesn't have, and the french eschalots give the dish a different element as opposed to using garlic.

My verdict - try this dish, if only once, it is worth it!!

My next mission was to make a slice to leave for "The Darlings" for the snacks the next day.  I had a babysitter organised and was off the the Good Food and Wine Show!!!

"Precious" and I took off for a girl's day at the show!!!  What fun we had!!

We went to the Celebrity Theatre and Pete Evans taught us how to make the perfect pizza (I must admit I am now tempted to make my own dough!!!).  He even made a Chocolate Pizza!  I used these ideas when I returned home and made pizza for dinner!! Pete says "less is more" when topping a pizza - and I think I have to agree (well at least with the Prawn pizza I made) - not so much with the Mexican one - you just have to layer all those lovely elements to get that true Mexican Flavour!!

Next demonstration was George Calombaris and Gary Mehigan - they made their own pasta dough (and yes, tempted again to give it a go!!) with their pasta dough they made lovely prawn ravioli (oh so easy.... watch this space I will have to try that as well!!)  George also made a very interesting dish - hommus which he spread in a baking dish, then topped it with green prawns, then put more hommus over the prawns (he called it a hommus doona!!!) and baked them!!  Would have loved to taste them to see how they turned out.

We tried lots of things, peking duck, oodles of noodles, cheeses, wines, liqueurs, sauces..... and after 9 hours, came home with a trolley full of goodies to try out at home!  Also lots of new recipes to try out!!!


Caramel Slice


1 cup self raising flour
1 cup brown sugar (firmly packed)
1 cup desiccated coconut
150g butter, melted
395 can condensed milk
2 tbs golden syrup
30g butter, extra
1 1/2 cups dark melts, melted


Preheat oven to 180C (non fan forced)


Line a lamington tin (18cm x 28cm) with baking paper.


Combine the flour, sugar, coconut and butter, mix well.  Press into the prepared pan and bake for 10 minutes.


While the base is cooking combine the condensed milk, golden syrup and extra butter in a saucepan.  Stir over medium heat until almost boiling (make sure your stir constantly or it will go lumpy).  Reduce the heat to low and cook for 5 minutes (keep stirring!!)


Pour the caramel over the base and bake for a further 10 minutes.  Cool.  Spread the melted chocolate over the top, then cool completely in the tin before cutting into squares.

Very, very easy!!!

Wednesday, July 14, 2010

Beef Satay with Cashew Sauce & Double Choc Marble Swirl Brownies

Well Dear Readers I'M BACK!!

Did you miss me/the recipes???  I hope so.

While it was good to get away it's good (I think) to be back home.  We seem to have been lucky and missed a lot of the bad weather here at home.  "The Darlings" even managed to do a little body surfing at the beach (too cold for this little black duck though!!)

I decided while I was away that I have to put my hand up and declare myself a food snob!!

I got quite tetchy one night when we went out for dinner because I had to eat pasta!!!  When I go out I want to eat something better than I can cook myself!!!  I can cook pizza or pasta any old day of the week.  When I eat out I want to eat something a little exciting - or at least something that I couldn't be bothered cooking myself.  The trouble is when you have "Darlings" in tow it really limits your dining options.  The fine dining experience doesn't have "kids menus" - and I must say I am not going to pay $30+ for a meal for them (particularly when they may or may not eat it!!!).  So what does that leave you with???

You know the places!!!  Places where there is always chips on your plate!!!  When we come home from holidays I always have a "no chips policy for at least a couple of weeks".  One of "the Darlings" would live on cheeseburgers and chips while we are away if I let him!!!  Kids menus are so limited for those of limited palate!!!  Are there not any kids/parents out there that think there is more to life than nuggets and chips!!!

I did manage to cook a couple of times - but even there you have a different set of limits - limited utensils, and you really are limited to ingredients - unless you want to go home with a boot that looks like a pantry!!!  So one night I made oysters kilpatrick for entree, and then salmon with couscous.  The supermarket had some lovely pre-prepared chicken (and don't tell them) vegetable sausage rolls.  Another night I made a fabulous butter prawns (shame that I left the apartment smelling like a curry house!!!).  All in all though we didn't fare too badly.


As I promised I will share with you now the meal that I made the night before we left - it was a lovely Beef Satay with a Cashew (Satay) Sauce - and no it did not get me eliminated from the house!  In fact - they all loved it!!


Beef Satay with Cashew Sauce


Serves 5


Marinade:
1/2 cup light soy sauce
1/4 cup honey
1 orange, juiced
3 cloves crushed garlic
3cm piece of ginger, finely chopped
2 tsp sesame oil
1.2kg rump steak - cut into strips approx 1cm x 3cm x 5cm - or cubes - whatever you like!!


Bamboo skewers that have been soaked in water for at least 30 minutes!!


Cashew Sauce


200g roasted salted cashews
1 clove crushed garlic
1 red chilli, finely chopped (remove seeds to lessen the heat)
small amount of oil for frying garlic & chilli
270ml coconut milk (I used light)
1/2 lime, juiced
2 tbs honey
2 tbs light soy sauce


To make the marinade combine soy sauce, honey, orange juice, garlic, ginger and oil in a bowl.  Add the beef and stir to coat.  Cover with plastic wrap, and leave to marinade for at least 3 hours.


To make the sauce grind or process the cashews until coarsely chopped. Heat the oil in a saucepan over medium high heat, and add the garlic and chilli, stir for approximately 1 minute, or until fragrant.  Add the nuts, coconut milk, lime juice, honey, and soy.  Bring to the boil, then simmer stirring for 3 minutes or until slightly thickened.  Season to taste with salt and pepper.  Set aside.


Drain the beef, discard the marinade.  Thread the beef onto the bamboo skewers.  Preheat a chargrill pan, or barbecue pan on high (I actually grilled them in the oven - place them on foil lined tray!!)  Cook turning for approximately 3 minutes, or until cooked to your liking.  Rare is best as they don't become too chewy!!!


Serve with steamed rice and the cashew sauce.

They will be asking for MORE!!!

To take away I also made some brownies - that were a great hit.  In fact we had to hide them on the top of the cupboard out of sight - but even so I think I only ended up with 2 pieces!!!


Double Choc Marble Swirl Brownies


250g butter
2 cups caster sugar
4 eggs
1 1/2 cups plain flour
1 tsp vanilla essence
100g choc chips
1/3 cup cocoa powder
100g white choc chips


Preheat oven to 180C (non fan)  Line a 20x30cm slab pan with non stick paper.


Melt the butter in  a saucepan over medium heat.  Remove from heat.  Stir in sugar.  Add the eggs one at a time, and stir until the mixture is thick and glossy.


Sift the flour over the egg mixture.  Stir until well combined.  Stir in the vanilla.


Divide the mixture evenly into 2 bowls.


Add the choc chips and the cocoa powder to one bowl.  Stir until well combined.


Stir the white choc chips into the the other bowl.


Spoon the chocolate mixture and the white mixture alternatively over the base of the prepared pan.  Use a flat bladed knife to create a swirled effect.


Bake for 30 minutes or until a skewer inserted in the middle comes out clean.  Don't overcook as they become quite hard - erring on the side of perhaps not quite cooked (skewer slightly moist) is best.


Let cool completely in the pan.


Cut into squares (and hide - the brownies not you - well unless you want to go hide and eat them all yourself!!!)


So what's for dinner tonight?  Boring old burritos!!  Rugby training and I am taking the path of least resistance!!  Do not fear though - there will be some enticing recipes later in the week.

Sunday, May 23, 2010

Double Choc Chip Oatmeal Cookies

On a wet Sunday afternoon what else is there to do but bake???

Having received my prize this week from Good Taste Magazine  (the Baker's Secret pack consisting of a cookie tray, bundt tin, and dessert moulds) I was inspired to bake.  My first thought was to make a bundt cake, but then settled on Chocolate Chip Cookies.  This recipe came to me via an email several years ago.  I can't quite remember the story - but it was one of those urban myth type emails about Neiman Marcus chocolate chip cookies.  Me being me, just went with the recipe!!  This recipe makes a serious amount of cookies - but if you have kids hanging around waiting for them to come out of the oven this won't be a problem!


Double Chocolate Chip Oatmeal Cookies

Makes about 60 cookies!!

250g butter, softened
340g chocolate chips (milk or dark)
2 cups plain flour
1 cup brown sugar
1 tsp bicarb soda
1/2 tsp salt
1 cup sugar
250g white chocolate chips
2 1/2 cups blended oatmeal
2 eggs
1 tsp baking powder
1 tsp vanilla

Note: You can also add 1 1/2 cup chopped nuts.  I personally don't add the nuts I think they are fine with just the chocolate chips.

In a food processor blend the oatmeal until finely ground.

In a mixer beat the butter and both sugars until creamy.

Add the eggs, vanilla, flour, oatmeal, salt, baking powder and bicarb soda.

Add the chocolate chips, (and nuts if you are using them) and mix well.

Roll approximately a dessertspoon of dough into a ball and place on a cookie tray that has been lined with baking paper - about 5cm apart.


Bake in the oven for approximately 10-15 minutes (check after 10 minutes and move the trays around so they brown evenly) they should be lovely and golden.

Cool on the tray for 5 minutes, then transfer with a spatula to a cooling rack (and try and keep the vultures off them!!!)


And the verdict is .......

                                            Everyone is happy!!

PS - Check out the latest edition of Good Taste magazine - I am on the Reader Taste Testing Panel (I won a fondue set!!!) - I tried some good recipes - you might like to give them a go too!

Sunday, May 9, 2010

Osso Bucco & Torta Caprese

Saturdays can be quite hectic in this house - sport is often late in the afternoon - lunch is after sport and then what to do about dinner?? This week I got it sorted! I prepared the Osso Bucco in the morning, covered it with foil and put it in the fridge for cooking when we got home. Too easy!!! I then got to relax and smell the beautiful aromas of dinner cooking, while having a glass of wine by the fire! This would also be a great meal to pop in the oven as you are leaving for an evening of sports training - all cooked when you walk back in the door!

Osso Bucco

Olive oil
2 x onions, chopped
2 x carrots, finely chopped
3 x celery sticks, finely chopped
2 cloves crushed garlic
3 x 4cm long pieces of lemon rind (use a vegetable peeler, being careful not to get any white pith) remaining rind to be used in the gremolata
several springs fresh thyme and rosemary (approximately 4-5 each see photo)
3 dried bay leaves
1/4 cup plain flour
8-9 pieces of osso bucco
1 cup white wine
1 cup chicken stock
400g can diced tomatoes


Gremolata
Shredded basil leaves
remainder of lemon rind, finely grated
salt, freshly ground black pepper

If you are making this to eat straight away - preheat the oven to 160 degrees C.

In a large frying pan heat a little olive oil. Cook the onion, carrot, celery and garlic until softened. Stir in the strips of lemon rind. Transfer this mixture to a large 3.5L casserole dish - a large flat type is best.

Place the flour on a large plate, season with salt and pepper. Add the veal pieces to the flour, coat, shake off excess flour. Heat a small amount of olive oil in the frying pan over medium high heat. Cook the veal pieces for approximately 3 minutes each side - or until they are lightly browned. Transfer to a plate while cooking the remaining pieces. You may need to add a little more oil each time you cook a new batch - make sure to reheat the pan each time.

Arrange the browned pieces of veal on top of the vegetables in the casserole dish.

Add the wine to the frying pan, making sure you scrape any browned bits from the bottom of the pan (these add to the flavour!) Cook for about 1 minute. Add the stock and the tomato. Bring the mixture to the boil. Pour this mixture over the veal, making sure that the meat is covered with liquid. If not, add a little more stock. Cover the pan tightly with foil.

At this point you can put the dish in the fridge for later cooking, or you may like to even freeze for later use. Before putting the dish in the oven make sure you let the pan sit out of the fridge for about an hour before putting in the oven. If you have frozen the dish, thaw overnight in the fridge, reheat - then bake.

Bake for 2 1/2 hours, or until the veal is very tender. Set aside for 10 minutes to rest after cooked.

To make the gremolata, mix together the shredded basil and lemon rind, season to taste with salt and freshly ground pepper.

Serve the Osso Bucco on top of Creamy Polenta, topped with a small amount of gremolata.

Creamy Polenta

3 cups chicken stock
1 cup polenta
300ml cream (I used light cooking cream)
50g butter
1/3 cup grated parmesan

Bring the chicken stock to the boil in a medium sized saucepan. Once boiling, add the polenta in a slow steady stream (do not add too quickly). Continue stirring the mixture for about 15-20 minutes (a balloon wisk works well for doing this), until the polenta is cooked and no longer crunchy. When cooked, add the butter, cream and the parmesan, to taste. I have found the best parmesan to use for this is the type that you can buy on the shelf in the pasta section of the supermarket. It doesn't go too sticky like the fresh type.

Now if you still have room after that here is dessert!!

Torta Caprese


210g pecans
180g 70% dark chocolate, broken into squares
4 eggs, separated
1 cup (220g) caster sugar
220g unsalted butter, melted, cooled
1 1/2 tsp vanilla extract (buy the best you can afford - it is worth it!)
Icing sugar to dust

Preheat the oven to 170 degrees C.

Place the pecans on a baking tray lined with baking paper, and roast for approximately 10 minutes. Keep an eye on them - they can burn quite quickly - check at 8 minutes to see how they are going. Cool down.

Grease and line the base and sides of a 24cm springform cake pan, then dust lightly with flour.

Place the pecans and chocolate in a food processor and grind them in short, sharp bursts until they are finely ground. Be careful not to grind it too much and turn it into a paste!! Set aside.

In a large bowl, beat the egg yolks and sugar with an electric beater for around 4 minutes, or until they are thick, creamy and pale. Gently mix in the cooled butter and vanilla. Now stir in the pecan mixture until thoroughly combined.

In a separate bowl (make sure it is dry and clean) whisk the egg whites with a pinch of salt until they are fluffy and hold their shape - do not make them overly stiff. Whisk 1/4 of the egg white mixture into the chocolate mixture, then gently fold the remaining egg whites in. Make sure the mix is thoroughly combined, but do not stir too much or you will loose the air in your whites!!

Pour the batter into the prepared cake pan, jiggle it to make sure it is settled evenly in the pan.

Bake for 40-50 minutes, or until the edges pull away from the pan and it feels firm when you place the palm of your hand on the surface and wobble it gently.

Cool the cake in the pan on a wire rack for 10 minutes, then carefully invert it onto a rack to cool completely.

To serve, dust with icing sugar. Serve with vanilla ice cream or whipped cream.

Did you enjoy your trip to Italy???