WELCOME TO MY KITCHEN


WELCOME TO MY KITCHEN!!
I hope you enjoy the food!!!
Showing posts with label Beef. Show all posts

Sunday, April 1, 2012

Chinese Braised Beef

A pinch and a punch for the first of the month!

Today marks several things!

It's April Fools Day, and it's also the end of daylight savings for us down here in the southern hemisphere. The days will now start to get shorter, and colder. For me though, the most important thing about today is that it's the start of the countdown to my trip! Only 20 days to go!!

After the horrible summer (or should I say lack of summer) that we have had here in Sydney, it's hard to believe looking out the window at the glorious sunny day we have today, that winter is just around the corner. So good bye summer, thanks for nothing!

It's time to turn our thoughts to autumn. Our meals will start to change, the BBQs will become less frequent, and soups and stews will start making appearances at our table. I made this stew just recently, and it was a lovely change from the usual. The flavours were fantastic. In fact it was so good, that "The Darlings" gobbled it all up, and left none for DH (who was late home this particular night - that will teach him!).

So if you are looking for something a little different from your usual beef stew, give this a try - you will not be disappointed.


Chinese Braised Beef
Recipe by Valli Little


Serves 4
2 tbs plain flour
1 tsp five spice
1kg chuck steak, cut into 5cm pieces *
1/4 cup peanut or sunflower oil
1 onion, finely chopped
4 cloves garlic, sliced
3cm piece of ginger, peeled, grated
1/2 bunch spring onions, finely chopped
1 long red chilli, seeds removed, finely chopped
50g Chinese rock sugar, or brown sugar
1/4 cup shaohsing Chinese rice wine
1 cinnamon quill
1/4 cup dark soy sauce
1 liter beef stock
2 tbs peanut butter
2 tbs hoi sin sauce
Preheat oven to 180 degrees.
Combine the flour and five spice powder with 1 teaspoon of salt. Coat the beef in the flour mixture, shaking off and reserving any excess flour.

Heat 2 tablespoons on the oil in a large flameproof casserole dish over medium high heat. In batches, cook the beef, turning for 3-4 minutes until browned all over. Remove for the pan and set aside.

Add the remaining tablespoon of oil to the pan and cook the onion, stirring for 1-2 minutes until softened. Add the garlic, ginger, spring onions and chilli, then cook, stirring for a further minute. Stir in the reserved flour mixture with the sugar, rice wine, cinnamon, soy sauce, beef stock, peanut butter and hoi sin sauce. Return the beef to the pan, then increase the heat to medium high and bring to the boil. Cover and transfer to the oven. Bake for 2 hours, or until the beef is tender.

Serve with steamed asian greens, and rice.

* I actually increased the beef to about 1.5kg and there was plenty of sauce even with extra meat.


The smell of this dish is wonderful. Make sure you get in quick, because I can guarantee you there will be no leftovers!

Sunday, September 11, 2011

Thermomix Chilli Con Carne

This recipe is for all my new Thermomix customers.  I made  this the other night and just loved it - the kids did too!!!  So super easy and tasty!!!


Chilli Con Carne
Adapted from EDC Thermomix Cookbook

Serves 4-6

1 onion, quartered
4 cloves garlic
1 small red chilli, or to taste
1 tbs olive oil
600g steak (I used porterhouse), roughly cut into cubes
400g can kidney beans, rinsed and drained
400g can chopped tomatoes
1 tsp ground cumin
1 tsp ground coriander
2 tbs TM vegetable stock concentrate
2 tbs tomato paste

To Serve
grated cheese
sour cream
salsa
avocado
warmed flour tortillas

Place the onion, garlic and chilli in the TM bowl - chop for 3 seconds on speed 7.  Scrape down bowl, and repeat if necessary.  Set aside.

In 2-3 batches place the beef into the TM bowl.  Set the dial to closed lid position and press the Turbo button 3-5 times, or until the beef is minced to desired consistency.  I like mine with a little texture - so I minced one batch a little more than the others, and one slightly less than the others - this gave it a really good chunky consistency.  Set meat aside.

Place the onion, garlic and chilli in the TM bowl.  Add the olive oil and saute for 2 minutes at 100 degrees on reverse and speed soft (without the MC in place).

Add the remaining ingredients and cook for 25 minutes at 100 degrees on reverse and speed soft.

Serve in bowls, garnished with grated cheese, sour cream and whatever other toppings you desire!!!


This was sooo yummy - I will definitely be making my chilli con carne this way from now on!!!  Trust me, making your own mince is worth the extra few minutes it takes!!  Perhaps not as cheap as the mince you buy already packaged - but at least you know what is in there!!!


Wednesday, August 10, 2011

Slow Cooked Beef in Stout

In between dog duties and kid duties yesterday I managed to set myself up with a lovely warming stew to have once we all got in from our various after school activities.

Of course one of "The Darings" is down for the count with a broken arm - but the other one still needs to get to and from Rugby practice.  It's kind of like a convalescent hospital here at the moment - a child with a broken arm and the dog recuperating from a stroke - I think I might have to go and find myself a Florence Nightingale outfit to wear!!!!

This recipe was featured in the latest edition of Delicious Magazine, and is one of Matt Preston's.  It appealed to me as it took several hours to cook, so that meant I could start it, go to sport and then finish it off before the rest of the hungry hoards arrived home!


Slow Cooked Beef in Stout
Adapted from Delicious Magazine - August edition - Recipe by Matt Preston

Serves 6

1.2kg blade or chick steak, trimmed, cut into 3cm cubes
1/4 cup flour, seasoned
1/4 cup olive oil
2 celery stalks, finely chopped*
4 garlic cloves, fined chopped*
250g bacon rashers, finely chopped*
2 tbs tomato paste
375ml Guinness
2 tbs concentrated TM vegetable stock **
2 cups water **
1 bay leaf
3/4 cup pitted prunes, chopped
1 tbs unsalted butter
400g small eschalots, peeled
4 carrots cut into chunks

* place the vegetables and the bacon in the TM bowl and put in closed lid position, press turbo 2-3 times until chopped to desired consistency.
** can substitute 2 cups beef stock

Garlic Paris Mash and Peas to serve

Preheat oven to 150 degrees.

Lightly dust the meat in the flour, shake off excess (reserving excess).

Heat 2 tbs of oil over medium high heat in a large flameproof casserole dish.  In batches, cook the beef, turning, for 3-4, minutes or until browned.  Remove from the pan and set aside.
Reduce the heat to medium, add remaining tablespoon of oil, add the celery, garlic and bacon.  Cook, stirring for 3-4 minutes or until tender.  Return the beef to the pan and add the tomato paste and reserved flour (don't worry if you don't have any - I didn't).  Stir for 1 minute.  Add the stour, stock, bay leaf and prunes and stir to combine.  Make sure you get all those lovely crispy bits off the bottom of the pan - they add great flavour to the dish!!!  Use a spoon to scrape then gently into the mixture.  Bring to a simmer, cover and cook in the oven for 1 1/2 hours.


Heat the butter in a small frypan over medium heat.  Cook the eschalots, stirring for 3-4 minutes, or until/ the outside layer starts to soften.  Add the eschalots and carrots to the casserole, cover and return to the oven for a further 1 hour, or until the meat is tender.


Garlic Paris Mash
1.2 kg potatoes, cut into chunks
2 cloves garlic
250g milk
salt
30g butter

Place the potatoes and garlic in the TM bowl  Season with salt.  Add the milk.  Cook for 20 minutes at 100 degrees on speed 1.

Insert the butterfly.  Season to taste with salt and pepper.  Add the butter and mash for 20 seconds on speed 3.

Place in Thermoserver until ready to serve.

Now it might seem a weird thing to add prunes to a beef casserole, but let me tell you it added a lovely richness to the sauce.  It didn't make it sweet, and I think you would be hard pushed to identify them in there - but it did a lovely depth to the gravy.  Well worth trying next time you make a stew!!


Sunday, July 31, 2011

Beef Rendang

This week I have had some wins, and some losses in the kitchen.

It's funny, I always feel that I should only tell you about the great meals that I make, and nothing about the dismal failures, but after having Madam T over for dinner the other night she persuaded me (she is very good at that!!) that I should tell you when a recipe just doesn't deliver - even when you have followed it to the T!  (no pun intended!!) Unfortunately, the meal I prepared for her was one of those dismal failures (I'm so sorry!)

Since setting out on the "Thermomix Consulting Journey" I have decided that I really need to cook a few more complete Thermomix meals so that I can guide my customers in a more knowledgeable way - and tell them what are great easy meals for them to try with their new mighty helper.

So in that vein this week I made a Beef Rendang (great!!) and a dish with a funny name - Kroppkakor - traditional stuffed Swedish dumplings or so the recipe said (these were not so great!!!).

 Perhaps I should have stopped at the Beef Teriyaki and Soba Noodles recipe - just because it has an enticing name doesn't mean that it will be an enticing meal (although looking around I see that mine possibly were pretty close to what they should have been - perhaps it was just us that didn't care for them?).

For my taste they were a little stodgy.  How would one describe them - kind of like a very large, stuffed gnocchi.  Inside the potato dumpling is a mixture of pancetta and ham.  It is then cooked (steamed) and served with a bechamel sauce and lignonberry / cranberry sauce.  Interesting - but just too heavy!  Not sure if I would ever go there again.  Any readers out there that have had these, or made these, please let me know where I went wrong!!!

No on to the success - I made Beef Rendang one night this week in the Thermomix - it was so easy, and so tasty - this will definitely be on my "Make Again List".


Beef Rendang
From EDC Cookbook - Thermomix

Serves 3-4

Paste Ingredients
1 large red chilli
1 tsp shrimp paste
2.5 cm piece of fresh ginger, peeled
1 clove garlic
1 small onion
1 tsp turmeric

Rendang Ingredients
4 fresh bay leaves
1 tsp cinnamon powder
1/2 tsp ground cloves
150g coconut milk
30g grated/shredded coconut
30g palm or brown sugar
2 tsp salt
2 tsp white pepper
1kg chuck steak, diced into 3cm cubes

Place the paste ingredients, except the oil, into the TM bowl and chop for 6 seconds on speed 7, until finely chopped.

Add the oil and saute for 3 minutes at 100 degrees on speed 3 to form a paste.

Add all the remaning ingredients to the bowl except for the meat.  Cook for 5 minutes at 100 degrees on speed 3.

Add the cubed meat and cook for 40-60* minutes at 100 degrees on Reverse + soft speed.

Season with salt and pepper to taste.

* 60 minutes made the meat lovely and tender - I would recommend this.


Serve with Jasmine rice.


I also highly recommend that if you like a little more richness/spiciness to your curry that you include a garnish of Mrs. Balls Hot Chutney. 

This is a great South African Chutney that I have only recently stumbled across.  They also have a milder version - but for me the hot one is the way to go.  You can find it in some supermarkets - or at specialty delicatessens.  Check it out - it is really good!!

I know that a curry usually is something that is left to bubble away on the stove left to it's own devices, but I did find  that making a curry this was was an incredibly easy/quick way to make a good curry.  I am keen to give this recipe a go using chicken.


So Dear Readers, do you hang your head in shame and try to forget about the failures, or do you seek advice on how to rectify, and try the recipe again?


Tuesday, July 26, 2011

Shredded Chilli Beef Burritos

No matter what type of filling I make, if it ends up being wrapped in a tortilla, it seems to be a winner!  In fact they love burritos so much that even if we are having a "make your own" dinner more often than not "The Darlings" will make some form of burrito - usually baked beans and cheese (which I am not complaining about, because it's vegetables, and they are eating it of their own free choice!!!).

I tend not to make the plain mince type that often, I like to experiment, so when I saw a recipe in the July edition of Good Taste Magazine for Shredded Chilli Beef I was pretty sure I was onto a winner!

This is one is easy to prepare, then you just let it simmer away for around 4 hours - trust me you will not be disappointed!


Shredded Chilli Beef
From Good Taste Magazine - July Edition

Serves 6 +

1.2kg beef chuck Steak, cut into thick slices
1 tbs olive oil
2 brown onions, finely chopped
2 cloves garlic, crushed
2 tsp cumin
1 1/2 tsp smoked paprika
1 tsp allspice
500ml tomato passata (tomato pasta sauce)
1 1/2 cups water
1 tbs finely chopped pickled jalapenos
3 dried bay leaves


To Serve:
Flour tortillas
Avocado
Sour Cream
Salsa
Grated Cheese

Season the beef with salt and pepper.  Heat the oil in a large flameproof casserole dish over high heat.  Cook the beef in batches, for 3 minutes each side, or until golden.  Transfer to a plate to keep warm.  Repeat with remaining beef.

Reduce the heat to medium-low.  Cook the onion, stirring for 10 minutes, or until golden.  Add the garlic, and cook, stirring for 1 minute.

Mix the cumin, paprika and allspice in a bowl.  Add to the onion mixture, and cook for 30 seconds, or until fragrant.  Add the passata, water, jalapenos, and bay leaves.  Bring to the boil.  Reduce heat to low. Cover and cook, stirring occasionally for 2 hours, or until the beef is almost tender.

Uncover and cook, stirring occasionally, for an additional 1 1/2 hours, or until the liquid is reduced and the beef is very tender.

Using two forks, take pieces of the beef from the liquid, and gently shred.  Place in a bowl, and repeat until all the beef is shredded.  Season with salt and pepper, plus a small amount of the cooking liquid.

Place a tortilla on a paper towel, on a plate, and warm in the microwave for 20 seconds.  Add grated cheese, and the beef, roll up, and then garnish with avocado, sour cream and salsa.


We have just bought a sandwich press so we like to make our burritos in that now - they end up nice and crispy on the outside, and toasty warm in the middle!


So Dear Readers how do you like your burritos?  Do you have a favourite recipe you would like to share with us?  Do you like yours crispy on the outside, or just regular warmed tortillas?


Wednesday, July 20, 2011

Asian Style Beef Pot Roast

Yesterday was cold, cold, cold!  I don't think the temperature climbed much above 12 degrees C all day, and as the afternoon progressed it seemed to get even colder.

Worst was yet to come though, overnight New South Wales was lashed with a severe storm - icy winds, and rain, rain rain.  I am thankful that even tough we live in an incredibly bushy little hollow, the winds tend to whip over the top of us - I can lie in bed and watch the trees whip from side to side - one day I am sure we will not be so lucky - but keep your fingers crossed!!  Rain however, that is another story - we still live with a room that leaks every time it rains (bad renovation and litigation still pending).  I'd like to tie the builder up and leave him to rot under the leak sometimes!!!

Thank goodness I had the foresight to prepare a lovely warming meal for last night's dinner.  It was supposed to be a pot roast that was cooked on the stove top, but I thought I would put it in the crock pot instead.  This was not your usual run of the mill pot roast - there was no thick gravy, instead a lovely Asian style broth.  At first I was going to serve it with rice and steamed Asian greens, but in the end I made Garlic Paris Mash (in the Thermomix of course) and some steamed veggies.


Asian Style Beef Pot Roast
Adapted from recipe found in Super Food Ideas Magazine - August Edition

Serves 4-6

1.2kg piece beef silverside roast
1 large brown onion, thinly sliced into wedges
4 cloves garlic, sliced
3 cm piece of fresh ginger, cut into thin slices
2 star anise
2 cinnamon sticks
the peel of 1 mandarin, (medium-large size) into strips
juice of 1 mandarin
1/3 cup Shao-Hsing cooking wine
1/3 cup light soy sauce
1/4 cup brown sugar
2 cups beef stock

Place a small amount of oil into a large frypan over medium high heat.  Brown all sides of the piece of beef.  Remove from pan.

In the same pan, add another small amount of oil, if needed, then add the onion, and cook stirring for 5 minutes, or until softened.  Add the  garlic, ginger, star anise, cinnamon and orange rind.  Cook stirring for 1 minute, or until fragrant.  Add the cooking wine.  Simmer for 1 minute.  Add the soy sauce, sugar, mandarin juice and beef stock.  Bring to the boil.

Place the piece of beef in the crock pot.  Cover with the liquid.  Cook on low for 8-10 hours.  You could also now cook this on the stove top.  Simmer, covered for 3 + hours, or until the beef is very tender.  You want the meat to be falling apart!!!

Serve with steamed veggies of choice and mashed garlicky potato!!!!


This was a deliciously light meal, I just loved having lots of the broth on the plate, and being able to mop it up with the garlicky mash!!!

All in all great flavours, and really simple to make!!!

If you live in New South Wales try to keep warm and dry Dear Readers!!!!

What to make to keep warm on the inside tonight???  Time to go raid the freezer and the pantry and see what we have in stock - don't want to go out in this weather!!

Do you have any suggestions Dear Readers, what do you like to make when it's cold and wet outside???

Tuesday, July 19, 2011

Beef in Sweet Soy Sauce

Firstly I have to start this post by saying thank you to all my loyal readers who have made such beautiful comments to my last couple of posts.

Life in blog world can be very strange - you sit here somedays and think that the whole world is listening to every little gem of wisdom that you offer up to the stratosphere. Then there are other days you feel like you are absolutely insane, and sitting here blabbering away to yourself.

I went through a couple of weeks there where I didn't feel like talking (not even to myself), didn't check my stats, didn't even want to post.  You know what - it made not an iota of difference. People still came and went, just random visitors that left no comments.  Then, I don't know why, but I felt the need to post something - anything to explain my absence - and the outpouring of love and heartfelt emotions overwhelmed me.  So thank you Dear Readers, I know now that I have some true friends out there, that do take notice when I am not here.

Last night was a quick and easy dinner, but a really tasty dish that was enjoyed by all  (some to more degrees than others) of course "The Darlings" didn't go for the tomatoes - but hey - you can please some of the people some of the time, but you can't please all of the people all of the time!!!


Beef in Sweet Soy Sauce
Adapted From Super Food Ideas Magazine August Edition

Serves 4-6

6 eschalots, peeled, quartered
6 cloves garlic
3cm piece of fresh ginger, peeled, roughly chopped
pinch white pepper
1/2 - 1 tsp tamarind concentrate (suit to taste)
1kg beef or veal schnitzel, cut in strips approx 5 cm in width
vegetable oil
4-5 small tomatoes, quartered
1/3 cup ketchap manis
1 green shallot, sliced on the diagonal
small handful of baby spinach

Place the eschalots, garlic, pepper, tamarind concentrate, and 1 1/2 tablespoons of water in the thermomix bowl (or a small food processor).  Pulse on turbo until you have a thick paste.

Heat a thin layer of oil in a large frying pan over medium high heat.  Cook the schnitzel in batches, until just browned.  Remove from the pan and keep warm.

Add the eschalot paste to the pan and stir fry for 1-2 minutes, or until fragrant.  Return the beef to the pan.  Add the ketchap manis and tomaotes to the pan, and stir fry for 1-2 minutes, until all well combined.

Top with the sliced green onions and baby spinach.  Serve with steamed rice.


The trick to this recipe is not to cook the schnitzel too long, or it will become tough.  Just a light frying to golden it up.


The flavours in this dish were really simple, but they worked so well together.  A good quick easy dinner to prepare.

Tonight I have an Asian Style Pot Roast in the Crock Pot - and boy am I glad, it is absolutely freezing here!!!  There is snow close by, just don't tell "The Darlings" or I will be making a 3 hour drive before dinner!!!!

Tuesday, July 5, 2011

Beef and Guinness Casserole with Parmesan Dumplings

On a blustery, cold, windy, wintery day like today is there anything better than a big warm casserole to end off the day?

There are so many beef casserole recipes out there, all with a few minor tweaks here and there - but the all important part of the dish is the beef that has has been simmered slowly until it is so tender it just falls apart.  You see lots of recipes using red wine, but I had some Guinness lurking in the back of the cupboard that I wanted to use.  I simply adapted a recipe that I found at Taste.com.au to utilise the Guinness.


Beef and Guinness Casserole with Parmesan Dumplings
adapted from Taste.com.au

Serves 6

1.5kg gravy beef, cut into cubes
1 tbs olive oil
1 onion, finely chopped
1 rashers bacon, roughly chopped
500g mushrooms, quartered
4 cloves garlic, crushed
2 tbs plain flour
2 cups beef stock
1 cup Guinness
2 thyme sprigs
3 fresh bay leaves
50g butter
2 cups self raising flour
1/4 cup grated parmesan cheese
3/4 cup milk

Heat the oil in a large saucepan over medium high heat.  In batches, brown the beef until it is sealed on all sides.  Remove to a plate, and keep warm.

Add the onion, bacon, mushrooms, and garlic, cook, stirring for 5 minutes, or until soft.  Stir in the flour. Add the beef, beef stock, Guinness, thyme, and bay leaves.  Bring to the boil.  Reduce heat to low, and simmer for 1 1/2 hours, or until tender and the meat is starting to fall apart.

Preheat oven to 200 degrees C.

To make the dumplings, rub the butter into the flour until it resembles fine breadcrumbs.  Stir in the parmesan cheese.  Add the milk and mix well to bring all the ingredients together.  Roll into approximately 20 small balls.

Spoon the meat in to a lightly greased casserole dish.  Top with the dumplings, making sure to push the dumplings at least halfway down into the sauce.


Bake in oven for 20-25 minutes, or until lovely and golden, and the dumplings are cooked through.


Serve with a green vegetable, and you have a lovely warm, winter hug!!!!


Stay out of the wind today if you are in Sydney, and try and keep warm!!!!!

So Dear Readers what are you do to keep warm on cold winter's days.  Do you snuggle up next to the fire, or do you go back to bed with a good book?  Perhaps you get cooking, and warm the heart of the house up by baking?

Wednesday, June 15, 2011

Prosciutto Steaks with Creamy Mushroom Sauce

This is one of those recipes that almost feels like it isn't a recipe at all.  Almost feels like cheating really, but saying that, it is published in this month's Good Food Magazine - so therefore it must be a recipe!!!

It is one of those meals that really is just "zooshing" up the "basics".  It is basically a steak and mash meal, with a lovely creamy mushroom sauce on the side.

Of course the Thermomix made it all so very simple.  I made the mash in there, and then made the sauce - but I will give you the recipe as printed in the magazine.


Prosciutto Steaks with Creamy Mushroom Sauce
From Good Food Magazine - June edition

Serves 4

600g sebago potatoes, peeled, chopped
1/4 cup skim milk
4 beef eye fillet steaks
4 slices prosciutto
2 tbs olive oil
1 tbs snipped chives

Mushroom Sauce
40g butter
1 tbs olive oil
500g mixed mushrooms, such as swiss brown, shitake, button
2 cloves garlic, crushed
1/2 cup white wine
2 tsp dijon mustard
1/2 cup reduced fat thickened cream

Place the potatoes in a microwave safe bowl.  Cover with plastic wrap.  Microwave at 100% for 4-5 minutes, or until tender.  Stand for 2 minutes.  Add the milk, and mash until smooth.  Season to taste with salt and freshly ground black pepper.

Meanwhile to make the sauce melt the butter and oil in a large frying pan on high.  Cook the mushrooms, stirring for 3-4 minutes, or until browned.  Add the garlic and cook, stirring, for 1 minutes, or until fragrant.  Add the wine and mustard and bring to the boil.  Reduce the heat to low and simmer for 2-3 minutes, or until reduced by half.  Stir in the cream.  Simmer, stirring, for 3-4 minutes, until sauce thickens slightly.  Season to taste.

Preheat a chargrill or BBQ on high.  Wrap the steak with the prosciutto slices.  Brush with a little oil.  Cook the steaks for 3-4 minutes each side, or until cooked to your liking.

Serve steak with the mash, mushroom sauce, and topped with the snipped chives.

As you can see I also served the steaks with my winter time favourite - brussels sprouts, panfried with a little prosciutto.


See ..... incredibly easy (made even easier with TM helping me!!).  It was just a great combination of flavours!!!  Often times it is the basics that produce the best results.  As it was steak - all the plates were literally licked clean at my house last night!!!  You can make all the fancy dishes in the world - but nothing beats a good steak in my books!!!

So Dear Readers what is your favourite - really fancy exotic meals, or the plain simple rustic meals - like good old steak and mash???/

Monday, June 13, 2011

Slow Roasted Beef Ribs with Cinnamon

If you haven't figured it out yet, I am a great advocate of the slow cooking method.

There are various methods of slow cooking - you can use an electric slow cooker (ie crock pot), you can slow cook on the stove top in a saucepan, or you can use the oven on a very low heat and cook away all day!  My "partner in crime" that I run with (she makes me!!) vows never to leave the oven on that long to make a dish - but what does she know - she obviously hasn't experienced a slow baked dish!!

I think you have to weigh up the pros and the cons of all the slow cooking methods, and use what you think is appropriate for the dish you are making.  Using a crock pot, as there is no evaporation only condensation, tends to end up with a more "diluted" flavour.  Using the oven, and covering up the dish tightly with foil, results in a more concentrated flavour.  I like all methods, but as I said, it is up to the ingredients and the dish involved, as to which method is best.

The recipe that caught my attention this week said to cook on the stove top for 3 hours.  Once I perused the ingredient list I decided that three hours probably wasn't going to do it.  The main ingredient in this dish was beef brisket.  I recently cooked a beef brisket, and was not that overly enthused with it.  It was tough and not a lot of meat on there compared to the amount of fat.  I headed off to the butcher (a different one from the last brisket) - I had a good chat with my "butcher buddy" - not only did he not have a brisket - but he couldn't get one for a whole week more - this will not do as I have a hankering for this dish now!!!  What he did have on offer however, was beef ribs.  He didn't steer me wrong last time with the Beef Ribs so I thought why not make this recipe with the ribs, and instead of braising on the stove top, slow bake them in the oven.

What is the old saying "A stitch in time saves nine" - well my saying is "A little prep in the morning saves a lot of stress in the evening".

After a long day at rugby in the freezing cold, first watching the game, and then manning the BBQ for the rest of the afternoon, the last thing I felt like doing when I walked in the door was making dinner.

Let me tell you though, the smell that welcomed us was we opened the door last night was wonderful..... imagine cinnamon and star anise - the best part though was that all I had to do now was cut up some greens, and steam some rice.  Too easy!!!!


Slow Roasted Beef Ribs with Cinnamon
Adapted from Booklet in current (June) edition of Good Food Magazine

Serves 5

2kg beef ribs cut into 5cm wide slabs, then cut in half
1 1/2 cups Shaoxing wine (Chinese cooking wine)
1 cup light soy sauce
1 cup sugar
1/2 cup sliced ginger (approx 5cm long piece)
8 cloves grlic, crushed
4 green onions, trimmed, cut into thirds
1 tsp sesame oil
2 long cinnamon quills
5 star anise
2 carrots, halved, chopped into 1 cm pieces
1 daikon, peeled, halved, chopped into chunks

Place the ribs in a large saucepan.  Cover with water.  Bring to the boil on high heat.  Simmer on low heat for 20 minutes.  Drain.  Rinse under cold water.  Drain well.

Preheat oven to 110 - 120 degrees (non fan forced).

Place the shaoxing wine, soy sauce, sugar, ginger, garlic, green onions, oil, cinnamon and star anise in a large saucepan.  Add 2 litres of water and bring to the boil, stirring to dissolve the sugar.

Place the ribs, diced carrot and daikon in the base of a very large baking dish.  Pour over the wine mixture. You may not be able to add all the mixture to the pan, reserve what you can't fit in.  It think I ended up putting in around 1 litre of the liquid to start and then about another cup full at around the 7 hours cooking stage.

Cover the dish tightly with several layers of foil.

Bake in the oven for approximately 9 hours, or until the meat is very tender.  Try to resist the urge to take a peek - believe me the liquid will last in there.  I checked at around the 7 hour mark, and added a little more liquid, but I could have probably got away with leaving it as it was.


Serve with steamed asian greens and steamed jasmine rice.

This dish was glorious - the flavours were so well developed, having bubbled away all day.  The beef was sooo tender - it was my idea of heaven.  Just what you need after a day out in the cold.

As an ending to this story I have to tell you about my trials and tribulations of finding daikon.

I live in an area that is fairly well inhabited with asian people, and therefore we have several asian grocery stores in the neighbourhood.  I have learned a lesson though - just because the ingredient you seek is "asian" doesn't necessarily mean that at the asian supermarket they will know exactly what you are looking for.  Now when I am looking for something a bit different I tend to google images as well - so that I at least know what the particular ingredient looks like.

I googled daikon


This is what they look like.

Do you think I could find them, do you think I could find anyone that knew what they were????  I had soooo many suggestions along the way as to what I could use instead of daikon - winter melon, hairy melon, parsnip, white radish.... oh the experts I met along the way.  I heard about what someones grandmother would use....... Everyone tried to be really helpful.  Eventually someone told me that they thought the daikon was a korean ingredient - the lightbulb then went on..... I knew where there was a korean supermarket - and guess what ???? They had daikon!!!!! The day is saved!!!

Would the dish have been any different without the daikon - possibly not - but it did add a little extra chunkiness to the end dish!.


Dear Readers I would love to hear your trials and tribulations of finding those "exotic" ingredients - how do you go about finding them?  Do you google images so you know what you are looking for - do you seek out an "expert" to help you.  I think at one stage yesterday I had everyone in the supermarket checkout line offering me advice of some kind (helpful or not!!!).

Tuesday, June 7, 2011

Massaman Curry and some exciting news!

There is nothing that evokes my olfactory system more than the words Massaman curry.  As soon as I see or hear the words I can already imagine that wonderfully heady, cinnamon infused aroma that is the Massaman.

On MasterChef last week when they had the pressure test - which should have been called "Fix my Massaman - if you even know what goes in one!" I knew straight away that I would have to make a Massaman, and very soon.  The difference for me this time, was that I was going to attempt one from scratch.  Usually I have relied on commercial pastes as the base, and then added the other ingredients - this time around I wanted the real deal!!  I did a bit of research along with my friend "Mr. Google", and I combined elements from several recipes to get the combination of flavours that I love.

What were the 2 core ingredients that I wasn't going to miss out on though???? What were they???Peanuts and potato!!!!  I am sure I wasn't the only one sitting at home yelling out - get the peanuts, get the potatoes!!!!  I mean really, Andrew professed to making Massaman at home on a regular basis!!!!  I don't think so!!!  How could you forget those two key elements - especially when they are sitting right there in pain view???

This recipe evolved over several days, due to unforeseen circumstances, and I can't say that I am upset about that.  I think by taking my time and making it over several days I allowed the flavours to fully develop.  Saying that however, if you are gung ho and have all day - go right ahead and make it in one day (but I think having the basic curry cooked, and resting for 24 hours makes a world of difference!! You decide.)


Massaman Paste
Makes approximately 250g (or enough for 2 curries - you can freeze the rest!)
Adapted from foodiesite.com

1 tbs crushed chilles (or to taste)
1tbs coriander seeds
1tsp cumin seeds
1/2 tsp black peppercorns
5 cloves
5 cardamon pods, crushed
2 star anise
3cm stick cinnamon bark
8 shallots, finely chopped
8 cloves garlic, finely chopped
3cm piece galangal, finely chopped
8 dried shrimp *
5cm pice lemongrass, finely chopped
2 kaffir lime leaves, veins removed, finely diced

* The recipe specified shrimp paste - but I did not have any - so used the shrimp instead.

Now while I did use the Thermomix to dry fry the spices, and I certainly advocate using the Thermomix for this I am not going to specify times as I was doing this for the first time, and it was all a bit of a hit and miss.  It did work, but I am unsure now how long etc each stage took.

Place the chillies, coriander seeds, cumin seeds, peppercorns, cloves, cardamon pods, star anise, and the cinnamon bark in a dry pan over a moderate heat, and cook them for a few minutes or until the spices are aromatic.  Place the spices in a food processor (TM) and grind on high speed until you have a powder.

Pour a little oil in a pan and saute the shallots, garlic, galangal, and shrimp paste if using (I added the dried shrimp in the last stages)  Cook over moderate heat, or until slightly browned.  Remove the mixture from the heat, and allow it to cool slightly.  When cooled, place in the food processor with the ground spices.  Add the lemon grass and lime leaves, and puree the mixture until you have a smooth paste.

Place the paste in a well sealed jar, and keep refrigerated.  It will keep for up to 3 months.  Or you can freeze the unused portion.


Now to the actual meat component of the dish

For this component I adapted a recipe that I found at cuisine.com.au.

1.2kg Stewing steak, such as chuck
1 large onion, sliced
2 x400g tins coconut cream *
4 tbs of curry paste (from recipe above)
1 litre beef stock
2 cinnamon sticks
2 bay leaves
2 large potatoes, peeled and cut into cubes
1 tbs fish sauce
1 1/2 tbs palm sugar (I used Jeenys cubes)
1/2 tbs tamarind concentrate
roasted peanuts to serve
chopped coriander to serve

* Allow one of the cans of coconut cream to sit undisturbed for several hours - you want to skim the creamy top part off!!

Trim the meat of any excess fat and sinew and cut into 5cm cubes.

Heat a small amount of oil in a large heavy based saucepan and fry the onions until soft and lightly golden.  Add the meat, season with a little salt and continue to cook the meat until it is browned all over.

Open the can of coconut cream and scoop out the thick cream that has risen to the top.  Add this and the curry paste to the pot, lower the heat and cook gently for approximately 5 minutes.  Add the beef stock and the remainder of the can of coconut cream.  Mix well.  Add the cinnamon sticks and bay leaves, and cook, uncovered on a slow steady simmer for 1-2 hours, or until you can see the meat beginning to become very tender.

At this stage you can allow the curry to cool slightly and store in the refrigerator for up to 24 hours to allow the flavours to develop, or you can add the remaining ingredients.

As I had allowed my curry to sit overnight, when I placed it back on the stove I added an additional cup of coconut cream.  Bring to a gentle simmer, and add the potatoes.  Adjust the seasonings to taste.  For me a good Massaman is slightly sweet with a good sense of cinnamon.  At this stage I added a sprinkle more of cinnamon powder to the mixture.


Don't forget the potatoes!!!


Serve over steamed jasmine rice, topped with peanuts and coriander.


Making this dish over several days meant that I had the wonderful aromas lingering around my kitchen for quite some time - something I was not unhappy about!!!!


So what is the exciting news I hear you ask?

This blog has been a good starting point in the food world for me, but I have decided to take it one step further.  As you know I became the proud owner of a Thermomix at Christmas time, and I think the time is right for me to combine my passion for food with my love of the Thermomix.  So yesterday I started my own business and became a Thermomix Consultant!  Of course I still have to complete basic training - but I will be up and running in a couple of weeks.

If there are any loyal readers out there who would like to help me get up an going, (I need some practice in front of people!!!) and would like to have a demonstration (and live within reasonable distance of the Sydney Metropolitan area) I would love to come and introduce you to the wonderful world that is Thermomix!!!


Saturday, May 21, 2011

Beef Brisket

I purchased a new slow cooker cookbook the other day - I know what you are thinking - another cookbook???  I just needed a little bit of inspiration for different things to put in the slow cooker.

In the beef section there were many recipes for Beef Brisket.  I googled what a brisket was, and looked at some


images and then set off to ask my local butcher.  It seems that this is not a particularly popular cut of meat here in Australia - but it is available.  He told me that he could get me one, and I planned to pick it up several days later.

Ok, so now I have the brisket in my possession - what am I going to do with it?  Which recipe will I try?

I think this is where I went a little wrong - I left it wrapped in it's brown paper bag in the fridge until I was ready to pop it into the crock pot.  Boy, was I surprised!!!  I was expecting a thicker piece of meat have a look here and tell me what you think??  Well this puppy (no, not a dog - the meat!!) was thin and long, and had huge amounts of fat on it (aaagh!!!)  I set about cutting it into three pieces that would fit into the crock pot.  I put them in, then took them out, then put them back in again - I simply could NOT cook this piece of meat with so much fat on it.  SO I took them out again. I tried to trim as much fast as was humanly possible from this cut - which was not easy given the thinness of the meat in some places.

Here is what eventuated.....


Barbecue Brisket
Inspired from a recipe in Easy Slow Cooker Cookbook

1.75kg beef brisket (trimmed of fat!!!)
1 onion, roughly chopped
1 red capsicum, roughly chopped
6 cloves garlic, cut into rough pieces
150g (approximately) Barbecue Marinade (bottled BBQ Sauce!!)


Place all the ingredients in the crock pot, stir to combine - add more sauce if needed to evenly coat the meat.  Put the lid on, and allow to cook for 7-9 hours.

The butcher told me that this particular cut of meat requires long, slow cooking in order for it to become tender!

So what does one serve with this???

I scrubbed some potatoes, cut them into wedges, tossed them in a good slurping of olive oil, and a generous shake of parmesan cheese.  The kind of parmesan cheese that you can find on the shelf - it is great for things like this.


This gave the wedges great flavour, and lots of added crispiness!!

I then wrapped some corn on the cob in foil - added a small amount of crushed garlic and a knob of butter, wrapped them up like a christmas bon bon and baked them in the oven for 15 minutes.  Cooking the corn like this produces lovely sweet juicy, buttery corn.  Too easy!!!


Add another slurp of the BBQ sauce to the meat before serving!

What was the verdict?  The meat was easy to shred - but it was still kind of stringy and chewy.  A little too chewy for my liking.  At $13.99 per kilo it was relatively inexpensive - but for my money, a pork scotch fillet at around $7.99 per kilo is a much better buy.

Personally I think this recipe would be much better using the pork.  I don't think I will bother buying a brisket again.

So Dear Readers I would love to hear from anyone that has any experience with cooking a brisket.  Did I just get a "toughy"?


Thursday, May 19, 2011

Beef with Mushroom Gravy, Garlic Mash and Brussels Sprouts

I can hear the groans out there already from Miss Piggy - Brussels Sprouts!!!  She recently made a funny comment to me about a particular something that she was asked to do, she told me she would rather eat brussels sprouts than do it!!!

The poor old brussels sprouts get a bit of a bad rap.  I think the problem being that we have all been exposed to badly cooked brussels sprouts.  I know my mum used to boil the crap out of the them - rendering them soggy and, ....well revolting.  It just so happens that overcooking them releases a substance called glucosinolate sinigrin, which produces a sulfurous smell - the main reason many of us dislike them!!!

They are actually great little veggies to add to your repertoire - having lots of healthful benefits, including having anti cancer properties.

My method of cooking is quick and flavourful.  Trust me, if you try them this way you will love them (perhaps not right away - but you will come around!!).


Beef with Mushroom Gravy
Adapted from Easy Slow Cooker Cookbook

Serves 6

1 kg chuck steak, cut into cubes
3 cloves crushed garlic
1 420g can cream of mushroom soup
1 40g pkt french onion soup mix
1tbs cornflour

Combine all the above ingredients, except the cornflour in the crockpot.  Place the lid on and cook on low for 6-8 hours.


Approximately 30 minutes before serving place the cornflour in a small bowl, ladle several spoonfuls of the gravy into the bowl with the cornflour, and mix to a thick liquid.  Add the liquid to the crock pot, and stir well to combine.  Replace the lid and put on high until serving time.

Serve with Garlic Mash and Brussels Sprouts.


Brussels Sprouts you will love!!!


500g brussels sprouts
100g pancetta, diced
1 tsp TM concentrated vegetable stock *

Place the pancetta in a large frypan over medium high heat.  Cook, stirring for 3-5 minutes, or until slightly crispy.  Add the stock concentrate, brussels sprouts and approximately 1/2 cup of water.  Cook over high heat - quickly, stirring constantly for approximately 3-5 minutes, or until the brussels sprouts are a lovely bright green.  Season with cracked black pepper.  Serve immediately.

* If you do not have access to TM vegetable stock concentrate simply use a teaspoon of chicken stock powder instead.


Trust me on this one - not smelly - lovely and crunchy, and very tasty!!!!

So tell me Dear Readers what vegetable do you have a particular aversion to?  Is it the poor brussels sprouts?  Woud you be willing to try this version?


Wednesday, May 18, 2011

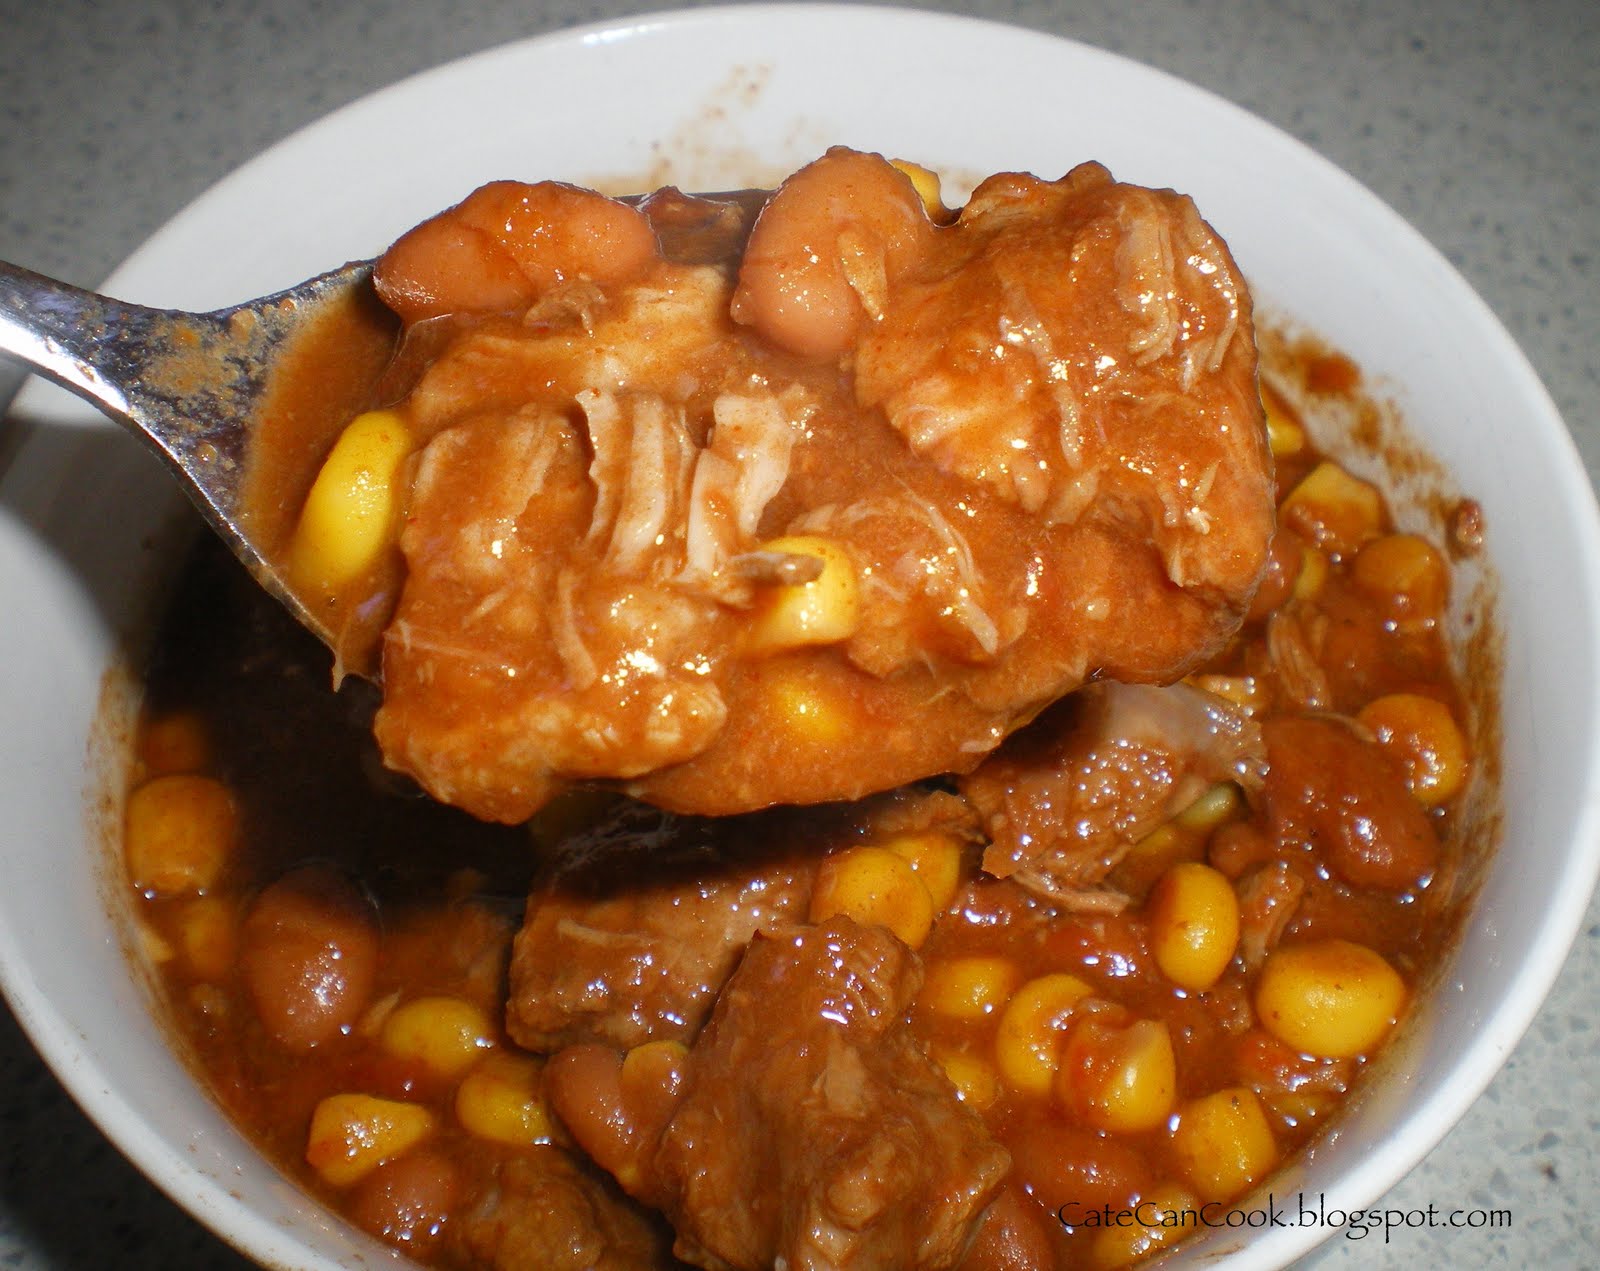
Chilli Bean Soup

Now that the winter cold has set it in, it is time to become best friends with your slow cooker.

A slow cooker saves so much time - of course there are those out there that will tell you that they use too much energy - but you have to make your own peace with that one.  For me, the slow cooker is an absolute godsend!

As you know I have a child with Prader Willi Syndrome.  Coupled with his insatiable appetite he is heading full bore into puberty!!!  Any of you that have pre-pubescent boys will know that filling them up is nigh on impossible.  I decided to take the tack that I would start sending a thermos of hot soup to school with him each day - not only would it keep him busier for longer each lunch time - but I was filling him with warm heartiness.

Last week I whipped up a batch of Pasta e Fagioli in the Thermomix - and that went down a treat.  Yesterday I decided to cook a batch of soup in the slow cooker.  The beauty of cooking the soup in  the slow cooker is that you don't need to add a lot of oil to the dish - I rarely brown my meat before adding it!!


Chilli Bean Soup
Adapted from Easy Slow Cooker Recipes

Serves 6 (at least)

1kg stewing steak *
1 400g can diced tomatoes
1 onion, diced
1 30g packet taco seasoning
2 cans Mexican Chilli Beans (1 drained)
1 400g can corn kernels, drained
1 tbs TM vegetable stock concentrate **

Cut the steak into cube sized pieces (don't have to be too technical - you are hoping they will all "melt down anyway!!).

Add the onion, the tomatoes, taco seasoning, one can of drained chilli beans, and the other can with the liquid, the corn and the stock concentrate.  Mix well.  Put the lid on the slow cooker and leave for 5-7 hours on low.


* I used gravy beef.  I am not sure if this was just incredibly tough meat, or if my beloved crock pot is on it's last legs - but after 7 hours it was still not as "falling apart" as I wanted.  I just continued to cook it for a few more hours.  Next time I will use chuck steak.

** If you do not have access to TM stock concentrate use either beef stock powder or a stock cube.


I am just about to go and load up my friend for tonight's meal - Beef with Mushroom Gravy.  I will serve this with Thermomix mashed potato (we have a long night tonight - and I want some hot food that I can throw on the table easily when I finally get in!)


Saturday, May 14, 2011

Chunky Beef Chilli

A good Chilli is a glorious thing!!!  There are 100's of recipes out there for Chilli - some made with mince, some made with chunks of beef - some slow cooked, some fast cooked.  Some (lord forbid) even made with other kinds of meat - such as chicken.  It all really boils down to personal preference.

There are different ways you can eat your Chilli as well - in a bowl garnished with toppings of your choice, or rolled up in a tortilla with cheese, like a burrito!  As I said, it all boils down to personal preference.

This week I decided to make a fast cooked chilli with chunks of steak in it.

I am sure I am cutting of my nose to spite my face here - but this recipe for Chilli is made using the Thermomix.  That is not to say that you can't "adapt" the recipe and cook it on the stovetop.

As a side note, I cannot tell you how much I love the Thermomix at the moment.  It truly is a time saver - it either cooks the meal totally for you - or allows you to multi task and do other things while it makes a component of the meal for you.  Last night I made two dishes - a soup for lunch today and the Chilli.  The night before I made mashed potato and then a gravy in it (let me tell you making gravy in the TM is sooo easy!!!).

Anyway back to the chilli.....


Chunky Beef Chilli
Adapted from Meat on the Menu - Thermomix Cookbook

Serves 4

5 cloves garlic
20g olive oil (approx 1 tbs)
1 tsp ground cumin
1 tbs sweet paprika
2 tbs ground turmeric
1/2 tsp cinnamon
1 tsp ground coriander
1/2 tsp chilli flakes (or to taste)
1 tbs concentrated vegetable stock
sea salt to taste
50g tomato paste (approx 1 1/2 tbs)
400g can chopped tomatoes
1 tbs brown sugar
600-750g rump steak cut into cubes *
400g kidney beans, drained and rinsed
1 1/2 tbs BBQ sauce **

Place the garlic and onions into the TM bowl and chop for 5 seconds on speed 6.

Add oil and dry spices, and saute for 3 minutes at 100 degrees on speed 1.

Add salt, tomato paste, tomatoes, sugar, stock and beef.  Cook for 15 - 20 minutes at 100 degrees on reverse and speed 1.

Add the kidney beans and heat through for 2 minutes at 100 degrees on reverse and speed 1.

* Do not substitute a cheaper cut - you want a tender cut of meat, as you are cooking for a short time)

** I added the BBQ sauce to sweeten the chilli as I was serving children.  Add either more chilli flakes, or add some cayenne pepper if you like a more spicy chilli.


I like to eat my chilli in a bowl topped with grated cheese, sour cream and extra hot chilli sauce.  I then use a rolled up tortilla as a scoop/spoon!!!

I must say I was very impressed with this chilli - not only was it easy to make, but it was very tasty.  "The Darlings" gobbled it all up too - so it must have been good.

I must apologise for the lighting in the photos - Mr. CCC has decided to change over all our lightbulbs to more energy efficient bulbs - and they just don't give out the same amount of light as those other energy devouring ones did.  He did add some LED lights under my counter -so that is what gives some of the photos that "disco" look!!!.

Next week - Chilli cooked in the slow cooker.

So tell me Dear Reader how do you like to eat your Chilli?  In a bowl or rolled up in a Burrito??  Do you have a favourite recipe you would like to share??