WELCOME TO MY KITCHEN


WELCOME TO MY KITCHEN!!
I hope you enjoy the food!!!
Showing posts with label Cookbook Challenge. Show all posts

Friday, June 10, 2011

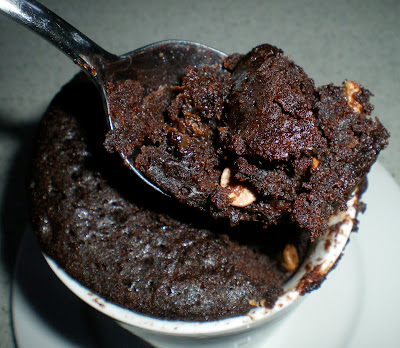
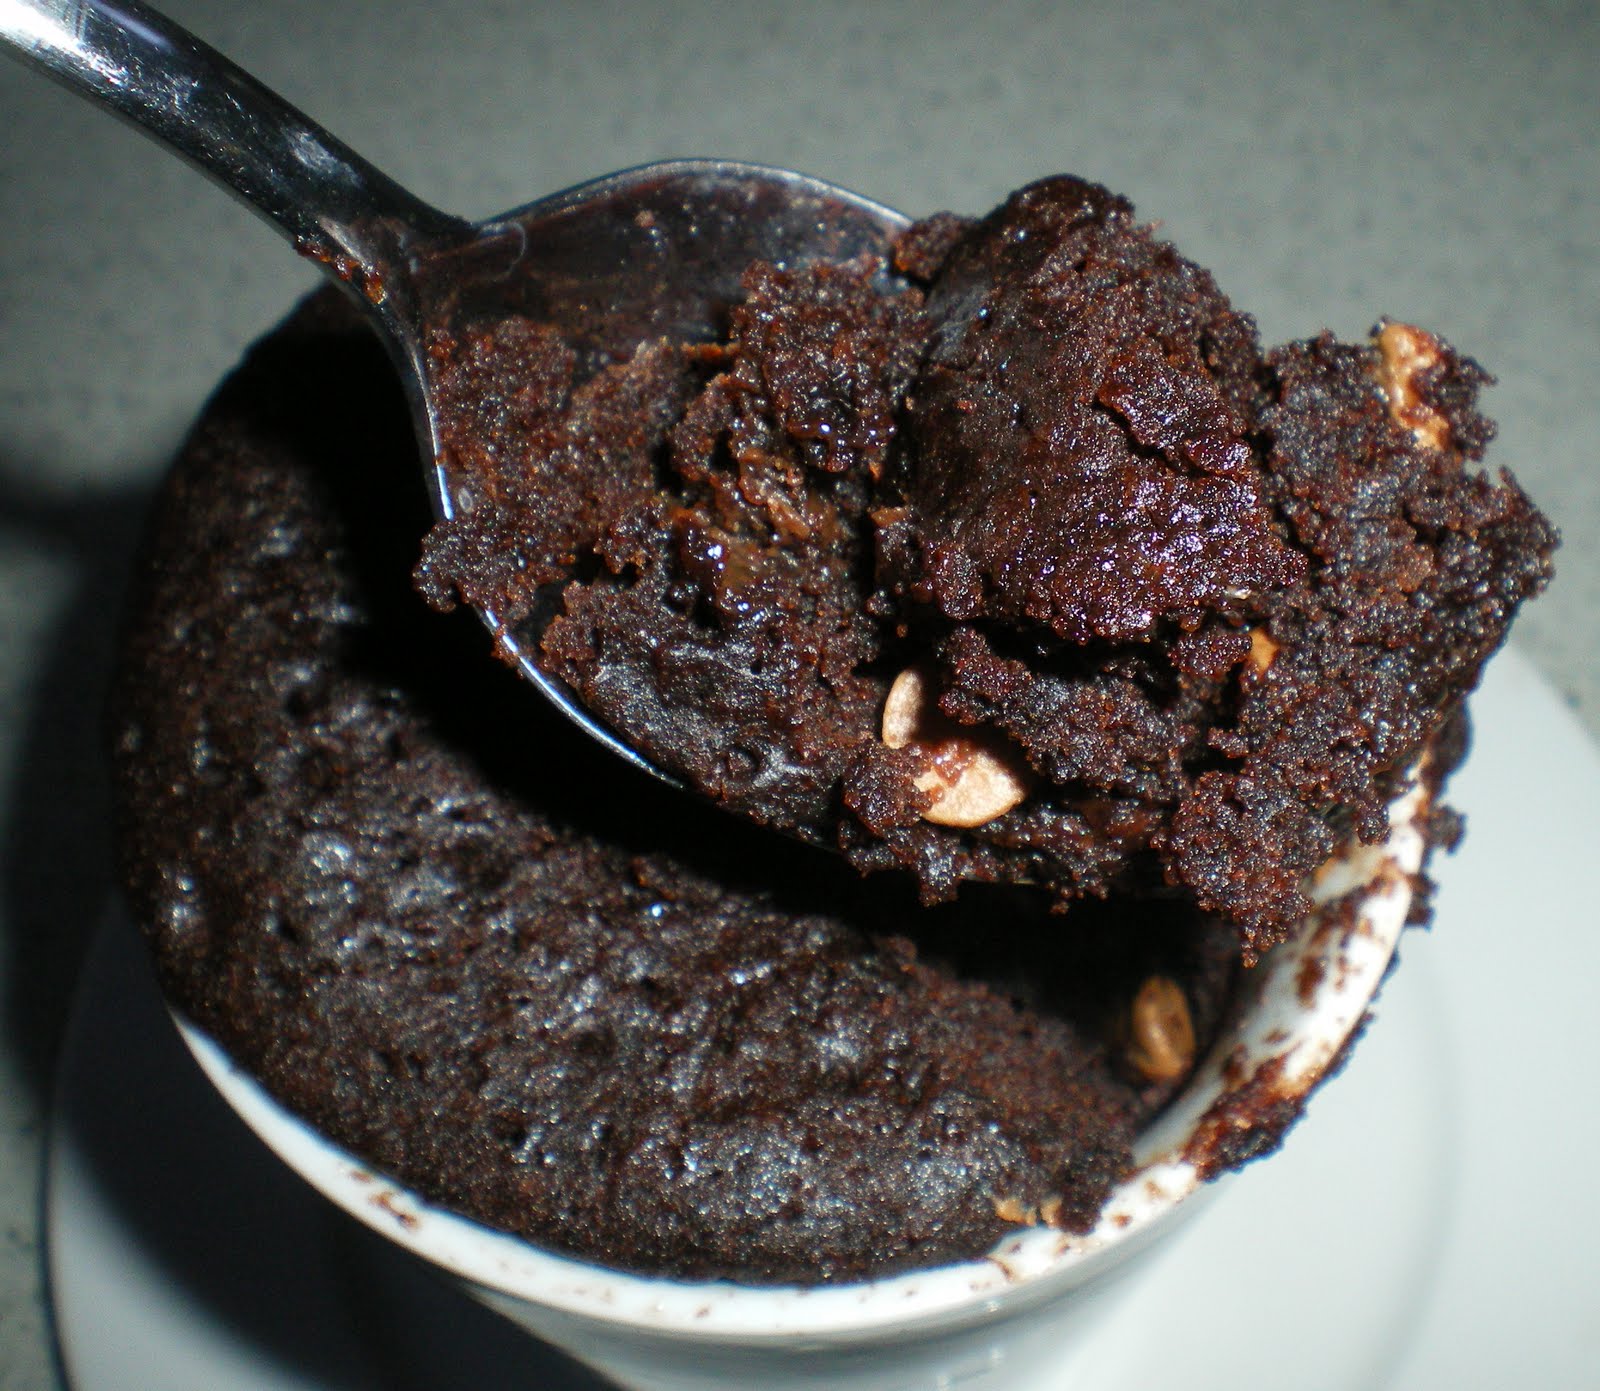
3 Minute Chocolate Cake in a Cup

Sometimes it is the things that seem the easiest that are the hardest.


The case in point is this fortnight's Cook Book Challenge.  The theme is "Cup".  Now you would not think that this would be particularly hard would you.  Well for me it was.  I naturally assumed that everybody would come up with simply stunning cupcakes.  They are not my forte - so I didn't even want to go there - so where else do you go?

I could make one of those "5 cup" cakes - but they are actually pretty boring.  I used to make a lemon chicken many, many years ago that the ingredients equalled up to a cup - but for the life of me I could not remember all three ingredients - I know 3 ingredients!!!

So..... I decided to go the incredibly boring, but oh, so tasty option of the 3 minute microwave Chocolate Cake in a cup!!!  Having made this now I must say this is a lethal weapon in your arsenal.  I wasn't going to try the cake - I was simply going to hand it on to "The Darlings" - but in the name of honesty in cooking I thought I better give it just a little taste test.  This cake was good!!!  Warm, and chocolatey and oh so sinful.  This could be the death of many a person when they get the late night munchies..... you know who you are!!!!!


3 Minute Chocolate Cake in a Cup
Makes 1

Recipe from - many and various places on the internet!!!! but I got this one from here

4 tbs plain flour
4 tbs sugar
2 tbs cocoa powder
1 egg
3 tbs milk
3 tbs oil
dash vanilla
1-2 tbs chocolate chips (optional)
dash salt
dash baking powder


Place all ingredients in a bowl and mix well.

Put mixture in a large coffee mug (I advise putting on a plate as it does overflow!!)

Microwave for 3 minutes, or until cooked (this will depend on the wattage of your microwave!)

The cake will rise, but then fall after you take it out of the microwave.


PLEASE, have some restraint and do not try and eat it immediately!!!! (I have warned you - if you cannot wait - you will pay the price - a burnt mouth!!!)

Yes, I know, not gourmet, not particularly exciting - but it is in a CUP!!!!


Thursday, April 21, 2011

Taquitos and Stuffed Peppers


I don't know why I had such a hard time with this fortnight's Cookbook Challenge.  The theme this fortnight was crunchy.  You would not think it would be that hard.

I sat and thought - couldn't come up with anything - even googled crunchy recipes - and all I came up with was a lot of fried stuff.  Perhaps therein lies my problem?!  We do not tend to do a lot of fried food in this house - don't like the mess it makes, and well.... we can do without it.  I did have an earlier attempt last week - decided to make honey chicken - but no, did not stop there - I thought let's fry up some rice vermicelli - that's crunchy!!!  Sadly after all the effort of making the batter (and I can't say that I was entirely happy with the batter I made), and then frying it all up - I just couldn't be bothered taking the photo - so no crunchy!!!

Now I don't like to admit defeat - so last night I thought I would rectify this non crunchy problem and make taquitos for dinner!!  Lovely little crunchy Mexican treats.  Usually fried - but I wanted to bake them instead!  Well the theory was good - but were they great???  Look, in my eyes they were what they were - crispy, crunchy little Mexican morsels.  They are not something I would probably ever order in a Mexican restaurant - so perhaps that is why I was not enamoured with them.  But in order to not fail this fortnight's challenge I present my Crunchy Menu!!

PS - I was eating alone - so I kinda just threw all the things together - measurements are all approximations!!!


Homemade Salsa


3-4 tomatoes - depending on size, cut into very small pieces
1 green shallot, finely chopped
2 chargrilled green chillies (the long kind)* finely chopped
juice of 1/2 lime
2 tbs chopped coriander
salt

* To chargrill the chillies place under a hot grill for approximately 5-10 minutes, or until skin is blistered and black.  Allow to cool, them remove skin.

Place all the ingredients in a bowl.  Season to taste, adjust chilli intensity to suit.


Taquitos


Serves 2


4 corn tortillas
BBQ chicken meat, shredded (approx 100g)
Prawn meat (approx 100g shelled weight), finely chopped
1 clove crushed garlic
Salsa
Grated Havarti Cheese
Olive oil

In a bowl combine the shredded chicken meat, and the chopped prawn meat with enough salsa and grated cheese to be just moist.  You don't want it too wet or it will make your taquitos soggy.


Lightly brush the corn tortillas with a little olive oil.  Turn the tortilla over.  Place a small amount of chicken/prawn mixture on each tortilla.  Roll up into a little "cigar shape".  Place on a baking tray.

Bake in oven that has been preheated to 200 degrees.  Bake for 15-20 minutes, or until golden brown and "crunchy"!.

Serve with extra salsa, sour cream and avocado.


You might like to add a little extra to the side of this dish - I decided to make a little stuffed pepper.  I bought the long kind that look like this - only straighter


I cut it in half lengthwise then stuffed it with the following:

Stuffed Peppers


2 long yellow peppers, halved
100g prawns meat  (approx 100g shelled weight)
1-2 cloves crushed garlic
salsa
salt and pepper
40g haloumi cheese with chillis diced
20g grated havarti cheese

Combine all the above ingredients in a bowl.  Place into the pepper halves.  Bake in the oven alongside the taquitos  (but for only 5-10 minutes, or until the prawn meat has cooked through - do not overcook as the prawn meat will become tough!)


So there you have it - my crunchy menu!!  Who would have thought it could be so hard??  I am sure now that I have laboured over it, and posted what I feel is a substandard post, I the big lightbulb in my head will go off and I will think of something infinitely better I could have made.  So be it - that is life!!!


Wednesday, April 13, 2011

Raspberry Bliss Cake

Many years ago a friend commented that there was a particular cake shop that made a particular cake that she liked.  Me being me, decided to investigate said cake, and attempt my version of it.  Now I have never tasted the original cake - but only gazed longingly at it, and based on her description - this is what I came up with.  I have made this recipe many times over the years - and it is always a winner!!

That was however, to change this time!!  Now I know that I sing high praises of the Thermomix - I love it in oh so many ways - but this time it failed me dismally.  I only had to beat egg whites - it can't be that hard - Thermie has huge beating power - should be a walk in the park.  Now I know that you will probably tell me that perhaps I had a speck of yellow in the whites - or the bowl was not clean - or....?  But I swear I did everything right.  I even looked up in the Thermomix Cookbook how to beat egg whites - and here is where I think it's a little weird.  They actually wanted you to beat the egg whites, and have the temperature set at 50 degrees (strange??)  Look - new machine - I will do as instructed.  Dismal failure!!! I ended up with a warm white soupy mixture.

Tossed that out - looked on google for a solution - and yes several other people have said 50 degrees is too much - lower the temperature to 37.  Another 4 eggs - and I am still not happy with the mix - but I'm going to run out of eggs at this rate (particularly seeing as Mr. CCC had just come to make his breakfast!!)  The whites were fluffy - but just not as fluffy as I have had them previously.  So read the recipe - I don't think I will advocate using the thermomix other than for the chopping of the nuts and chocolate, and the whipping of the cream.  Please, if any of you out there have experience with this let me know the secret.


Raspberry Bliss Cake

4 egg whites
1 tsp white vinegar
200g sugar
50g ground roasted hazelnuts
100g white chocolate, finely chopped

To decorate
whipped cream
2cups frozen or fresh raspberries
grated dark chocolate

Preheat oven to 150 degrees.

Grease, and line with baking paper 2 x 18cm springform pans.  Grease the paper lightly.

Beat the egg whites with the vinegar until soft peaks form, then gradually add the sugar, beating well after each addition, until the mixture is thick and shiny.  Gently fold in the chocolate and hazelnuts.

Pour the mixture into the prepared pans.  Bake in the oven for 30-40 minutes, or until they are hard.  Turn off the oven, leaving the door slightly open, allow the meringues to cool in the oven.

Lightly dust serving plate with icing sugar.  Place one meringue cake on the icing sugared plate.

Top with whipped cream that has been flavoured with vanilla and sugar.  Top the cream with raspberries.  Place second meringue on top of the cream and berries.  Top the cake with more whipped cream and decorate with raspberries and grated dark chocolate.


This cake can be enjoyed either served straight away - the texture will be more crunchy - or you can assemble ahead of time - and allow the cream to soften the meringue - either way it is a delicious cake.  A real stunner - and always a favourite.


As an aside -  I am entering this as my post for the CookBook Challenge.


This fortnight's theme is eggs - being Easter I am sure there will be many talented people out there making all forms of chocolate eggs.  I say based on all the eggs I used for this cake - this is my take on the "egg theme".  Now I have to come up with a way to use all of those yolks!!!


Sunday, April 3, 2011

Seared Barramundi with Asian Broth and Sweet Potato Mash

I get so excited when I see a new cooking magazine in my mailbox!  Thursday the latest edition of MasterChef arrived, and after a quick flick through it I had already pegged this recipe as a "must make!"

I had already made out my shopping list, and had planned on making salmon - but I scribbled the ingredients needed for the new dish on the back of the list, and  I headed off to the shops with two menu scenarios (kind of like an alternate ending to a movie!!)  I intended to make the salmon, planned to make the salmon, ....... but I just couldn't help myself - I bought the barramundi!  I had even told myself that I was only going to buy the barra if it was cheaper than the salmon - which of course it wasn't - but that recipe was calling me - I wanted to be the first on the kid on the blogosphere to make it!!!!

I am so glad that I did too - this dish was soooo good!!!  OMG - kinda like a laksa, but not really, hard to describe - there is  this lovely spicy asian flavoured broth, then the creamy sweet potato mash (with some of the broth mixed through it) and then the delectable golden piece of barramundi.  Our plates were cleaned up pronto, and we both had happy smiles on our faces afterwards!!


Seared Barramundi with Asian Broth and Sweet Potato Mash
Recipe from Curtis Stone, featured in MasterChef Magazine April Edition

Serves 4


1kg orange sweet potato, peeled, cut into 4cm pieces
1 stalk lemongrass, white part only, bruised
2cm piece ginger, thickly sliced
1 clove garlic
40g butter
2tbs olive oil
4 x 200g pieces barramundi fillet, skinned, pin boned

Coriander sprigs and sesame oil to serve

Asian Broth

670ml light coconut milk (I used light coconut cream)
3cm piece ginger, finely grated
2 cloves garlic, crushed
2 red bird's eye chillies, halved lengthwise (I used 1 long red chilli)
2 tbs finely chopped coriander leaves
2 eschalots, roughly chopped
1 stalk lemongrass, white part only, thinly sliced
4 kaffir lime leaves
1 carrot, cut into 2cm pieces
zest of 1 lime

To make broth, place all ingredients in a large pan.  Bring to the boil and cook for 5 minutes for the flavours to infuse coconut milk.  Remove from the heat and season with salt and pepper.  Cover.


* I actually made mine the in the Thermomix - I figured I could chop the ingredients, and then just cook the sauce in the TM bowl.  I cooked the sauce on varoma temperature for around 6 minutes - until it was boiling!  I then strained the solids from the broth, and kept it warm in the Thermoserver.


Meanwhile to make the mash, place the sweet potatoes, lemongrass, ginger and garlic in a large saucepan.  Add enough water to cover, bring to the boil over high heat, then cook for 20 minutes, or until the sweet potatoes are tender.  Drain and discard lemongrass, ginger and garlic.

Strain the broth through a fine sieve and discard the solids.

Place the sweet potatoes, butter, and 1/3 of the broth in a bowl, and mash with a potato masher.  Season. Cover to keep warm.

Heat the olive oil in a large non stick frying pan over medium high heat.  Add the fish and cook for 2 minutes each side, or until just cooked and golden.

Divide the mash among bowls, then top with the fish.  Spoon over remaining broth, scatter with coriander and drizzle with sesame oil to serve.


I cannot tell you enough how good this was!!!


Another picture - just to make you drool!!!

As I was only serving 2 people I had some sweet potato mash and broth left over.  Last night we had a cocktail party here at home - 22 people!!!  I made my usual canapes - chicken dumplings (and tried a new version - same recipe but instead of chicken, used green prawns, then added some finely sliced kaffir lime leaves - experiment worked - everyone love them!!!)  Anyway to cut to the chase I kept a few chicken dumplings hidden in the fridge - and tonight I plan on having the broth and mash with the dumplings!!!

So tell me Dear Readers, do you head off to the shops with a shopping list that has alternate ingredients just in case!!  Just in case you change your mind, and talk yourself into making something else!!!


Tuesday, February 15, 2011

Valentine's Day Recipes


So how was your Valentine's Day?  I hope you had a lovely meal with your loved one somewhere.

We had a quiet night in at home.  As promised, here are the recipes from last night's dinner.

For starters we had Souffle Oysters.  I am not a huge fan of raw oysters, so I always tend to cook them some how.  I am kind of tired of the usual of Oysters Kilpatrick, so decided to make Souffle Oysters this time.  Years and years ago I had a go at making these, but for the life of me I couldn't remember where the recipe was (don't you hate when that happens?).  So after several google attempts, and not finding the recipe I wanted here, is what I I ended up making (I think it was kind of close to the one I made many moons ago!!!)


Souffle Oysters


Serves 2

12 oysters on the half shell
2 tbs finely grated parmesan cheese
1 large egg, separated
2 tbs whole egg mayonnaise
1 tbs snipped chives
squeeze of lemon juice
1 tsp dijon mustard

Prepare a small baking try by either spreading rock salt on the tray or by placing a piece of foil that you have crinkled up on the tray (you want a decent amount of crinkles to hold the oyster shells in place!!)

Place the oysters on your prepared baking tray.

Combine the parmesan, egg yolk, mayonnaise, chives, lemon juice and dijon mustard in a small bowl.  Mix well, season with salt and freshly ground black pepper.

In a separate small bowl beat the egg white until stiff peaks form.  Fold 1/3 of the beaten egg white into the parmesan mixture, until just combined.  Fold in the remaining egg white, being careful not to mix it too much and break up the air bubbles.

Spoon 1 -2 teaspoons of the souffle mixture onto each oyster shell.

Place the oysters under the grill, and grill for approximately 3 minutes, or until the topping is lovely and golden.

So how were they - delicious!!!  not overly cooked, but not raw either.  The lovely light cheesy souffle topping was just what I was searching for!

For the main I wanted to try something a little different, and decided to try steamed salmon (in the Varoma). The recipe actually had the salmon being stuffed with a salmon mousse, but I wanted to vary it a little, so I gave it a prawn and salmon mousse filling!


Salmon with Prawn and Salmon Mousse Stuffing with Curried Mango Sauce
Adapted from Full Steam Ahead - Thermomix Cookbook

Serves 2


Mousse Stuffing
180g green prawn meat *
60 g salmon (these were the off cuts from evening out the fillet pieces) *
15g butter, softened
200g cream (30% fat)
2tbs snipped chives
salt and freshly ground black pepper
pinch cayenne pepper
pinch freshly ground nutmeg

Place the salmon pieces and prawn meat into the TM mixing bowl.  Mince for 15 seconds on speed 5.
Add the cream, salt and pepper, nutmeg, chives, and cayenne pepper.  Mince for 15 seconds on speed 6.

Transfer mousse mixture to a bowl.

* You can either use approximately 250g of salmon, or prawn meat for the mousse, or do as I have done and make a combination.  You will have slightly more than is needed for stuffing the fillet, but wait.... and see what I did with it!

Salmon


I purchased 2 x large tail pieces, skinned

Trim the tail pieces so that they match each other exactly in size, and you have a nice even sized pieces of fish.

Spread out a large piece of cling wrap on the kitchen bench.

Place one fillet on the cling wrap.  Spread the fillet with a generous amount of the mousse.  Place the second fillet on top of the mousse.  Wrap the cling wrap tightly around the fish, making sure that you have completely enclosed the fish.

Place the wrapped salmon fillet into the Varoma receptacle.

Now I hear you asking what I did with the left over mousse mixture???

Lay out another piece of cling wrap.  Place the mouse onto the wrap, and roll it into a sausage shape.  Place in the Varoma along with the salmon.

Curried Mango Sauce
250g of fresh mango pieces
50g brandy
1/2 tsp curry powder
salt and freshly ground black pepper
300g fish stock
200g cream (30% fat)
100g plain yoghurt
2 tsp cornflour

Now here is the beauty of cooking with the Thermomix.  You can steam your fishand vegetables, and cook your sauce all at the same time (while you are still sitting at the table having a glass of wine!!!).  There are two levels to the Varoma - on the bottom level you have your fish, and the top level the vegetables that you are serving with the fish.  Leave the vegetable layer out for the first 2 cooking stages.

Place the mango pulp, brandy and salt and pepper into the TM mixing bowl.  Cook for 5 minutes/Varoma/Speed 1.

Add the stock, place the Varoma (with the fish inside!!) into position and cook for 20 minutes/Varoma/Speed 1.

Set the varoma aside.  (Keep covered) Add the cream through the opening in the mixing bowl lid, place the varoma back in place, with only the vegetable layer in place.  Cook for 5 minutes/90 degrees/Speed 1.

Add the yoghurt that you have combined with the cornflour, blend for 30 sec/speed 10.  Season if needed.  Add both levels back to the varoma, and cook for an additional 4 minutes/varoma/speed 1.

Carefully remove the fish, and unwrap from the plastic.  Cut neatly into two serving portions.  Unwrap the mousse "sausage" and slice up and serve along side the salmon.

Serve the salmon with potatoes and steamed vegetables of choice.


The reason I split up the vegetables and the fish was that last time I cooked the vegetables in the varoma for the length of time the recipe specified I found the vegetables too soft for my liking - you may alter this if you like.

Now of course if you do not have a Thermomix - do not despair.  You can make the mousse filling in a food processor - and steam the fish in a similar way using other steaming methods.

Now onto the piece de resistance!!!  Dessert.  I pondered long and hard over this one - I was going to make my favourite Creme Brulee - but Precious wanted to bake cupcakes for her new beau - so we compromised, and split one batch of Red Velvet Cupcakes between us - and had fun making them together.  I had seen many and various recipes for these floating around the internet - but this is the one we tried to adapt to the Thermomix.


Red Velvet Cupcakes
Adapted from recipe found at joyofbaking.com
Makes approx 12-13 (you want a "spare" to sacrifice for crumbs!)

200g plain flour
1/4 teaspoon salt
10 grams cocoa powder
60g butter, at room temperature
180g white caster sugar
1 large egg
1/2 teaspoon vanilla extract
1/2 cup buttermilk
1 tbs red liquid food colouring
1/2 tsp white vinegar
1/2 tsp bi carb soda

Cream Cheese Frosting
250g crem cheese, at room temperature
1 tsp vanilla extract
110g icing sugar, sifted

I will give you both methods for making these - the regular version and in bold the TM method.

Preheat oven to 180 degrees C (non fan forced)

Prepare muffin tray with liners.

In a large bowl sift together the flour, salt, and cocoa powder.

In the bowl of electric mixer (TM) beat the butter until soft. (1.30 minutes 50 degrees - Speed 4).   Add the sugar and beat for 2-3 minutes, or until light and fluffy (30 seconds speed 5).  Add the egg and beat until incorporated. (10 seconds speed 3).  Scrape down the sides of the bowl.  Add the vanilla extract and beat until combined. (5 seconds speed 6).

In a measuring cup whisk the buttermilk with the red food colouring.  With the mixer on low speed (speed 3) alternatively add the flour mixture, and then the buttermilk mixture to the bowl.  Do this in three additions, ending with the flour mixture.

In a small cup combine the vinegar with the bi carb soda.  Allow the mixture to fizz, and then quickly mix into the cake batter. (10 seconds speed 6).


Now they said to work quickly - but we couldn't and it didn't seem to make much of a difference. Divide the batter amongst your prepared muffin cups.  Smooth the tops.

Bake in the oven for 15-20 minutes, or until a toothpick comes out clean.

Cool the cakes on a wire rack until completely cool.

To make the cream cheese frosting place the cream cheese in the bowl of your electric mixer (TM - with butterfly attachment) Beat the cream cheese until smooth (20 seconds speed 4) scrape down the bowl. Add the vanilla and icing sugar, and beat until the mixture in nice and smooth (20 seconds speed 4).  You may need to add more icing sugar to get the right consistency.  Now you can either pipe the frosting onto the cupcakes (but we found this took way too much frosting!!) - or you can use a spatula knife.

Crumble your "sacrificial" cupcake and top the frosting with those lovely red crumbs!!


So how were these lovely little red cakes?


Pretty darn good ........


Even the taste tester said so!!!!

So I hope you enjoyed your Valentine's Day as much as we did.

.... and in answer to the question that I know you are going to ask.... no "The Darlings" did not partake of this meal with us - I fed them earlier - on 4 ingredient pasta!! So everyone was happy last night!!!

I apologise if I have not given exactly accurate directions with the TM - but it got a little frenetic at times in the kitchen yesterday while we were baking!!!


As you all know I am signed up for the 2011 Cookbook Challenge.  This fortnight's theme was LOVE!!!  So last night's meal I thought fit pretty well into that theme!!!  Go check out the site to see what others have been making.

Saturday, January 29, 2011

Sticky Salmon Noodle Salad

The theme for this fortnight's Cookbook Challenge is Rice/Noodles.

There are so many things that could be made with either of these ingredients, and I am sure that I will come up with several entries in this theme.  The first dish that I have made using these ingredients however, is this Sticky Salmon Noodle Salad.

The recipe is in the current edition of Super Food Ideas, and the photo appealed to me as soon as I saw it.  I find that I often embark upon a recipe without too much thought as to how the dish will actually taste (I don't know how I can possibly do that - I mean, I guess I must have some sort of an idea - otherwise why would I make it - but I don't think the penny actually drops until I have made it.) This was the case last night.  As I put the components together I was struck by how similar it was in flavours to the Beef Salad that I made several weeks ago - but this was oh so much better because the "meat" part of it was my favourite - salmon!!!


Sticky Salmon Noodle Salad
From Super Food Ideas February edition
Serves 2


2 tbs brown sugar
2 tbs dark soy sauce
1 clove crushed garlic
2cm piece of ginger, finely chopped
2 x pieces of salmon tail fillet
270g noodles (I used thin egg noodles)
1 small lebanese cucumber, halved, sliced diagonally
2 green onions, thinly sliced
50g mixed lettuce leaves
200g cherry tomatoes, halved or quartered, depending on size
2 tbs fresh mint, chopped
2 tbs fresh coriander, chopped
2 tbs oil
2 tbs sweet chilli sauce

Combine the sugar, soy sauce, garlic and ginger in a shallow glass or ceramic dish.  Add the salmon. Turn to coat.  Cover and refrigerate for at least 30 minutes for the flavours to develop.


Cook the noodles according to packet directions.  Drain, then rinse, and then drain well.


In a bowl combine the cucumber, onion, lettuce, tomato, mint and coriander.  Add the noodles, then toss to combine well.

Heat the oil in a large frying pan over medium high heat.  Remove the salmon from the marinade.  Cook for 2-3 minutes each side (for medium) or until cooked to your liking.  Transfer the salmon to a plate.

There are two options here - you can either flake the salmon into the salad and serve.  Or you can plate up the salad and top with the piece of salmon.  I took the second option as I didn't want to miss out on any of "my" salmon.  It would definitely look a little prettier is you flaked the salmon through the noodle salad - but you know it's not always about looks is it?  Anyway - you decide.  Which ever way you do it - sprinkle the top of the salmon/or salad with the sweet chilli sauce.


After making this dish I was thinking that another nice addition to the salad would be some chopped cashews - see what you think when you try this.  This is a lovely light, refreshing dinner, and I will definitely make it again (but with the addition of cashews!!)

Friday, January 7, 2011

Pork Cutlets with Cherry Port Sauce and Potato Crisps

I have recently joined up for the Cookbook Challenge, hosted by Jeroxie, Iron Chef Shellie, Kat, and Agnes.


The Challenge has been set up this year so that every fortnight there will be a new key ingredient that must be used - it can be a sweet or savoury dish, but it must contain the key ingredient.

What luck!!  The meal that I had actually planned for last night's dinner actually contained this fortnight's ingredient!!

So what is the ingredient - stonefruit!!  This brought forth a discussion at the table last night - is Avocado classed as a stone fruit?  I am guessing yes - so there may be further recipes forthcoming!!!!

What I actually made last night was inspired by a recipe that I saw in the current edition of Good Taste, and it fits the challenge - so here goes.....

I am going to use......


Pork Cutlets with Cherry Port Sauce and Potato Crisps
Adapted from a recipe found in Good Taste Magazine, January issue
Serves 4

4 potatoes - 1 large one for each person, peeled
60g butter, softened
4 cloves garlic, crushed
4 pork cutlets
450g fresh cherries, pitted
1/2 cup water
1/2 cup port
200g snow peas
1 zucchini
200g peas


Preheat the oven to 180C.

Line a baking tray with baking paper (you may need two - you do not want to crowd the potatoes)

In the TM bowl place the garlic bulbs, process on reverse speed 4 for 3-6 seconds to remove the skins.  Remove the skins from the bowl.  Add the butter and process for 40 seconds at 50C on speed 4.  Or simply use softened butter and crushed garlic!!

Using a pastry brush, brush a small amount of the garlic butter over the baking paper.

Using a mandoline cut the potatoes into thick slices.

Lay the potato slices on the prepared baking trays.  Brush the potato slices with more garlic butter.

Bake for 25-30 minutes, or until golden and crisp, turning over halfway through cooking.


Season the pork chops with salt and freshly ground black pepper.

Place the remaining garlic butter into a frypan, add 1 tbs olive oil, and heat over medium high heat.

Cook the pork chops for 4-5 minutes each side, or until golden, and cooked through.

Remove the chops from the pan and place on a plate, cover loosely with foil to rest.

Add the cherries to the pan.  Cook, stirring for 3-4 minutes, or until the cherries start to soften.

Add the water and cook stirring for an additional 5-10 minutes.  Add the port and any juices that have come from the meat while resting.  Cook for an additional 2-3 minutes, or until the sauce thickens.

Divide the pork and potatoes among the serving plates. Top the pork cutlets with the cherry port sauce. Serve with steamed green vegetables.


There you have it - Challenge # 1!Cookbook Challenge