WELCOME TO MY KITCHEN


WELCOME TO MY KITCHEN!!
I hope you enjoy the food!!!

Monday, May 30, 2011

Veal Osso Bucco with Creamy Polenta

I think I cooked dinner the other night, but I can't be sure!!!

Now before you start wondering whether I have hit the cooking sherry that is hidden in the kitchen cupboard, or if I am having a "senior's moment", let me explain.

This dish was just so easy to make that it truly felt like I hadn't cooked.  With the help of my "apprentice" Thermie, the preparation took me all of about 7 seconds, and then I just had to let it simmer for 1 hour 45 minutes.  Thermie then stepped up to the plate and cooked the polenta for me - so really not much to do at all!!!

This is one of those wonderful winter warmer meals - smells great while it is cooking, and just warms the cockles of your heart when you are eating it!!!
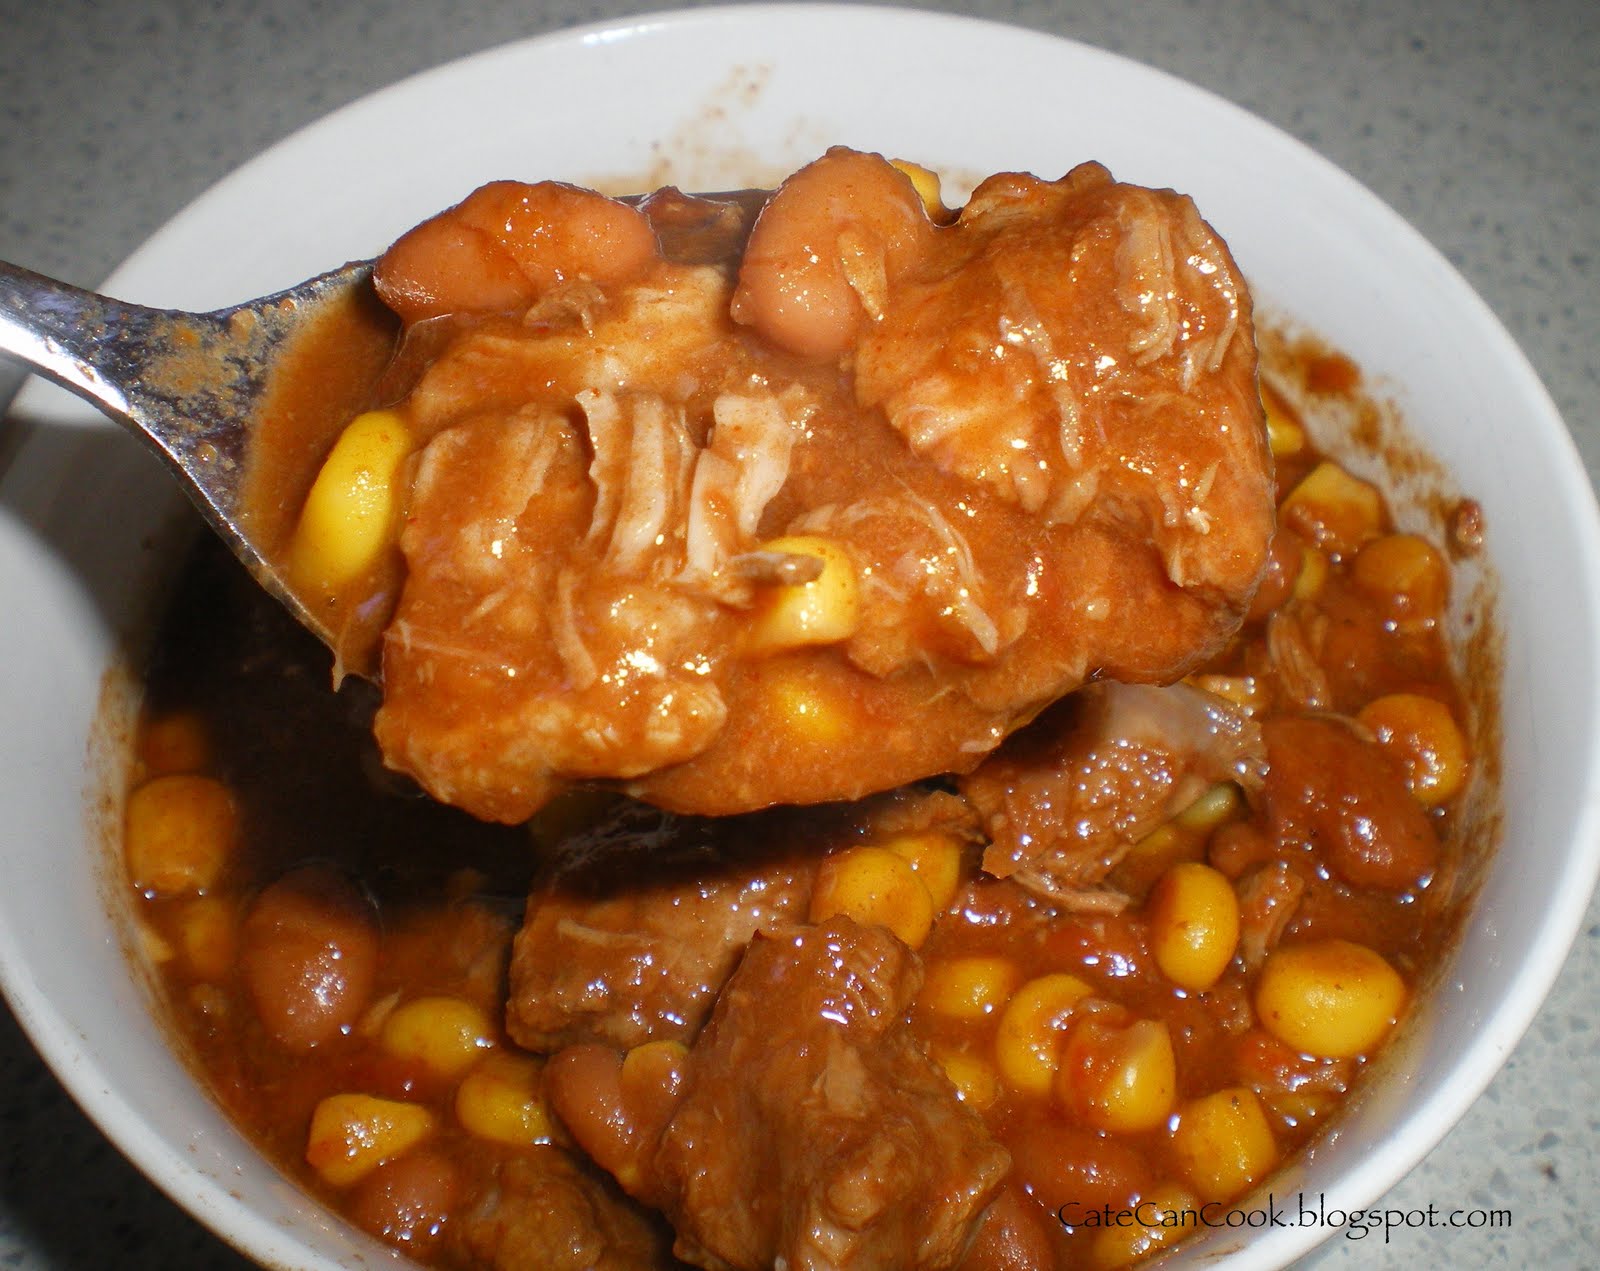


Veal Osso Bucco
From Good Food by Neil Perry

Serves 4-6

1.2kg veal shanks, cut osso bucco style
1 tbs plain flour, seasoned with sea salt and freshly ground black pepper
extra virgin olive oil
1 onion, finely diced
2 cloves garlic, finely chopped
2 celery stalks, finely diced
2 carrots, finely diced
1 cup Ligurian Olives (optional)
2 tbs tomato paste
grated zest of 1 lemon
grated zest of 1 orange
1 cup white wine
400g can tinned tomatoes *
3 cups chicken stock
4 fresh bay leaves
2 thyme sprigs


* These are my favourite canned tomatoes at the moment - great flavour - and I just love the little cherry tomatoes in my sauce!

Place the flour in a large plastic bag.  Season with the salt and pepper.  Toss the veal shanks in the flour.

Heat some olive oil in a large heavy based saucepan and cook the shanks until browned all over.  Remove from the pan.  Heat a little more oil and add the onion, garlic, celery, carrot and a pinch of sea salt, and cook over medium heat until the onion is soft.  Stir in the olives (if using), tomato paste, lemon and orange zests, wine, tomatoes, stock bay leaves, thyme and browned shanks.

Simmer very slowly, covered for 1 hour.  Remove the lid, and simmer uncovered for an additional 45 minutes, or until the meat is tender and falling off the bone.

Check the seasonings, and add salt and pepper if needed.

Serve with creamy polenta.

Creamy Polenta
From EDC Thermomix Cookbook

1500g water **
20g olive oil
salt to taste
350g polenta
50g butter
grated parmesan cheese


Place the water, oil and salt in the TM bowl and cook for 12 minutes at 100 degrees on speed 1.

Add the polenta slowly to the bowl (with the blades turning on speed 1) and cook for 15 minutes at 100 degrees on speed 2.

Add the butter and season to taste with the parmesan cheese.  Serve immediately.

** you may wish to use chicken stock instead of water for a richer flavour.  You could also use half and half water and stock.  For an even creamier polenta you could replace half of the liquid with milk.

Polenta (Non Thermomix)
From Good Food by Neil Perry

250g polenta
sea salt
100g unsalted butter, chopped
150g finely grated parmesan cheese
freshly ground black pepper

Bring 1.25-1.5 litres water to the boil in a saucepan.  Add some sea salt and pour in the polenta, whisking constantly, until it is completely incorporated.  Reduce the heat and cook for 40 minutes at a gently simmer, stirring from time to time with a wooden spoon.  Stir in the butter and the parmesan cheese.  Season to taste with sea salt and freshly ground black pepper.


Thank you to my good friend Madame T, who came and kidnapped me last week when I was down in the dumps!  She took me on a walking foodie tour of Ramsay Street Haberfield.

We visited  Pasanella, a wonderful cheese shop, Colefax Chocolates, Franks' Fruit Market, The Haberfield Bakery, and David Gojak Butchers to name but a few.  From the butchers shop I procured some wonderful meat - these veal osso bucco, some tomato and provolone cheese sausages, and some absolutely beautiful home made chevapi sausages (I will show you what I did with those in another post!!)

What a wonderful day - looking at, and tasting food is sure to make one feel so much better!!!  Thank you Madame T!!!!

Are you wondering what I did with all that time I had while dinner was simmering away on the stove??

I was sitting here at the computer of course!!! I ran across a blog that let me while away the time.

If you are like me, and like houses - looking at other peoples homes, trawling real estate sites - then this blog is for you.  I actually found out that I am not alone in this voyeuristic habit.  Julia has a little questionnaire on her site - and it appears that I am definitely "Hooked On Houses".  On this blog site you will find houses that have been in movies - celebrity houses, and just plain funny stuff that has been seen on houses listed for sale.  If you are into houses check it out - there's a lot of fun stuff there!!!  While it is an American site it is interesting!  I think I found my dream home there!!!!

So Dear Readers what do you do to while away the time while dinner is cooking?  Do you have any interesting blogs/websites you would like to share??  Do tell!!!


Friday, May 27, 2011

Pork and Pasta Bake

"The Darlings" gave me an Italian Cookbook for my birthday, and on first glance I didn't think there was anything in there that jumped out at me and said "make me!"  So what I did was turn the book on them, and ask them to pick a dish that they would like me to make.  

This is the dish that they picked.  On closer inspection I  saw that there were vegetables in there - they of course hadn't read the ingredients - just looked at the picture!

I thought to myself - just another pasta dish.  Boring!!!  But, boy was I wrong - this dish was great - so much flavour, and it pleased everyone because it had the best of both worlds in there.  The creamy sauce, and the meat sauce!!


Pork and Pasta Bake
Adapted from Best Ever Italian Cookbook

Serves 6

1 tbs olive oil
1 onion, finely diced *
3 cloves garlic, finely chopped *
2 carrots, finely diced *
100g pancetta, chopped *
200g mushrooms, chopped *
1kg pork mince
1 cup dry white wine
400g can chopped tomatoes
2 tbs fresh sage, finely chopped
500g penne pasta
240g mozzarella cheese
8 tbs freshly grated parmesan cheese
3 cups Bechamel Sauce

Bechamel Sauce
From EDC Thermomix Cookbook

1000g milk
100g flour
100g butter
1 tsp salt
pinch freshly grated nutmeg

Preheat oven to 200 degrees.

Heat the olive oil in a large frying pan over medium high heat.  Add the onion, garlic and carrots and cook stirring occasionally for 3-5 minutes, or until the onion has softened.  Add the pancetta and cook for a 5 minutes.  Add the mushrooms, cook for 2 minutes, stirring occasionally.  Add the pork and cook, breaking up with a wooden spoon, until all the meat is browned all over.  Add the wine, tomatoes and the sage.  Bring to the boil, then reduce heat to low, and simmer for 25-30 minutes, or until the liquid has reduced by about 1/2.  Season to taste with salt and freshly ground black pepper.

* I used the Thermomix to cut up all the vegetables - simply processed the onion and garlic for 3 seconds on speed. 7.  Then did the same for the carrots, and then the mushrooms, and then the sage.  Made it all too easy!!!!


While the meat is cooking, bring a large saucepan of salted water to the boil.  Cook pasta for 8-10 minutes, or until still al dente.  Drain well.

Bechamel Sauce

TM Method:
Place all the ingredients in the TM bowl and cook for 12 minutes at 90 degrees on speed 4.

Once the sauce is cooked add the mozzarella cheese, and 4 tbs of the parmesan cheese to the sauce, season to taste with salt and freshly ground black pepper.  Mix on speed 5 for 5 seconds.


(I did not make this recipe - I used the TM version above!)
Conventional Method:
110g unsalted butter
110g (3/4) cup all purpose flour
1000ml (4 cups) milk
1 bay leaf
salt and pepper
pinch of freshly grated nutmeg

Melt the butter in a medium sized saucepan over medium - low heat.  Add the flour, and cook over low heat, stirring constantly, for 1 minute.  Remove the pan from the heat and gradually stir in the milk.  Return the pan to the heat and bring to the boil, stirring constantly, until thickened and smooth.  Add the bay leaf and let simmer gently for 2 minutes.

Remove the bay leaf and season to taste with salt, pepper and the nutmeg.


Spoon the pork mixture in a large ovenproof dish.  Add the bechamel sauce to the drained pasta.  Mix well.  Spoon the pasta and sauce mixture over the pork mixture.  Sprinkle the top of the sauce with the reserved 4 tbs of parmesan cheese.


Bake in the oven for 25-30 minutes, or until golden brown.


Serve with additional parmesan cheese on the side.

I must say this was one of the nicest pasta dishes I have had in a long time.  The flavours were great, and a big bonus for me was that there vegetables in there - and "The Darlings" had no clue!!!  Just gobbled it all down!!


This was a big winner in my books - and there was sufficient left over that I have put some in the freezer for another night for "The Darlings".  Everyone is a winner now!!!  Got to love that!!!

So Dear Readers tell me what is your favourite pasta dish?  Is it creamy, meat, seafood, vegetarian?? Do tell.


Thursday, May 26, 2011

Hoisin Pork Belly Rashers

Is there anything better on a cold winter's night than a piece of meltingly soft, sweet, juicy pork belly?  I think not!!

Last night was a cold blustery night here in Sydney - and we were in need of some serious comfort food!!

I was inspired by a recipe that I saw in Super Food Ideas - in the magazine there was a section on pork spare ribs.  Whenever I serve pork ribs of any kind in this house I know that everyone will leave the table smiling!

I used to steer away from cooking the pork belly rashers - I felt that they were just too fatty - but if you treat them lovingly and cook them well, then a lot of the fat is rendered out of them (that's what I like to tell myself anyway!!)


Hoisin Pork Belly Rashers
Adapted from a recipe in Super Food Ideas June edition

Serves 6

2kg pork belly rashers, cut into approximately 10cm long pieces
3 cloves garlic, crushed
5cm piece ginger, finely chopped
1 cup hoisin sauce
1/4 cup light soy sauce
1/4 cup Shao Xing Cooking Wine
3tbs brown sugar

2 tbs hoisin sauce, extra
1 tbs honey

Preheat oven to 160 degrees.

Combine the garlic, ginger, 1 cup hoisin sauce, light soy, cooking wine and brown sugar in a large bowl.

Add the pork belly rashers, mix well to coat the pork in the sauce.

Line a large disposable foil baking tray with baking paper.  Add the pork belly rashers to the pan.  I lined mine all so that the skin side was facing up to start off with.  Make sure there is adequate amount of the marinade on the pork, but make sure you still have some left to brush over during the cooking.


Cook in oven for 2 hours - turning every 30-45 minutes.  Brush with reserved marinade as needed.

When you get to the last 20 minutes of baking.  Combine the extra hoisin sauce and honey together.  Brush this over the pork, and bake for an additional 20 minutes to make them irresistibly sticky and sweet!!!


I am not going to tell you that these are low fat - but a lot of the fat had rendered out and was left in the baking dish (if you are smart and use disposable - you can now just throw the "washing up" out!!!).

To make yourself feel a little bit better I recommend you serve a big plate of steamed greens, that have been drizzled in ketchap manis, along with the pork.


Of course the obligatory steamed rice is needed here as well!  Am I making your mouth salivate????

Last night "The Darlings" must have been off their game a little, and we did end up with a few pieces left over - but you know what - as one of them said "This is going to make a great pizza!!!"  Into the ziploc bag they went, and they were loving tucked away in the freezer until we make pizza on sunday night!!!  Sticky Hoisin Pork Pizza!! Yum!

So Dear Readers how did you keep yourselves warm last night - was it a soup or a stew?


Tuesday, May 24, 2011

Lemon Veal Schnitzel with Chunky Chips and Garlic Aioli

A particular favourite here in this house is crumbed veal.  While it may not hit the top of the list of my favourites, the men of the house always give it the thumbs up.

I saw this in an advertising promotion for Alfa One Rice Bran Oil in the latest edition of Good Food Magazine.  I have used Rice Bran oil quite often, and must say I quite like it.  Usually I cook my oven baked chips in olive oil, but I must say these ones, cooked in the rice bran oil were quite crunchy for oven baked chips!!

Of course I utilised my old friend Thermie, to make the breadcrumb component of the dish, and also to make the aioli.  In fact using Thermie almost makes this recipe too easy, almost unworthy of blogging.  Saying that though, the flavours of the breadcrumbs and the garlic aioli I think makes it worthy!!!


Lemon Veal Schnitzels with Chunky Chips 
Adapted from Alfa One Rice Bran Oil Advertisement

Serves 4

800g sebago potatoes, peeled, cut into thick chips
Alfa One Rice Bran Oil
1 1/4 cups fresh breadcrumbs
2 tbs finely chopped chives
rind of 1 lemon
4 veal schnitzels
1/3 cup flour, seasoned with salt and pepper
1 egg, lightly beaten
2 tbs milk

Garlic Aioli
2 cloves garlic
2 eggs
1 tbs dijon mustard
salt and pepper to taste
300ml Alfa One Rice Bran Oil

Preheat oven to 200 degrees.  Toss together the potato chips and a good slurp of rice bran oil.  Place the potato on a baking tray that has been lined with baking paper, in a single layer.  Bake, turning occasionally, for 30-35 minutes, or until golden and crunchy.

To make the breadcrumbs place the bread in the TM bowl and process for 8 seconds on speed 7.  Place the bread crumbs in a large bowl.  Place the lemon rind (that has been removed using a vegetable peeler) and the chives in the TM bowl.  Process for 3 seconds on speed 7.  Add to the breadcrumbs, and mix well to combine.

Season the flour and place in a large plate.

Mix the egg and milk in another large plate.

Dip the veal into the flour mixture, then place in the egg wash.  Press the veal into the breadcrumb mixture.  Set aside until ready to cook.

To make the aioli

Place the garlic in the TM bowl and chop for 5 seconds on speed 9.  Scrape down the sides with a spatula.

Insert the butterfly.  Place the egg yolk and mustard into the TM bowl.  Mix for 1 minute on speed 4.

With the blades rotating on speed 4 (and with the MC in place) slowly drizzle the oil onto the lid.  Add the oil at a steady rate.  This should take between 4-6 minutes in total.

Once the mixture has thickened add the egg white and salt and pepper to taste.  Mix for 10 seconds on speed 4.

There you have it - one of the favourites in our house - it may not be gourmet - but it always goes down a treat!!!!

So what else did Thermie get up to this weekend?  Pea and Ham Soup.


Orange Cake, grating cheese, and then he helped my with the prep for Chicken Quesadillas!!  You see I keep my little "apprentice" quite busy!!!


Monday, May 23, 2011

Fish Curry with Cheese Naan

While I did so well last week, I seem to be behind the 8 ball in posts again.  In an effort to catch up here is the fish curry that we had on Friday night.


Fish Curry 
Adapted from Fish Food Cookbook

Serves 4

4 cardamon pods
1 tsp coriander seeds
2 tsp mustard seeds
2 tbs shredded coconut
1/4 cup oil
1 large onion, chopped
2 cloves garlic, crushed
2-3 small green chillies, deseeded and finely chopped
1 tbs fresh ginger, finely diced
1/2 tsp ground turmeric
pinch of freshly ground nutmeg
2 cloves
1 tbs tamarind concentrate
20 curry leaves
2 cinnamon sticks
800ml coconut cream (I used light)
2 tbs brown sugar
1 tbs ketchap manis
500g (with shell) green prawns, peeled and deveined
500g fish (I used salmon and firm white fish), cut into strips

Lightly crush the cardamon pods until the pods split, then remove the seeds from the pods and put in a small frying pan with the coriander seeds.  Dry-fry the seeds until fragrant and the seeds begin to jump.  Remove from the heat and tip into a mortar and pestle.  Grind the seeds to a powder.

Add the mustard seeds to the frying pan with the coconut, and toast together until the seeds begin to pop, and the coconut is light golden in colour.  Remove from the heat and set aside.

Heat the oil in a saucepan and add the onion.  Cook for 4-5 minutes, or until it starts to soften.  Add the garlic, chilli, ginger, turmeric and nutmeg and cook for a further minute.  Add the ground spices, the toasted coconut and mustard seeds, the cloves, tamarind concentrate, curry leaves, cinnamon sticks and coconut cream.  Stir well and heat to just below boiling point, then reduce the heat and simmer, uncovered for 10 minutes, or until slightly thickened.

Add the fish and prawns and poach for 5 minutes, or until the fish is opaque and the prawns are pale pink.

Season to taste with the brown sugar and ketchap manis.

Serve over steamed rice, and with cheese naan.


Cheese Naan
Adapted from  Meat on the Menu Thermomix Cookbook

1 egg
50 olive oil
200g milk
210g greek style plain yoghurt
2 tsp yeast
600g bakers flour
1/2 tsp salt
1 tsp sugar
1/2 tsp baking powder
grated tasty cheese

Place the egg, oil, milk, yoghurt and yeast into the TM bowl and mix for 5 seconds on speed 3.  Cook for 4 minutes at 50 degrees on speed 3.  Leave in TM bowl for approximately 10 minutes to activate yeast.

Add the flour, salt, sugar and baking powder into the TM bowl.  Set dial to closed lid position and knead for 3 minutes on interval speed.  Place the dough into a large oiled bowl.  Cover tightly with plastic wrap and leave in a warm place to rise for up to 2 hours.

Preheat oven to 200 degrees - or I used my electric pizza oven to cook the naan.

Turn the dough out onto a floured surface, knead by hand until the dough is smooth.  Divide the dough equally (approx 100g per portion)  between two pieces of baking paper, roll out the dough until 1/2cm thickness - add a small amount of grated cheese to the middle of the dough, turn the edges into the middle to cover the cheese, then roll out again.

Now either cook individually in a pizza oven, or place on a baking sheet that has been lined with baking paper in the hot oven for 5-8 minutes.

I have been a little remiss in the photo department - and I have no photos of the naan bread.  They were really popular though let me tell you!!!!


Saturday, May 21, 2011

Beef Brisket

I purchased a new slow cooker cookbook the other day - I know what you are thinking - another cookbook???  I just needed a little bit of inspiration for different things to put in the slow cooker.

In the beef section there were many recipes for Beef Brisket.  I googled what a brisket was, and looked at some


images and then set off to ask my local butcher.  It seems that this is not a particularly popular cut of meat here in Australia - but it is available.  He told me that he could get me one, and I planned to pick it up several days later.

Ok, so now I have the brisket in my possession - what am I going to do with it?  Which recipe will I try?

I think this is where I went a little wrong - I left it wrapped in it's brown paper bag in the fridge until I was ready to pop it into the crock pot.  Boy, was I surprised!!!  I was expecting a thicker piece of meat have a look here and tell me what you think??  Well this puppy (no, not a dog - the meat!!) was thin and long, and had huge amounts of fat on it (aaagh!!!)  I set about cutting it into three pieces that would fit into the crock pot.  I put them in, then took them out, then put them back in again - I simply could NOT cook this piece of meat with so much fat on it.  SO I took them out again. I tried to trim as much fast as was humanly possible from this cut - which was not easy given the thinness of the meat in some places.

Here is what eventuated.....


Barbecue Brisket
Inspired from a recipe in Easy Slow Cooker Cookbook

1.75kg beef brisket (trimmed of fat!!!)
1 onion, roughly chopped
1 red capsicum, roughly chopped
6 cloves garlic, cut into rough pieces
150g (approximately) Barbecue Marinade (bottled BBQ Sauce!!)


Place all the ingredients in the crock pot, stir to combine - add more sauce if needed to evenly coat the meat.  Put the lid on, and allow to cook for 7-9 hours.

The butcher told me that this particular cut of meat requires long, slow cooking in order for it to become tender!

So what does one serve with this???

I scrubbed some potatoes, cut them into wedges, tossed them in a good slurping of olive oil, and a generous shake of parmesan cheese.  The kind of parmesan cheese that you can find on the shelf - it is great for things like this.


This gave the wedges great flavour, and lots of added crispiness!!

I then wrapped some corn on the cob in foil - added a small amount of crushed garlic and a knob of butter, wrapped them up like a christmas bon bon and baked them in the oven for 15 minutes.  Cooking the corn like this produces lovely sweet juicy, buttery corn.  Too easy!!!


Add another slurp of the BBQ sauce to the meat before serving!

What was the verdict?  The meat was easy to shred - but it was still kind of stringy and chewy.  A little too chewy for my liking.  At $13.99 per kilo it was relatively inexpensive - but for my money, a pork scotch fillet at around $7.99 per kilo is a much better buy.

Personally I think this recipe would be much better using the pork.  I don't think I will bother buying a brisket again.

So Dear Readers I would love to hear from anyone that has any experience with cooking a brisket.  Did I just get a "toughy"?


Thursday, May 19, 2011

Beef with Mushroom Gravy, Garlic Mash and Brussels Sprouts

I can hear the groans out there already from Miss Piggy - Brussels Sprouts!!!  She recently made a funny comment to me about a particular something that she was asked to do, she told me she would rather eat brussels sprouts than do it!!!

The poor old brussels sprouts get a bit of a bad rap.  I think the problem being that we have all been exposed to badly cooked brussels sprouts.  I know my mum used to boil the crap out of the them - rendering them soggy and, ....well revolting.  It just so happens that overcooking them releases a substance called glucosinolate sinigrin, which produces a sulfurous smell - the main reason many of us dislike them!!!

They are actually great little veggies to add to your repertoire - having lots of healthful benefits, including having anti cancer properties.

My method of cooking is quick and flavourful.  Trust me, if you try them this way you will love them (perhaps not right away - but you will come around!!).


Beef with Mushroom Gravy
Adapted from Easy Slow Cooker Cookbook

Serves 6

1 kg chuck steak, cut into cubes
3 cloves crushed garlic
1 420g can cream of mushroom soup
1 40g pkt french onion soup mix
1tbs cornflour

Combine all the above ingredients, except the cornflour in the crockpot.  Place the lid on and cook on low for 6-8 hours.


Approximately 30 minutes before serving place the cornflour in a small bowl, ladle several spoonfuls of the gravy into the bowl with the cornflour, and mix to a thick liquid.  Add the liquid to the crock pot, and stir well to combine.  Replace the lid and put on high until serving time.

Serve with Garlic Mash and Brussels Sprouts.


Brussels Sprouts you will love!!!


500g brussels sprouts
100g pancetta, diced
1 tsp TM concentrated vegetable stock *

Place the pancetta in a large frypan over medium high heat.  Cook, stirring for 3-5 minutes, or until slightly crispy.  Add the stock concentrate, brussels sprouts and approximately 1/2 cup of water.  Cook over high heat - quickly, stirring constantly for approximately 3-5 minutes, or until the brussels sprouts are a lovely bright green.  Season with cracked black pepper.  Serve immediately.

* If you do not have access to TM vegetable stock concentrate simply use a teaspoon of chicken stock powder instead.


Trust me on this one - not smelly - lovely and crunchy, and very tasty!!!!

So tell me Dear Readers what vegetable do you have a particular aversion to?  Is it the poor brussels sprouts?  Woud you be willing to try this version?


Wednesday, May 18, 2011

Chilli Bean Soup

Now that the winter cold has set it in, it is time to become best friends with your slow cooker.

A slow cooker saves so much time - of course there are those out there that will tell you that they use too much energy - but you have to make your own peace with that one.  For me, the slow cooker is an absolute godsend!

As you know I have a child with Prader Willi Syndrome.  Coupled with his insatiable appetite he is heading full bore into puberty!!!  Any of you that have pre-pubescent boys will know that filling them up is nigh on impossible.  I decided to take the tack that I would start sending a thermos of hot soup to school with him each day - not only would it keep him busier for longer each lunch time - but I was filling him with warm heartiness.

Last week I whipped up a batch of Pasta e Fagioli in the Thermomix - and that went down a treat.  Yesterday I decided to cook a batch of soup in the slow cooker.  The beauty of cooking the soup in  the slow cooker is that you don't need to add a lot of oil to the dish - I rarely brown my meat before adding it!!


Chilli Bean Soup
Adapted from Easy Slow Cooker Recipes

Serves 6 (at least)

1kg stewing steak *
1 400g can diced tomatoes
1 onion, diced
1 30g packet taco seasoning
2 cans Mexican Chilli Beans (1 drained)
1 400g can corn kernels, drained
1 tbs TM vegetable stock concentrate **

Cut the steak into cube sized pieces (don't have to be too technical - you are hoping they will all "melt down anyway!!).

Add the onion, the tomatoes, taco seasoning, one can of drained chilli beans, and the other can with the liquid, the corn and the stock concentrate.  Mix well.  Put the lid on the slow cooker and leave for 5-7 hours on low.


* I used gravy beef.  I am not sure if this was just incredibly tough meat, or if my beloved crock pot is on it's last legs - but after 7 hours it was still not as "falling apart" as I wanted.  I just continued to cook it for a few more hours.  Next time I will use chuck steak.

** If you do not have access to TM stock concentrate use either beef stock powder or a stock cube.


I am just about to go and load up my friend for tonight's meal - Beef with Mushroom Gravy.  I will serve this with Thermomix mashed potato (we have a long night tonight - and I want some hot food that I can throw on the table easily when I finally get in!)


Tuesday, May 17, 2011

Chicken with Roasted Cherry Tomato and Basil Sauce

There are some really simple partnerships in food that just work so incredibly well.  Tomato and Basil is one of them.  Add a little cream, and some seasonings and you have a sauce that you can serve with either seafood or chicken.

This is fast, simple, and very flavoursome!  Combine it with with some simply prepared vegetables and dinner is on the table in no time!


Chicken With Roasted Cherry Tomato and Basil Sauce
Adapted From Grill by The Australian Women's Weekly

Serves 4


500g cherry tomatoes
5 cloves garlic, unpeeled
2 tbs olive oil
4 x 200g chicken breast fillets
1/2 - 1 cup shredded basil leaves (I used the Philadelphia reduced fat cooking cream cheese)
Salt and Pepper to taste

Preheat oven to 200 degrees.

Combine the tomatoes, garlic and olive oil on a baking sheet lined with foil (saves washing up!!).  Roast for approximately 20 minutes, or until the tomatoes soften.  When the garlic is cool enough to handle, peel the skin from the bulbs.


Meanwhile cook the chicken in a large frying pan that has been heated to medium high.  Cook for 5 minutes each side, or until cooked through (will depend on actual thickness of each piece).

Blend or process the garlic and half of the cherry tomatoes until smooth.  Pour into a medium saucepan.  Add the basil and the cream, cook stirring over low heat until heated through.  Season and add the remaining cherry tomatoes back into the sauce. (Note, this can be done really easily in the Thermomix - less washing up!! - Process the tomatoes and garlic on speed 7 for 3 seconds.  Add the cream and basil, cook on 90 degrees for 2 minutes. Add the reserved tomatoes, use reverse speed for 30 seconds to combine).


To serve I added "smashed potatoes" and baby carrots that I baked in foil with a little butter and brown sugar.


Boil the potatoes until tender.  Place on a baking sheet and gently smash.  Spray with olive oil spray and bake in the oven along with the tomatoes and garlic (they will take around 25 minutes to become golden - so add 5 minutes before the tomatoes!!)  The carrots will only take around 5 minutes to cook.

Simplicity at it's best!!!


Reuben Sandwiches

A reader commented to me recently and I quote .....

"Miss CCC, you are amazing.  Thanks to you I have learned to feed my family food they love.....I can go to your blog, plan for the next week and do my shop.  It's changing my life, making me more organised, and they actually like my cooking - unheard of."

To me this is like music to my ears!  The reason I bring this quote to your attention is not to gloat - but it does make me question my reasoning behind why I don't post all of the dishes that I make?  Why do I feel compelled to only blog about meals that I tend to think of as "recipe book food" and not the humble stuff that is more often than not, what we eat?  Why do I think that the food that I have to whip up on a busy sport night is not what would actually benefit all those other busy mums out there?

I am going to take a bit of a rethink here and actually let you know about a lot more of the meals that we consume here on a regular basis.  I put my hand up and admit that sometimes I take the easy way out.  Some nights we are running around for many hours before we finally all get home.

So let me give you a real glimpse into our lives.....

Friday night we had rugby until around 7:30.  When we arrived home it was cold and dark - and they were all hungry.  I had asked before we left what we should do about dinner - had several contingencies in mind - but I was told "don't worry about food...you are always thinking about food!!"  Now, though reality had hit the fan and I was faced with - we want pizza for dinner!!!  I had to turn around and make pizza dough - thank god for the thermomix - making pizza dough is really only about 2 minutes of kneading - the rest proving.  I have a tendancy to keep all those little tidbits of leftover meals in ziploc bags in the freezer - you know that last couple of meatballs - the last couple of sausages..... so I thankfully I was able to rustle up a "meatlovers" pizza in no time at all.  A little foresight meant that I had also picked up some lovely prawns at the fish market - and a prawn, basil and tomato pizza was also on the menu.

Saturday we had the Blue Eye Cod with Kaffir Lime and Chilli Pilaf.  "The Darlings" of course did not have this (they had actually filled themselves up after rugby - yes, another game!!) - but for them I prepared Teriyaki Basa and plain boiled rice.

Sunday - I had that in the bag! I wanted to Make Reuben Sandwiches.  Have you ever had a Reuben???  A good Reuben is a glorious thing.  Now while I do not profess to have made the perfect sandwich - it certainly filled their bellies!

So what does a Rueben involve?  Well there are a couple of schools of thinking here - you can make it with Pastrami - or you can use corned beef.  I chose the latter - and simmered a piece of corned beef in the crock pot all day.  As for the other elements...... there are those that say a "thousand island dressing" is the condiment of choice - while others say that a "Russian Dressing" - with horseradish is the way to go.  I had been perusing Pam's menu the other day and decided to make thousand island type spread she prepared.


Reuben Sandwich

Rye Bread
Corned Beef
Sauerkraut
Swiss Cheese
1 tbs mayonnaise
2 tsp pickle relish
2 tbs tomato sauce (ketchup)

Combine mayonnaise, tomato sauce and pickle relish in a small bowl.

Spread the rye bread with the "dressing"  add slices of corned beef, swiss cheese, and sauerkraut.  Season with salt and pepper.  Either pan fry in a dry frypan, or in a sandwich toaster until bread is toasted.

Serve with fries.

There you have it Dear Readers - not everything that we eat here ends up on the blog.  This was a  simple, tasty meal - that really anyone can produce.

What do I look for each week when I start to plan my menus?  I look for inspiration!  I think I will now try to share with you the plain, simple (and more often than not un-photogenic) meals that we actually eat.  If they can help inspire, or make life easier for someone, then this blog has been successful.

Dear Readers please share with me your thoughts and ideas of ways that I can help you too.


Sunday, May 15, 2011

Kaffir Lime and Chilli Pilaf with Blue Eye Cod


The theme for this fortnight's Cookbook Challenge is blue!  I have thought long and hard about what I could cook that was blue.  I googled "blue recipes" - didn't have huge success there - lots of recipes for blueberry this and blueberry that - so I figured that would be what most people offered, but not me.  I could go the route of making a cake that was blue - but I didn't really fancy that idea too much.

So what did I do?  I decided to think outside the box.

Growing up in the 60's and 70's there wasn't the huge array of fish available at fish shops that there is today.  My dad was a salesman and used to travel and dine out a bit.  Whenever he went to a "fancy" restaurant (remember this is the 60's and 70's) he would more often than not order "blue eye", and then come home and tell us how good it was.  During these times it was probably one of the few fish that was served thick - like a steak!  Once blue eye became more popular we would often have it at home.  Somehow, over the years I have neglected buying this fish - I always tend to steer towards salmon or ocean trout.  But.... for this challenge I am revisiting Blue Eye - it may not be actually blue - but it does have blue in it's name!!!


Kaffir Lime and Chilli Pilaf with Blue Eye Cod
Adapted From Taste.com.au - Recipe by Emma Braz

Serves 6

60ml canola oil
1 brown onion, halved, thinly sliced
2 cloves garlic, crushed
1 tbs finely chopped ginger
1 stalk lemon grass (white part only), finely chopped
1 red chilli, seeds removed, finely chopped
2 tsp ground coriander
5 kaffir lime leaves (2 leaves joined = 1), centre vein removed, thinly cut (use scissors)
2 cups (400g) brown rice, rinsed drained
4 cups (1800g) water
60ml (1/4 cup) soy sauce
100g toasted slivered almonds
1/4 cup continental parsley, coarsely chopped
2 tbs red curry paste
6 blue eye cod fillets
lime wedges to serve

I am going to make this using the thermomix - so I will give two methods.  I am also going to halve the recipe.  So the Thermomix version reflects the changes in amounts.

Conventional:
Heat 1 tbs of the oil in a large heavy based saucepan over medium heat.  Add the onion, garlic, ginger, lemon grass, chilli, coriander and lime leaves, and cook, stirring for 3 minutes, or until onion softens.  Add the rice and stir to combine.

Stir in the water and soy sauce, and bring to the boil.  Reduce heat to low and simmer, covered for 50 minutes, or until the rice is tender and the liquid is absorbed.  Remove from heat.  Stir in the almonds and parsley.


Thermomix:
Add the onion, garlic, ginger, lemon grass and chilli to the TM bowl, chop for 3 seconds on speed 7, or until chopped to desired consistency.  Add 1 tbs of oil to the TM bowl and saute for 2 minutes at 100 degrees on speed 1.  Add the rice (200g) and stir using reverse, speed 1 for 30 seconds.

Add 900g water and the soy sauce (1 tbs).  Cook for 50 minutes at varoma temperature on speed 4, or until the rice is tender and the liquid is absorbed.  Make sure the MC is not in place, cover hole with a piece of paper towel.

Add the almonds and parsley and mix using reverse, speed 1 for 30 seconds.


To cook the fish:
Meanwhile preheat a large frypan on high heat.  Combine the remaining oil and curry paste in a bowl.  Brush both sides of the fish with the curry mixture.


Cook the fish for 2 minutes each side, or until just cooked.

Spoon pilaf on serving plates, and top with the fish.  Garnish with lime wedges.


So there you have my contribution to the Blue Theme.  A little bit tricky???  Does it qualify??  You tell me.


Saturday, May 14, 2011

Chunky Beef Chilli

A good Chilli is a glorious thing!!!  There are 100's of recipes out there for Chilli - some made with mince, some made with chunks of beef - some slow cooked, some fast cooked.  Some (lord forbid) even made with other kinds of meat - such as chicken.  It all really boils down to personal preference.

There are different ways you can eat your Chilli as well - in a bowl garnished with toppings of your choice, or rolled up in a tortilla with cheese, like a burrito!  As I said, it all boils down to personal preference.

This week I decided to make a fast cooked chilli with chunks of steak in it.

I am sure I am cutting of my nose to spite my face here - but this recipe for Chilli is made using the Thermomix.  That is not to say that you can't "adapt" the recipe and cook it on the stovetop.

As a side note, I cannot tell you how much I love the Thermomix at the moment.  It truly is a time saver - it either cooks the meal totally for you - or allows you to multi task and do other things while it makes a component of the meal for you.  Last night I made two dishes - a soup for lunch today and the Chilli.  The night before I made mashed potato and then a gravy in it (let me tell you making gravy in the TM is sooo easy!!!).

Anyway back to the chilli.....


Chunky Beef Chilli
Adapted from Meat on the Menu - Thermomix Cookbook

Serves 4

5 cloves garlic
20g olive oil (approx 1 tbs)
1 tsp ground cumin
1 tbs sweet paprika
2 tbs ground turmeric
1/2 tsp cinnamon
1 tsp ground coriander
1/2 tsp chilli flakes (or to taste)
1 tbs concentrated vegetable stock
sea salt to taste
50g tomato paste (approx 1 1/2 tbs)
400g can chopped tomatoes
1 tbs brown sugar
600-750g rump steak cut into cubes *
400g kidney beans, drained and rinsed
1 1/2 tbs BBQ sauce **

Place the garlic and onions into the TM bowl and chop for 5 seconds on speed 6.

Add oil and dry spices, and saute for 3 minutes at 100 degrees on speed 1.

Add salt, tomato paste, tomatoes, sugar, stock and beef.  Cook for 15 - 20 minutes at 100 degrees on reverse and speed 1.

Add the kidney beans and heat through for 2 minutes at 100 degrees on reverse and speed 1.

* Do not substitute a cheaper cut - you want a tender cut of meat, as you are cooking for a short time)

** I added the BBQ sauce to sweeten the chilli as I was serving children.  Add either more chilli flakes, or add some cayenne pepper if you like a more spicy chilli.


I like to eat my chilli in a bowl topped with grated cheese, sour cream and extra hot chilli sauce.  I then use a rolled up tortilla as a scoop/spoon!!!

I must say I was very impressed with this chilli - not only was it easy to make, but it was very tasty.  "The Darlings" gobbled it all up too - so it must have been good.

I must apologise for the lighting in the photos - Mr. CCC has decided to change over all our lightbulbs to more energy efficient bulbs - and they just don't give out the same amount of light as those other energy devouring ones did.  He did add some LED lights under my counter -so that is what gives some of the photos that "disco" look!!!.

Next week - Chilli cooked in the slow cooker.

So tell me Dear Reader how do you like to eat your Chilli?  In a bowl or rolled up in a Burrito??  Do you have a favourite recipe you would like to share??


Tuesday, May 10, 2011

Prawn Bisque with Spaghetti and Roasted Garlic Tomatoes


Mother's Day has been and gone. I am a happy girl - I got my cookbooks - but really haven't had too much time to devour them completely yet - I have had a quick flick through, and there are some lovely recipes that I want to make. The Macaron book certainly has me interested, and after a quick trip to Manly yesterday I am more than anxious to try my hand at macarons again.

I decided to take my mum on a "Post Mother's Day" treat down to Adriano Zumbo's Patissier - she lives about an hour and a half away and this would be a bit of an adventure for her.

I will let you in on a little bit of a secret - don't go after Mother's Day!!! We walked into the store and were greeted by empty cabinets!!! I said - oh, hasn't the truck arrived yet? (remember last time??) - and they replied - we totally sold out of all the cakes yesterday (Mother's Day!!) 

Imagine BIG sad faces now!!!


What???? This can't be!!! They did however have some macarons. We were going to have lunch, then come back and get some macarons - but we were quietly told - no, this is all they had!! Better buy up quick - here is the selection they had yesterday


Left to right Satay, Vanilla, Caramelised Palm Sugar, Strawberries and Cream, Ginger and Kaffir Lime, Mint and Chestnut, Honeycomb and Gingerbread, and Pandan!

Clutching our macarons we headed out to find some lunch - we had intended to have a pie and eat it in the sun on the pier - but unfortunately yesterday, Manly was hit with gale force icy cold winds - this was not going to be an option today!

As we headed back to the car after lunch, we decided to take one last look into Zumbo land - and luckily we did - as joy of joys, somehow, from somewhere, they had procured a few cakes!!! Unfortunately I did not get to take any photos - but I did take a photo of the one cake I bought - can't remember it's name - but think it was Cocoa Bombe - we have not cut into it yet - but I will let you know when we do!!  There are certainly some eclectic choices in the collection at the moment!  There was one called Enter the Dragon - but I thought that was a little too out there for my lot!!!


So back to the real topic of the post. In the latest edition of MasterChef there is a section called MasterClass - this edition's is about European Classics. One of the dishes that caught my eye was Lobster Bisque. I certainly couldn't afford Lobster - but in the tip section it said for a more economical version to make it with green prawns. I set out to get the ingredients - but somewhere along the way I missed a couple - so this is what eventuated - and I must say it was pretty good!!


Prawn Bisque with Spaghetti and Roasted Garlic Tomatoes
Adapted from MasterChef Magazine - May edition

Serves 4

1 kg green prawns, shelled, reserve shells
3 french eschalots, roughly chopped
5 cloves garlic, chopped
1 large carrot, roughly chopped
1 small bulb fennel, roughly chopped, fronds reserved
1 tsp peppercorns
3 bay leaves
5 sprigs lemon thyme
1/3 cup brandy
3 cups chicken stock
3 vine ripened tomatoes, roughly chopped
250 ml cooking cream
small bunch of parsley
I simply blitzed all the vegetables, individually, in the thermomix on Turbo twice - to chop them up.

Heat a large saucepan over medium high heat. Add 2 tbs oil to the pan. Add the prawn shells and heads, and cook stirring for 5 minutes. Add the eschalots, garlic, carrot and fennel and cook stirring for 5 minutes or until the vegetables are softened. Add the peppercorns, bay leaves, and thyme and cook stirring for an additional 2 minutes. Add the brandy, and cook for 2-3 minutes or until almost all evaporated. Add the reserved fennel fronds, stock, and tomatoes. Bring to the boil, then reduce the heat to medium and simmer for 35 minutes, or until the liquid is reduced by 1/3.


Add the cream and the parsley, bring to a simmer and cook for 10 minutes to infuse the flavours into the cream.

Strain the bisque through a fine sieve into a clean bowl, by pressing down on the solids. Discard the solids. Bring the bisque to a simmer over medium heat and cook for 10 minutes or until reduced by 1/3. Season with salt.

During the time that the bisque is reducing, make the roasted garlic tomatoes.


Roasted Garlic Tomatoes

1 punnet (400g) tomato medley
4 cloves crushed garlic
olive oil


Preheat oven to 180 degrees.

Line a baking tray with foil. Cut the tomatoes into into halves or quarters (depending on size) sprinkle with the garlic and olive oil. Roast in oven for 20-25 minutes, or until lovely and golden.

While the tomatoes are roasting and the bisque is reducing put your pasta on to cook.  Cook according to directions on packet.


As all the components come to their final stages - it is time to cook the prawns - simply heat a large frypan over medium high heat.  Add a splash or olive oil, 2-3 cloves crushed gar;lic and quickly pan fry the prawns until they change colour and are cooked through.

To plate up place some pasta in the bottom of a serving bowl, top with the prawns, then ladle over some bisque.  Top the whole lot with a little of the roasted tomatoes!


What a wonderful "posh" dish.  May not be exactly as printed in MasterChef Magazine - but we enjoyed it never the less!!!

Dear Readers as a post script - I have had so many problems entering this post - so I apologise if there are any errors that I have missed - I have had enough of this post!!!! - Let's publish and be done!!


Monday, May 9, 2011

Corned Beef with mash and mustard sauce

Now that the weather is cooling down, and the days seem so much shorter, making your meal in the slow cooker is a great option.  Simply place it all in the crock pot - turn it on and forget about it until dinner time.

One of our all time favourites is corned beef.  Most times (unfortunately) there are never any leftovers - such the favourite it is.

It's a cold day here today - and this is the perfect warm you up meal for those cold winter nights!


Corned Beef
Cooked the way my Mum does it - well kind of - she doesn't use the crock pot - she cooks it on the stove

1 piece of corned beef
1 carrot, cut into large chunks
1 onion, quartered
1 tbs brown sugar
2 tbs white vinegar
2 whole cloves

Place the carrot, onion, brown sugar, cloves and white vinegar in the crock pot bowl.


Wash your piece of corned beef well, under running water.  I also like to remove as much of the fat as I can. Place on top of the vegies.  Cover with water.  Put the lid on the crock pot and allow to cook on low for 8-10 hours.


Serve with mashed potato, vegies of choice, and we like to top it with a mustard sauce.

I know I blab on and on about the thermomix, but one of the great things it does is make mashed potato.  It is so smooth and creamy.

Mashed Potato
Thermomix EDC Cookbook


1kg potatoes, peeled and chopped into 2cm cubes
250g milk
salt to taste
30g butter

Place the milk, salt and potatoes into the TM bowl.

Cook for 20 minutes at 100 degrees on speed 1.

Insert the butterfly.  Add the butter and mash for 20 seconds on speed 3.

Place in the Thermoserve (that has been preheated with boiling water while you are cooking the potatoes) to keep warm while you prepare the sauce.

One of the other great things the Thermomix does, I have now learn,t is making bechamel sauce - wow - no standing and stirring to avoid lumps - simply bung it all in the TM bowl and turn it on!!!

Mustard Sauce
Adapted from Thermomix EDC cookbook

500g milk
50g flour
50g butter
1 tbs american mustard
salt and pepper to taste

Place the milk, flour, and butter into the TM bowl.  Cook for 7 minutes at 90 degrees on speed 4.  Add the mustard.  Mix for 3 seconds on speed 4.  Season to taste - you may like to add a little sugar to sweeten if you like - depends on personal taste.  If you are not serving children you may also choose to make the mustard sauce using powdered mustard, if I do it this way I add a little stock concentrate to flavour up the sauce.

There you have a wonderful winter warmer the whole family will love.  The kids love it because the meat is so soft - the adults love it because it is pure comfort food at it's best.

What is your ultimate comfort food Dear Reader - please share!