WELCOME TO MY KITCHEN


WELCOME TO MY KITCHEN!!
I hope you enjoy the food!!!

Sunday, June 26, 2011

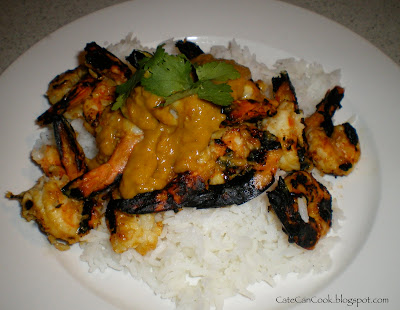
Satay Prawns on the BBQ

When I asked Mr. CCC what he wanted for dinner, bearing in mind that I had brought prawns, he told me he wanted prawns, on skewers, on the BBQ.  Who am I to argue with that - it makes an incredibly easy meal from my standpoint.  Make the marinade, thread the skewers and cook the rice - he can do the rest (outside in the freezing cold!!!)

I have had a bit of a disjointed couple of days - I didn't really plan my grocery shop too well, and just sort of bought a bunch of "stuff" hoping in the end it would all work out.  We were one down for all weekend, so it kind of meant I could take it sort of easy anyway.  "The Darlings" had requested tacos for dinner - so I set all the ingredients out and let them cook the taco meat themselves.  Of course having Thermie there to help makes it oh so easy - child's play actually!!!  In fact that is one of the great things about the Thermomix - it is really good for the kids to start getting them more involved with the cooking.

I had just received my delivery of Thermomix Cookbooks in the last couple of days, so on the way to rugby I leafed through the one entitled "A Seafood Bounty" looking for some ideas for the prawns - what should I find - but a photo of Spicy Satay Prawns on Skewers!!! Perfect - had all the ingredients - there's our dinner!!


Spicy Satay Marinade for Prawns
Adapted From A Seafood Bounty - Thermomix Cookbook

1 kg green prawns, peeled, tails still on
1 large piece fresh ginger, peeled
1 clove garlic
2 MC of crunchy peanut butter (approx 4 tbs)
300g water
2 tbs chinese cooking wine
1 tbs light soy sauce
2 tbs lemon juice
2 tbs honey
2 tbs curry powder
1 tsp cumin

Place the ginger and garlic into the TM bowl and chop for 6 seconds on speed 7.  Place all the remaining ingredients in the TM bowl and mix for 3-6 seconds on speed 6.

Pour the marinade over the prawns and allow to marinade for 1-4 hours.

Thread onto skewers.


Place the marinade that is left over into a small saucepan.  Bring to the boil over medium heat.  Simmer while the prawns are cooking.

Cook on the BBQ for 2-3 minutes each side, or until cooked through.


Serve the skewers with steamed jasmine rice and satay sauce on the side.


This was really far too easy a meal to even warrant this blog - but boy was it good!!!  Perhaps because there was so little work involved!!

The flavours were great - the only thing I might do differently next time is use coconut milk instead of the water - but really it worked pretty well as it was!!!  If you don't have a Thermomix - simply blend in a food processor.

So last night - the marinade was made in Thermie, "The Darlings" Taco meat was made in Thermie, and the rice was steamed in Thermie - so there was hardly any washing up last night!!! Got to love that!!!

So Dear Readers what is your idea of a really easy dinner?  Is it something you can throw on the BBQ?  Or do you have someone that will cook for you to give you a break?

Hope you have all had a nice weekend - I know we have had a nice quiet one!!!!
Saturday, June 25, 2011

Spiced Lamb Free Form Pie with Dukkah and Yoghurt

Last night was a bit of a rush - I came in late, and a million things hit me head on that needed to be done - not the least of them was get a meal on the table to feed the starving "Darlings".

I did procrastinate a little on getting this started, but once I did it all came together quite quickly with the help of my kitchen helper "Thermie".

The recipe is my take on a recipe that I saw in the latest edition of Super Food Ideas - I of course added more meat, and kind of made it my way.....


Spiced Lamb Free Form Pie
Adapted from Super Food Ideas Magazine July Edition

Serves 6

1 1/2 cups plain flour
125 butter, chilled, cut into cubes
1/2 cup approx chilled water
1 zucchini, cut into cubes
150g sweet potato, cut into cubes
1 small bunch coriander
1 brown onion
2 cloves garlic
1 tsp paprika
1 tsp allspice
1kg lamb mince


Place the flour in the TM bowl.  Put on closed lid position and press Turbo once to "sift" the flour.  Add the butter and process on speed 4-5 until the ingredients look like breadcrumbs.  With the motor running, gradually add the water until the mixture comes together.

Knead on Interval setting for 1-2 minutes, or until the mixture is smooth.

Roll the pastry out between two sheets of baking paper until it is forms a rectangle approximately 30cm x 40cm.  Place on a baking sheet, and refrigerate for 30 minutes.

Place the zucchini in the TM bowl and process for 3 seconds on speed 7.  Place the zucchini in a strainer over the bowl, pushing out as much liquid as possible.

Place the sweet potato in the TM bowl, process for 3 seconds on speed 7.  Remove from bowl and set aside.

Place the onion, garlic and coriander in the TM bowl, process for 3 seconds on speed 7.  Scrape down sides of bowl and repeat if necessary.

Add the mince, the zucchini, sweet potato, allspice paprika and salt and pepper to taste to the onion mix in the TM bowl.

Mix the onion mixture with the spatula just enough to get a little of the meat mixture down the bottom of the bowl.

Set dial to closed lid position and and knead on interval setting for 2-3 minutes, or until all the ingredients are well combined.

Place the meat mixture in the middle of the pastry, and fold up the edges to make a rough free form pie shape.

Sprinkle the top of the pie with a small amount of dukkah.


Spray the pastry with olive oil spray.


Bake in an oven that has been preheat to 200 degrees C for approximately 1 hour, on until when a sharp knife inserted in the centre come out clean (ie no red juices flow out).

Dukkah
From EDC Thermomix Cookbook *

150gsesame seeds
100g hazelnuts & almonds (mixture)
25g cumin seeds
30g coriander seeds
1 tsp sea salt
1/2 tsp black peppercorns
1 tsp dried mint

Place the sesame seeds, hazelnuts, almonds, cumin and coriander seeds into the TM bowl and dry roast for 8 minutes at 100 degrees on speed 1.


Remove the lid and the bowl from the housing and allow to cool.

When all the ingredients are cool, add the salt and peppercorns and the mint.  Set dial to closed lid position and pulse 1-2 times on Turbo to form a coarse powder.

* I altered the amounts shown in the cookbook as I did have the full amounts in the cupboard.  This still made a lot of dukkah!!!

Yoghurt

200g greek style plain yoghurt
1/2 cup loosely packed mint leaves
1 tbs sweet chilli sauce
salt and pepper

Place the mint in the TM bowl, process for 3 seconds on speed 7.  Scrape down the side of the bowl.  Add the yoghurt, sweet chilli sauce and salt and pepper.  Mix on speed 3 for 3 seconds or until combined.

Serve the pie topped with additional dukkah and a dollop of yoghurt, and extra sweet chilli sauce to taste.


I know the photos are not that appealing - but they were ready to eat their arms off if I didn't get a meal to them - so it was plate and eat (or else!!!)

We all thought this meal was really good - and "The Darlings" even ate it all without complaining!!!  One of the them told me he knew there were vegetables in there - but it was OK because they were chopped up very small!!!

So all were happy - dinner was a little late getting to the table - but at least they all ate it!!!!

Friday, June 24, 2011

BLT Burgers with Homemade Brioche Rolls

It seems to be the trend these days that burgers come on a lightly toasted brioche bun.

Not to be outdone by the likes of Charlie and Co. I decided that I too would attempt to make my own brioche buns - it was a cold day outsides - what else is a girl to do??

Home made Brioche Buns
From EDC - Thermomix cookbook

Makes 8 buns

30g sugar
330g warm milk
15g  yeast
1 tsp salt
80g butter
650g bakers flour
1 egg

1 egg yolk extra
sesame seeds

Place the sugar in the TM bowl and pulverise for 3 seconds on speed 9.

Place the warm milk, yeast, butter, flour and egg in the TM bowl. Mix to combine for 10 seconds on speed 7.

Set the dial to closed lid position.  Knead for 3 minutes on Interval speed.

Remove the dough,  Place in a large lightly oiled bowl.  Cover with cling wrap that has been lightly oiled, and place in a warm place for for 30-60 minutes.

Knock down the dough and shape into 8 rolls.  Place the rolls on a baking sheet that has a small amount of polenta sprinkled over it.


Allow the buns to rest in a warm place for up to 30 minutes.

Preheat oven to 200 degrees.

Lightly beat the egg yolk.  Brush the egg yolk over the buns.  Sprinkle with sesame seeds.

Bake in preheated oven for 15-20 minutres, or until cooked through and golden.


Now for the all important patty.....

BLT Burgers
Adapted from MasterChef Magazine May edition

Makes 8 patties

1 onion, finely chopped
2 cloves garlic, crushed
1/4 cup parmesan cheese, grated
2tbs dijon mustard
2 tbs wholegrain mustard (I used honey wholegrain mustard)
2 tbs garlic aioli (or whole egg mayo)
4 tbs BBQ sauce
1 egg lightly beaten
1/2 cup dried breadcrumbs
1kg pork and veal mince

To serve:
8 slices bacon
lettuce
tomato


Combine all the ingredients in a large bowl (or if you have a TM do it in there - I use the knead function for 3 minutes - making sure that all the ingredients are incorporating by moving with the spatula half way through)

Divide the mixture into eight equal portions  Place on a tray and chill for at least 15 minutes to firm.

Cook the burgers in a lightly oiled frypan (or on the BBQ if desired) for 3 minutes each side, or until cooked to your liking.

Cover and keep warm.

Cook the bacon until cooked to your liking.

Lightly toast the brioche buns.  Place a small amount of extra garlic aioli on each bun.  Top with a patty, bacon, lettuce and tomato and your condiments of choice!


Yummm a burger worthy of any restaurant!!!!  Was it worth the effort making the buns??? Absolutely!!!


Thursday, June 23, 2011

Malaysian Chicken Curry with home made Naan Bread

Do you ever see a photo of a dish and know that you just have to make it?  I do it all the time.

I saw the photo for this dish in the MasterChef magazine several months ago.  It looked so good, I just knew I had to make it.  I even went out and bought all the ingredients, but just never seemed to get around to making it.  Anyway I was revisiting the magazine and ran across the picture again. That was it, I just had to make it now!  The trouble was after going to all the effort of making the dish I was really let down by the flavours.

I think if I ever made it again I would do it all a little differently.  It needed a little more flavour - perhaps a little more chilli, and I really think the curry leaves need not only to be a garnish, but cooked within the dish as well.


Malaysian Chicken Curry
From MasterChef Magazine April edition

Serves 4

2tbs vegetable oil
20 curry leaves *
1/2 tsp chilli flakes, or more to taste
1 cinnamon quill
1 onion, halved, thinly sliced
2 cloves garlic, crushed
185g jar Malaysian Curry Paste **
800 - 1kg chicken thigh fillets, trimmed and cut into cubes
2tbs coconut milk ***
2 large desiree potatoes, quartered lengthwise
1 tsp sugar
50g unsalted peanuts, roughly chopped
coriander sprigs, hard boiled eggs and steam rice to serve

Heat oil in a deep frying pano voer medium high heat.  Add curry leaves and chilli flakes, and fry for 1 minute or until curry leaves are crisp.  Remove and drain on a paper towel.

Add the cinnamon, onion and garlic to the pan and cook, stirring frequently, for 5 minutes, or until the onion is soft.  Add the curry paste and stir for 2 minutes or until fragrant.  Add the chicken and cook for 3 minutes until well coated.  Add 1/2 cup water, coconut milk, potatoes and sugar.  Season with salt and stir to combine.

Bring to the boil, then cover and simmer over low-medium heat for 25 minutes or until the potatoes are tender and the chicken is cooked.

Divide the curry among bowls and scatter with the curry leaves, peanuts and coriander sprigs.  Serve with quartered hard boiled eggs.


* I think you need to double the amount - fry off half and put the other half in the curry while cooking
** I used Ayam brand
*** I omitted the water and added more coconut milk - around 200ml

Homemade Naan Bread

FromMeat on the Menu Thermomix Cookbook

1 egg
50 olive oil
200g milk
210g greek style plain yoghurt
2 tsp yeast
600g bakers flour
1/2 tsp salt
1 tsp sugar
1/2 tsp baking powder

Place the egg, oil, milk, yoghurt and yeast into the TM bowl and mix for 5 seconds on speed 3.  Cook for 4 minutes at 50 degrees on speed 3.  Leave in TM bowl for approximately 10 minutes to activate yeast.

Add the flour, salt, sugar and baking powder into the TM bowl.  Set dial to closed lid position and knead for 3 minutes on interval speed.  Place the dough into a large oiled bowl.  Cover tightly with plastic wrap and leave in a warm place to rise for up to 2 hours.

Preheat oven to at least 200 degrees C.

Turn the dough onto a floured surface and knead by hand until smooth.  Divide the dough equally. Roll out to 1/2cm thickness.  Stretch by hand into a pear shape.  Place onto a baking sheet that has been lined with baking paper.  Bake in the hot oven for around 5-8 minutes, or until golden. You do not need to turn them over.


 Serve with curry....


Has anyone else made this curry - I would be interested to hear your thoughts on it.  I just think it lacked a little something - I was so disappointed after all that anticipation.

It does look nice though!!!!

Wednesday, June 22, 2011

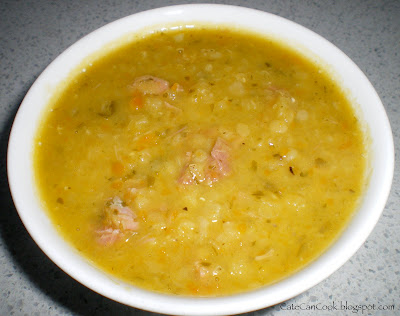
Ham and Red Lentil Soup

In my never ending quest to keep "The Child Who Cannot be Filled" happy, I'm onto my I don't know how many it is pots of soup this winter???!!!  He seems to love it, and I must say it is pretty good for him - the only real hassle for me is getting up each morning and warming up the thermos and the soup for him.

The other big challenge of course is coming up with a new soup each week - especially ones that are not creamy, or if they are, making modifications to them.

I just love pea and ham soup, I have already made a batch of that so far in this quest, but this recipe took my eye.  It is Ham and Red Lentil Soup.  Using the red lentils as opposed to the peas makes it lower in GI - which is always a good thing. So this soup is great for those people out there that have diabetes, or are following a low GI diet.  Following a diet that is rich in foods with a low GI means that you will achieve a better blood sugar level control.  Foods that have a high GI rating give the blood sugar a rising spike in levels - rising quickly and then dropping just as quickly, leaving you craving more food.  The key to controlling food cravings lies in trying to eat foods that are lower in GI.


Ham and Red Lentil Soup
From Super Food Ideas Magazine - July issue

Serves 4

1 tbs olive oil
1 medium brown onion, finely chopped
2 medium carrots, peeled, chopped
3 celery stalks, finely chopped (use leaves too)
2 cloves garlic, crushed
2 litres chicken stock (salt reduced)
100g piece of leg ham *
1 cup red lentils
chopped flat leaf parsley to garnish

Heat oil in a large saucepan over medium heat.  Add the onion, carrots, celery and garlic.  Cook, stirring for 5 minutes or until the onion has softened.

Increase the heat to high.  Add the stock.  Bring to the boil.  Reduce the heat to medium.  Add the ham and lentils.  Simmer for 20 - 30 minutes, or until the lentils are tender.

Remove the ham from the pan and shred the meat using two forks.  Return the ham to the saucepan.

Season to taste with salt and freshly ground black pepper.

Served garnished with chopped parsley.

* check out your local deli or deli counter in the supermarket.  More often than not you can buy large chunks of off cuts of ham (and usually very cheaply).  These chunks are great for using on pizzas, in risottos and even in soups!!!

I did make the soup in the Thermomix - just chopped up all the vegetables and then proceeded to cook for 25 minutes at varoma temperature, speed 1.  There was a little too much liquid - so I had to remove the MC and place the basket over the hole to avoid the eruptions!!!!


Another lovely winter warmer!!  This soup was great - it still had all the lovely flavours of pea and ham soup - but it just wasn't as thick and stodgy as some pea and ham soups can be!!!

The boy was happy - so I was too!!

Tuesday, June 21, 2011

The Salt Book

Imagine my surprise the other day when I opened up my mailbox and found a beautiful book!!!  What's more, this book had recipes!!!  Oh glorious days!!

The lovely people at Arbon Publishing had sent me a copy of their new book called The Salt Book your guide to salting wisely and well, with recipes.  


Salt....it is one of those things that you just don't tend to think too much about do you?

It is a much maligned compound.  On the one hand we have the health experts telling us we need to cut down the amount of salt we consume from our diets, and on the other had we have chefs telling us to season our food with salt.  The book makes recommendations on ways to eliminate unwanted salt from our diet, and how to add the flavourful salts that our body needs, and wants, in order for food to be palatable.

Salt is an ingredient that can be found in any kitchen, anywhere in the world.  But are we using it correctly?  Did you know that what is commonly called table salt, should never be used at the table?  It should only be used in the salting of cooking water, or in baking.  It is a highly refined salt, created by a mechanical process, and has a strong sharp taste.  What we should be using at our tables is sea salt, or lake salt, or some of the other more exotic salts that available.


The book advocates that we throw out our old salt shakers
 and replace them with small containers that enable us to add the salt to our meals by using our fingers.  

Have you ever noticed how chefs salt the food when they are cooking?  They add it pinch by pinch, using their fingers.  The book says we should get to know our salt, and be familiar with it. Taste, it, touch it, feel it.  Become familiar with the various types of salt that are available, and what their particular uses are.  We should learn to layer the salt, by adding small increments at a time, and tasting after each addition. This way we can avoid over salting our food.

I for one, was particularly salt ignorant before reading this book.  In my kitchen I had pink lake salt, and sea salt for finishing and serving, and table salt for cooking - but was completely unaware of all the other types of salt that are available such as:

Fleur de Sel - this salt is found predominantly along the Atlantic coast in France.  It is prized by chefs for it's high quality - it is light and flaky with a slightly pure mineral taste.

Grey salt or Sel Gris is another French salt which as it's name suggests is slightly grey in colour, sometimes with a purplish tinge.  

Red, Black and Blue Salt - The Red coming from the volcanic clay which is high in iron oxide found on the Hawaiian island of Kauai.  Blue Salt is harvested in Iran and is a natural rock salt that is also very mineral rich.  The Black salt (also known as kala namak)  is an unrefined volcanic table salt with a strong sulphuric flavour and is mined in Central India (it is not actually black as the name suggests - and is actually light pink in colour)  It is rich in minerals and is used to flavour vegetable and fruit dishes.

Another salt I was unfamiliar with was the Himalayan Salt Block.  Did you know that this salt block can be chilled to freezing point, or heated to up to 230 degrees C, making it a useful tool for serving hot or cold foods?

After reading so much interesting information about salt I was keen to head into the recipe section.  There are some wonderful recipes in this book that just make you want to start cooking right away.

There are recipes for making Spiced and Herbed Salts, Combination Salts and Exotic Salts (such as Vanilla Salt and Porcini Salt).  It takes you through the processes of Soffrito and Mirepoix, brining and stocks, preserving and curing.

There are several recipes for cooking seafood with salt, such as baking in a layer of salt, or cooking surrounded by rock salt (this is one I will be trying very soon!!)

There are sauces and gravies, and then on to the all important sweet dishes.  Here you will find chocolate mousse, salted caramels, truffles and macarons to name but a few dishes.

There are so many recipes that I cannot simply list them all.  I will however, be attempting to recreate some of these recipes in the weeks to come.

This is truly a lovely companion book to have alongside all your other cookbooks in the kitchen.  It is not only a handy reference book, but also a great recipe book.

If you are interested in obtaining a copy simply click on the link at the right hand side of the page.


Note:  While I received a copy of The Salt Book, I was not paid to make these comments.  The views and opinions I have expressed here are entirely my own.


Monday, June 20, 2011

Pork Cutlets with Parsnip Puree and pan fried Apples

Sometimes it's the simple things that are often the best.

Take for example the marriage of pork and apple.  It has been around forever, and why is that so?  Purely and simply because it works so well.  Add another simple element like parsnip puree and you have a truly winning combination.  You can slave away all day over a hot stove making some gastronomic delight, but often times you will receive just as many accolades when you produce a simple meal just like this.


Pork Cutlets With Parsnip Puree and pan fried Apples
Adapted from From Delicious Magazine June Edition to use the Thermomix

Serves 4-6

5 parsnips (approx 1kg), peeled, cut into small pieces
200g milk
2 cloves garlic
2 tbs olive oil
6 pork cutlets
50g unsalted butter
3 granny smith apples, peeled, cored, cut into 1 cm thick wedges
2 tsp caster sugar
1/4 cup sage leaves

I adapted the parsnip puree to make in the Thermomix.  I will give both sets of directions - with and without the Thermomix - if you are making this in a saucepan note that the amount of milk used is slightly different.

TM Version

Place the parsnip pieces, garlic and milk in the TM bowl.  Cook for 20 minutes at 100 degrees on speed 1.  Insert the butterfly.  Add the butter, and season to taste with sea salt and freshly ground black pepper.  Mash for 20 seconds on speed 3.  Place in the thermoserver to keep warm.

Non TM version

Place the parsnips and garlic in a saucepan.  Add 2 2/3 cups of milk.  Bring to just below boiling point, then reduce the heat to medium low and allow to simmer for 15 minutes or until the parsnip are tender.

Remove the parsnip and garlic from the milk, reserving the milk.  Place the parsnip and garlic in a food processor, add 1/2 to 1 cup of the reserved milk, the process to a smooth puree.  Add ing more milk if necessary.  Season to taste with sea salt and freshly ground black pepper.  Seat aside to keep warm.

Meanwhile heat 1 tbs of olive oil in a frypan over medium high heat.  Season the cutlets with sea salt and pepper then cook for 2-3 minutes each side, or until just cooked through.  Remove from the pan, loosely cover with foil and rest while you cook the apple.

Heat a small amount of butter and the remaining 1 tbs of olive oil in the same frypan.  Add the apple and caster sugar, season with sea salt and black pepper, then cook for 5-6 minutes, tossing until the apple is lightly caramelised and tender.  Add the sage leaves and cook for a further 1 minute, or until wilted.


Serve the pork and apple on top of the parsnip puree, then drizzle over pan juices.


My "Partner in Crime" told me how wonderful this dish was, and she was not wrong!!!  Simple to cook, and delicious to eat!!!  Perfect comfort food!!!


Saturday, June 18, 2011

Spaghetti Carbonara

I was under the misconception that spaghetti carbonara was a creamy sauce.  This is apparently incorrect.  A true carbonara sauce is a combination of raw eggs, cheese, bacon, and butter or olive oil with black pepper.  The addition of cream was to come later.

The history of this dish is a little unclear - but some tend to believe that it started making appearances on dinner tables during World War 2, when the American troops were stationed in Italy.  The troops bartered their rations of powdered eggs and milk with the Italian peasants, and hence spaghetti carbonara was born.  When the troops returned home they then replicated the dish, but "Americanised" it with the addition of cream.

What got me wondering about the dish was the fact that it is in the current edition of Good Food Magazine as one of George Calombaris' mum's dishes - they are after all Greek, are they not?  Perhaps spaghetti carbonara is a dish that knows no international boundaries?


Spaghetti Carbonara
From Good Food Magazine - June edition

Serves 4-6

1 litre chicken stock
5 chicken wings
1 cup parmesan rinds (optional) *
3 thyme sprigs
1 clove garlic
500g spaghetti
1 tbs olive oil
200g piece of bacon, cut into 1cm cubes (I used speck)
5 egg yolks
20g butter, diced
2 tbs chopped flat leaf parsley

* Parmesan rinds are the ends of the block of cheese - use them to flavour stocks, risottos or soups.  Discard them before serving.


Bring the stock to boil in a large saucepan on high heat.  Add the chicken wings, parmesan rinds, if using, them and garlic.  Reduce heat to low and simmer for 1 hour, removing any scum from the surface.  Strain through a fine sieve, discarding solids.  Return the stock to a clean saucepan and simmer on medium heat for 10-15 minutes, or until reduced to 2 cups.

Meanwhile cook the spaghetti in a large saucepan of boiling water according to packet directions.  Drain and return to the pan.

Heat the oil in a frying pan on high heat.  Cook the bacon for 5 minutes, or until crisp. Drain on a paper towel.

Remove the stock from the heat.  Using a stick blender, blend the egg yolks and diced butter into the hot stock, until smooth and thickened.  Add the sauce to the spaghetti along with the parsley.  Toss well to combine.  Season with sea salt and freshly ground black pepper.  Scatter with bacon and serve.

As you can see reading the recipe - there is no use for the chicken wings.  I thought to myself I am not going to just throw these away, but I didn't want to add them to the pasta either, so what should I do with them?

I was baking a loaf of multigrain bread to go with the meal so I decided to put the chicken wings in the oven at the same time.  I had used 7 wings in total.  I lined a baking tray with foil.  Placed the chicken wings on the tray and then sprayed them with garlic infused olive oil spray.  Next I sprinkled a little parmesan cheese on them - and into the oven for the 20-25 minutes that the bread would take.


As for the bread - I made my usual bread mix, but added 30g each of sunflower seeds and linseeds, and 15g of sesame seeds.

After 25 minutes ......


How beautiful are these??

So to go with our bowls of spaghetti carbonara we had a lovely crispy chicken wing.  "The Darlings" declared the wings "better than KFC!"  Now that's some compliment coming from them!


MR. CCC was not with us when we ate, and unfortunately "The Darlings" liked the wings so much that they ate his share - oops!!!!

I will definitely make the wings again - I wonder if it was just a fluke - or can I replicate them again???

So Dear Readers have you made any little gastronomic discoveries whilst in the pursuit of making another dish?  Do tell.

Thursday, June 16, 2011

Baked Greek Lamb Meatballs & Surprise Soup!

Yesterday was full of (culinary) surprises for me.

The first one was the meal I cooked for dinner last night.  As usual, I got suckered in by the nice photos - there was this lovely shot of a tray of baked meatballs resplendent with cherry tomatoes and zucchini and crumbled feta cheese - well of course I knew mine would never look that way (especially when I forgot to add the feta!!!).  What hooked me in though, was that it was a one dish meal - the components all looked good (albiet I knew "The Darlings" wouldn't eat the vegetable part).  What didn't gel however, was how I was going to actually serve this - and did it need anything to go with it?  This all came together as the day progressed, and meal time became closer.

The first thing I thought it needed was some bread - after deliberation I decided some lebanese bread would be good.  Then I thought that perhaps the addition of a dip of some kind - perhaps herb and garlic!

OK the basis was taking shape.

This is how the afternoon in my kitchen progressed

First thing I made was the dip.

Herb and Garlic Dip
Adapted From EDC Thermomix Cookbook

small bunch of flat leaf parsley
1 small glove of garlic
1 shallot (green onion)
1/2 bunch chives
250g light cream cheese
small amount of reduced fat cream

Place the parsley, chives, shallot and garlic into the TM bowl.  Chop for 5 seconds on speed 7.  Scrape down bowl and repeat if necessary.

Add the cream cheese.  Mix for 20 seconds on speed 4 - add small amount of cream until desired consistency is achieved.


There you have it - dip in around 25 seconds!!!

Now onto the surprise soup!

I am not going to give you the recipe because I am not sure I could replicate it again - but I ust wanted to let you know what a wonderful flavour I achieved - accidentally!!

I had a pretty busy day yesterday so I took the incredibly easy way out of making some soup for "The boy who will never be filled" for his school lunches.  Rather than peel a pumpkin (you know how hard that can be at times) I decided to place the whole piece of pumpkin in the oven and bake it.  So onto a baking sheet went 1/2 a pumpkin (minus the seeds).  I sprayed it with garlic infused olive oil spray and baked it at 200 degrees for around an hour.  It came out all lovely and golden.  I let it rest on the kitchen bench all afternoon until I was ready for it.

Then came the next part - what was I going to add???  I was sure I had some red lentils in the cupboard - but no, I seemed to have used them all - have some black - that will have to do.

Fry up a little onion and garlic in the TM - then added around 2 cups of chicken stock, brought it to the boil and added the black lentils.  Cooked them (but not probably enough - but was running out of time - that will have to do!).   Added the cooked pumpkin to the pot, then added a can of coconut evaporated milk

Then a little curry powder, ground coriander and some cumin.  Blended it all together.  I had a little mashed potato left over from the previous night's dinner - so decided why not add that to the pot too!!  A little too thick - so added a bit of milk.  Soup finished now!!!

The result - well the lentils were not entirely cooked through so they added a nice textural component to the creamy soup - but the biggest surprise was the flavour!!!!  I swear if you were blindfolded you would have thought you were eating peanut butter soup!!!!


I must say I was pretty impressed with the flavour - wonder if I can do it again though???  The combination of the coconut evaporated milk and the roasted pumpkin lifted boring old pumpkin soup to a new level!!!!

OK so the soup is now done - on to dinner....

Baked Greek Lamb Meatballs
Adapted From Good Food Magazine June edition

Serves 6

1kg lamb mince *
3 slices of bread, made into breadcrumbs
2 eggs, lightly beaten
1 onion
1/3 cup chopped mint (around 1/2 a bunch)
4 large potatoes, cut into wedges
4 zucchini, cut into batons
300-400g cherry tomatoes
60g feta cheese, crumbled **

Preheat oven to 200 degrees.  Lightly grease a large baking tray.

Place the mince, breadcrumbs, onion and egg, and mint in a large bowl.  Season with salt and freshly ground black pepper.  Mix well (or you can place it in the TM and using the knead function knead the mixture for 2 minutes until combined!!) Using your hands shape into meatballs.  Place in the prepared pan.

Place the potato, zucchini and cherry tomatoes around the meatballs.  Spray with garlic infused olive oil.


Bake for 40-60 minutes.  Turning the potatoes, so that they brown evenly.

Season the potatoes with sea salt.  Scatter with feta cheese.


* the recipe says 250g lamb mince for 4 people (making 8 meatballs - there was no way that was going to cut it with my crowd - so I increased it to 1kg)

** oops I forgot - the feta is still resting nicely in the fridge!!!

The reason that there is no "plating up" photo is that even as I got this dish out of the oven I had no idea how I was going to serve it.  I simply ended up throwing it all onto a large platter so that everyone could help themselves!!!  And help themselves they did!!!

The nice surprise about this dish was the wonderful flavours - Mr. CCC remarked how lovely and fresh it all seemed.  "The Darlings" made theirs into "kebab" type rolls!!  All were happy (and fed!)

And so ends another night in our kitchen!

So Dear Readers what surprises (good and bad) have you had in the kitchen lately?  Is your kitchen a hive of activity like mine come late afternoon???  Do tell!!

Wednesday, June 15, 2011

Prosciutto Steaks with Creamy Mushroom Sauce

This is one of those recipes that almost feels like it isn't a recipe at all.  Almost feels like cheating really, but saying that, it is published in this month's Good Food Magazine - so therefore it must be a recipe!!!

It is one of those meals that really is just "zooshing" up the "basics".  It is basically a steak and mash meal, with a lovely creamy mushroom sauce on the side.

Of course the Thermomix made it all so very simple.  I made the mash in there, and then made the sauce - but I will give you the recipe as printed in the magazine.


Prosciutto Steaks with Creamy Mushroom Sauce
From Good Food Magazine - June edition

Serves 4

600g sebago potatoes, peeled, chopped
1/4 cup skim milk
4 beef eye fillet steaks
4 slices prosciutto
2 tbs olive oil
1 tbs snipped chives

Mushroom Sauce
40g butter
1 tbs olive oil
500g mixed mushrooms, such as swiss brown, shitake, button
2 cloves garlic, crushed
1/2 cup white wine
2 tsp dijon mustard
1/2 cup reduced fat thickened cream

Place the potatoes in a microwave safe bowl.  Cover with plastic wrap.  Microwave at 100% for 4-5 minutes, or until tender.  Stand for 2 minutes.  Add the milk, and mash until smooth.  Season to taste with salt and freshly ground black pepper.

Meanwhile to make the sauce melt the butter and oil in a large frying pan on high.  Cook the mushrooms, stirring for 3-4 minutes, or until browned.  Add the garlic and cook, stirring, for 1 minutes, or until fragrant.  Add the wine and mustard and bring to the boil.  Reduce the heat to low and simmer for 2-3 minutes, or until reduced by half.  Stir in the cream.  Simmer, stirring, for 3-4 minutes, until sauce thickens slightly.  Season to taste.

Preheat a chargrill or BBQ on high.  Wrap the steak with the prosciutto slices.  Brush with a little oil.  Cook the steaks for 3-4 minutes each side, or until cooked to your liking.

Serve steak with the mash, mushroom sauce, and topped with the snipped chives.

As you can see I also served the steaks with my winter time favourite - brussels sprouts, panfried with a little prosciutto.


See ..... incredibly easy (made even easier with TM helping me!!).  It was just a great combination of flavours!!!  Often times it is the basics that produce the best results.  As it was steak - all the plates were literally licked clean at my house last night!!!  You can make all the fancy dishes in the world - but nothing beats a good steak in my books!!!

So Dear Readers what is your favourite - really fancy exotic meals, or the plain simple rustic meals - like good old steak and mash???/

Monday, June 13, 2011

Slow Roasted Beef Ribs with Cinnamon

If you haven't figured it out yet, I am a great advocate of the slow cooking method.

There are various methods of slow cooking - you can use an electric slow cooker (ie crock pot), you can slow cook on the stove top in a saucepan, or you can use the oven on a very low heat and cook away all day!  My "partner in crime" that I run with (she makes me!!) vows never to leave the oven on that long to make a dish - but what does she know - she obviously hasn't experienced a slow baked dish!!

I think you have to weigh up the pros and the cons of all the slow cooking methods, and use what you think is appropriate for the dish you are making.  Using a crock pot, as there is no evaporation only condensation, tends to end up with a more "diluted" flavour.  Using the oven, and covering up the dish tightly with foil, results in a more concentrated flavour.  I like all methods, but as I said, it is up to the ingredients and the dish involved, as to which method is best.

The recipe that caught my attention this week said to cook on the stove top for 3 hours.  Once I perused the ingredient list I decided that three hours probably wasn't going to do it.  The main ingredient in this dish was beef brisket.  I recently cooked a beef brisket, and was not that overly enthused with it.  It was tough and not a lot of meat on there compared to the amount of fat.  I headed off to the butcher (a different one from the last brisket) - I had a good chat with my "butcher buddy" - not only did he not have a brisket - but he couldn't get one for a whole week more - this will not do as I have a hankering for this dish now!!!  What he did have on offer however, was beef ribs.  He didn't steer me wrong last time with the Beef Ribs so I thought why not make this recipe with the ribs, and instead of braising on the stove top, slow bake them in the oven.

What is the old saying "A stitch in time saves nine" - well my saying is "A little prep in the morning saves a lot of stress in the evening".

After a long day at rugby in the freezing cold, first watching the game, and then manning the BBQ for the rest of the afternoon, the last thing I felt like doing when I walked in the door was making dinner.

Let me tell you though, the smell that welcomed us was we opened the door last night was wonderful..... imagine cinnamon and star anise - the best part though was that all I had to do now was cut up some greens, and steam some rice.  Too easy!!!!


Slow Roasted Beef Ribs with Cinnamon
Adapted from Booklet in current (June) edition of Good Food Magazine

Serves 5

2kg beef ribs cut into 5cm wide slabs, then cut in half
1 1/2 cups Shaoxing wine (Chinese cooking wine)
1 cup light soy sauce
1 cup sugar
1/2 cup sliced ginger (approx 5cm long piece)
8 cloves grlic, crushed
4 green onions, trimmed, cut into thirds
1 tsp sesame oil
2 long cinnamon quills
5 star anise
2 carrots, halved, chopped into 1 cm pieces
1 daikon, peeled, halved, chopped into chunks

Place the ribs in a large saucepan.  Cover with water.  Bring to the boil on high heat.  Simmer on low heat for 20 minutes.  Drain.  Rinse under cold water.  Drain well.

Preheat oven to 110 - 120 degrees (non fan forced).

Place the shaoxing wine, soy sauce, sugar, ginger, garlic, green onions, oil, cinnamon and star anise in a large saucepan.  Add 2 litres of water and bring to the boil, stirring to dissolve the sugar.

Place the ribs, diced carrot and daikon in the base of a very large baking dish.  Pour over the wine mixture. You may not be able to add all the mixture to the pan, reserve what you can't fit in.  It think I ended up putting in around 1 litre of the liquid to start and then about another cup full at around the 7 hours cooking stage.

Cover the dish tightly with several layers of foil.

Bake in the oven for approximately 9 hours, or until the meat is very tender.  Try to resist the urge to take a peek - believe me the liquid will last in there.  I checked at around the 7 hour mark, and added a little more liquid, but I could have probably got away with leaving it as it was.


Serve with steamed asian greens and steamed jasmine rice.

This dish was glorious - the flavours were so well developed, having bubbled away all day.  The beef was sooo tender - it was my idea of heaven.  Just what you need after a day out in the cold.

As an ending to this story I have to tell you about my trials and tribulations of finding daikon.

I live in an area that is fairly well inhabited with asian people, and therefore we have several asian grocery stores in the neighbourhood.  I have learned a lesson though - just because the ingredient you seek is "asian" doesn't necessarily mean that at the asian supermarket they will know exactly what you are looking for.  Now when I am looking for something a bit different I tend to google images as well - so that I at least know what the particular ingredient looks like.

I googled daikon


This is what they look like.

Do you think I could find them, do you think I could find anyone that knew what they were????  I had soooo many suggestions along the way as to what I could use instead of daikon - winter melon, hairy melon, parsnip, white radish.... oh the experts I met along the way.  I heard about what someones grandmother would use....... Everyone tried to be really helpful.  Eventually someone told me that they thought the daikon was a korean ingredient - the lightbulb then went on..... I knew where there was a korean supermarket - and guess what ???? They had daikon!!!!! The day is saved!!!

Would the dish have been any different without the daikon - possibly not - but it did add a little extra chunkiness to the end dish!.


Dear Readers I would love to hear your trials and tribulations of finding those "exotic" ingredients - how do you go about finding them?  Do you google images so you know what you are looking for - do you seek out an "expert" to help you.  I think at one stage yesterday I had everyone in the supermarket checkout line offering me advice of some kind (helpful or not!!!).

Sunday, June 12, 2011

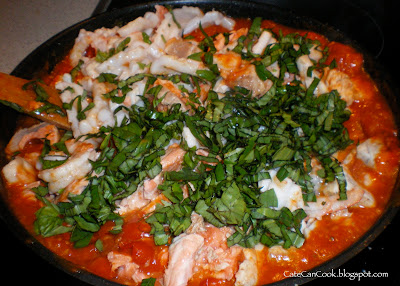
Spaghetti Marinara

When I make Spaghetti Marinara I like to make up my own mix of seafood.  We prefer to have it loaded up with salmon and prawns in particular, however, feel free to change the amounts or varieties to suit yourself!!


Spaghetti Marinara

Serves 6

2 squid tubes (approx. weight 500g)
2 x salmon portions (approx. weight 500g)
1 x barramundi fillet (approx. weight 240g), cut into 2cm chunks
500g green prawns (with shell weight), shelled
2 x 400g cans cherry tomatoes
250g fresh cherry tomatoes
1 cup dry white wine
2 cloves garlic, crushed
20g butter
1/2 cup shredded basil
500g angel hair pasta, cooked according to packet directions

Cut squid hoods in half, and gently score the inside.


Cut into 2cm wide ribbons.

Heat half the butter and a small amount of olive oil in a large frypan over medium heat.  Add the garlic and fry gently until just starting to turn golden.  Add the fresh cherry tomatoes, and cook stirring constantly until they start to soften.  Add the canned tomatoes and gently simmer for approximately 10-15 minutes, or until you are able to gently "pop" the tomatoes by pressing a spoon on the tomato.  Add the wine and simmer for 15 - 20 minutes or until the mixture starts to thicken.


Season to taste with sea salt and freshly ground black pepper.

In a second frying pan gently heat the remaining butter with a little olive oil.  Cook the salmon pieces for 2-3 minutes each side, or until just lightly browned.  You want the fish to be still pink in the middle.


Remove from pan and set aside.

Add the prawns, squid and barramundi to the pan and gently cook for 2-3 minutes, or until the prawns are just starting to change colour.  Remove from the pan and set aside.

Gently flake the salmon into chunks.


Add the seafood to the sauce, and mix gently.  Simmer for a minute, then add the basil.  Combine well.


Add the seafood mix to the cooked pasta. Toss gently to combine.


Serve with grated parmesan cheese on the side.

So what goes with a good pasta dish???  Garlic Bread of course!!!

I was inspired by a post I saw recently on Sunday's Kitchen - while mine is not the same as hers - I did use the fontina cheese, as I have not tried it before!

Killer Garlic Cheese Bread

530g Bakers Flour
2tsp yeast
300ml warm water
1 tsp salt
1tsp sugar


Knead in the TM for 4 minutes.  Remove from TM bowl place in a lightly greased bowl, and allow to sit in a warm place for approximately 1 hour, or until doubled in bulk.

Then into the Thermomix I popped:

8 cloves of garlic

I blitzed the garlic for 4 seconds on speed 7.

Then I added:

150g fontina cheese, broken into small pieces
1 egg yolk (reserve the white)
140g butter, cubed

I blitzed these together for 6 seconds on speed 6.

Spread this mixture out over the rolled out bread dough.


Now roll up, using the baking paper as a guide, in a jelly roll fashion.  Make sure you secure all the edges well - or you will have garlic cheese butter everywhere!!!


Place on a baking tray that has been lined with baking paper, and sprinkled with a little polenta.  Allow to rise again in a warm place for approximately 30 minutes.

Lightly beat the egg white, and then brush the loaf all over with the egg white.

Bake in an oven that has been preheated to 200 degrees for 20-25 minutes, or until golden brown and cooked through.

and voila!!!!


Isn't that a beautiful loaf of bread????


You know we have no problems with vampires in this house - what with all the garlic we eat!!!!!

So tell me Dear Readers how do you like you garlic bread?  With cheese, with roasted garlic - or with both!!!! Do tell.