WELCOME TO MY KITCHEN


WELCOME TO MY KITCHEN!!
I hope you enjoy the food!!!
Showing posts with label Soup. Show all posts

Saturday, June 2, 2012

A Little Bowl of Tuscany!

On a cold wet, winter night is there anything better than having dinner in front of a log fire?  I think not!!!

I was feeling a little homesick for Italy the other day, so I took myself off for a shopping trip to Haberfield.  Now, it's not quite like shopping at the market place in Italy, but it was the best I was going to get here in Australia!

I wandered up one side of Ramsay Street, and back down the other, peering into all the shops, and making a mental shopping list as I travelled form shop to shop - menu plans were formulating!

One thing that I have been craving since getting back, is Mozzarella di Bufala (Buffalo Mozzarella), so a trip to Paesanella Cheese Shop was a prerequisite on this trip!  There they were - my beautiful little lovelies, sitting in their milky looking brine!!  There were two varieties on offer - the true Italian one, and the ones that they make themselves.  After being told in Italy, that they should never be refrigerated, I decided to go for the local ones, who knows how long the imported ones have been refrigerated on their trip here!

There were so many lovely looking things on display in the cabinet, it was very hard to choose.  I limited myself with what I though we would consume in the next few days.  Some speck, provolone, and pecorino, but the carciofi (artichokes) looked tempting too, and also the caramelised tomatoes.  A tasting plate was forming in my mind.

Onwards I travelled, some beautiful proscuitto was procured, along with a lot of beautiful looking meats (osso bucco, lamb shanks, Italian sausage, lamb kebabs).  Next some pasta, and then various other vegetables, including some tuscan cabbage were added to the growing mountain of food in my boot!!!

It was very tiring work, all this shopping, so a rest was required - lunch stop was at  Pasticceria Papa for a cappuccino and a panini.

A few more stops, and I had enough food to feed the family for the week!!!

What fun it was, so much better that going to the local iridescently lit shopping mall,  and offending supermarket!!!  Sure it wasn't a market place, but it was different to how I usually shop. The only thing I wasn't able to get were those beautiful Italian tomatoes, but then it is the wrong season!!!  Me thinks a return visit in summer is in order!!!

So what were we going to have for our meal in front of the fire?


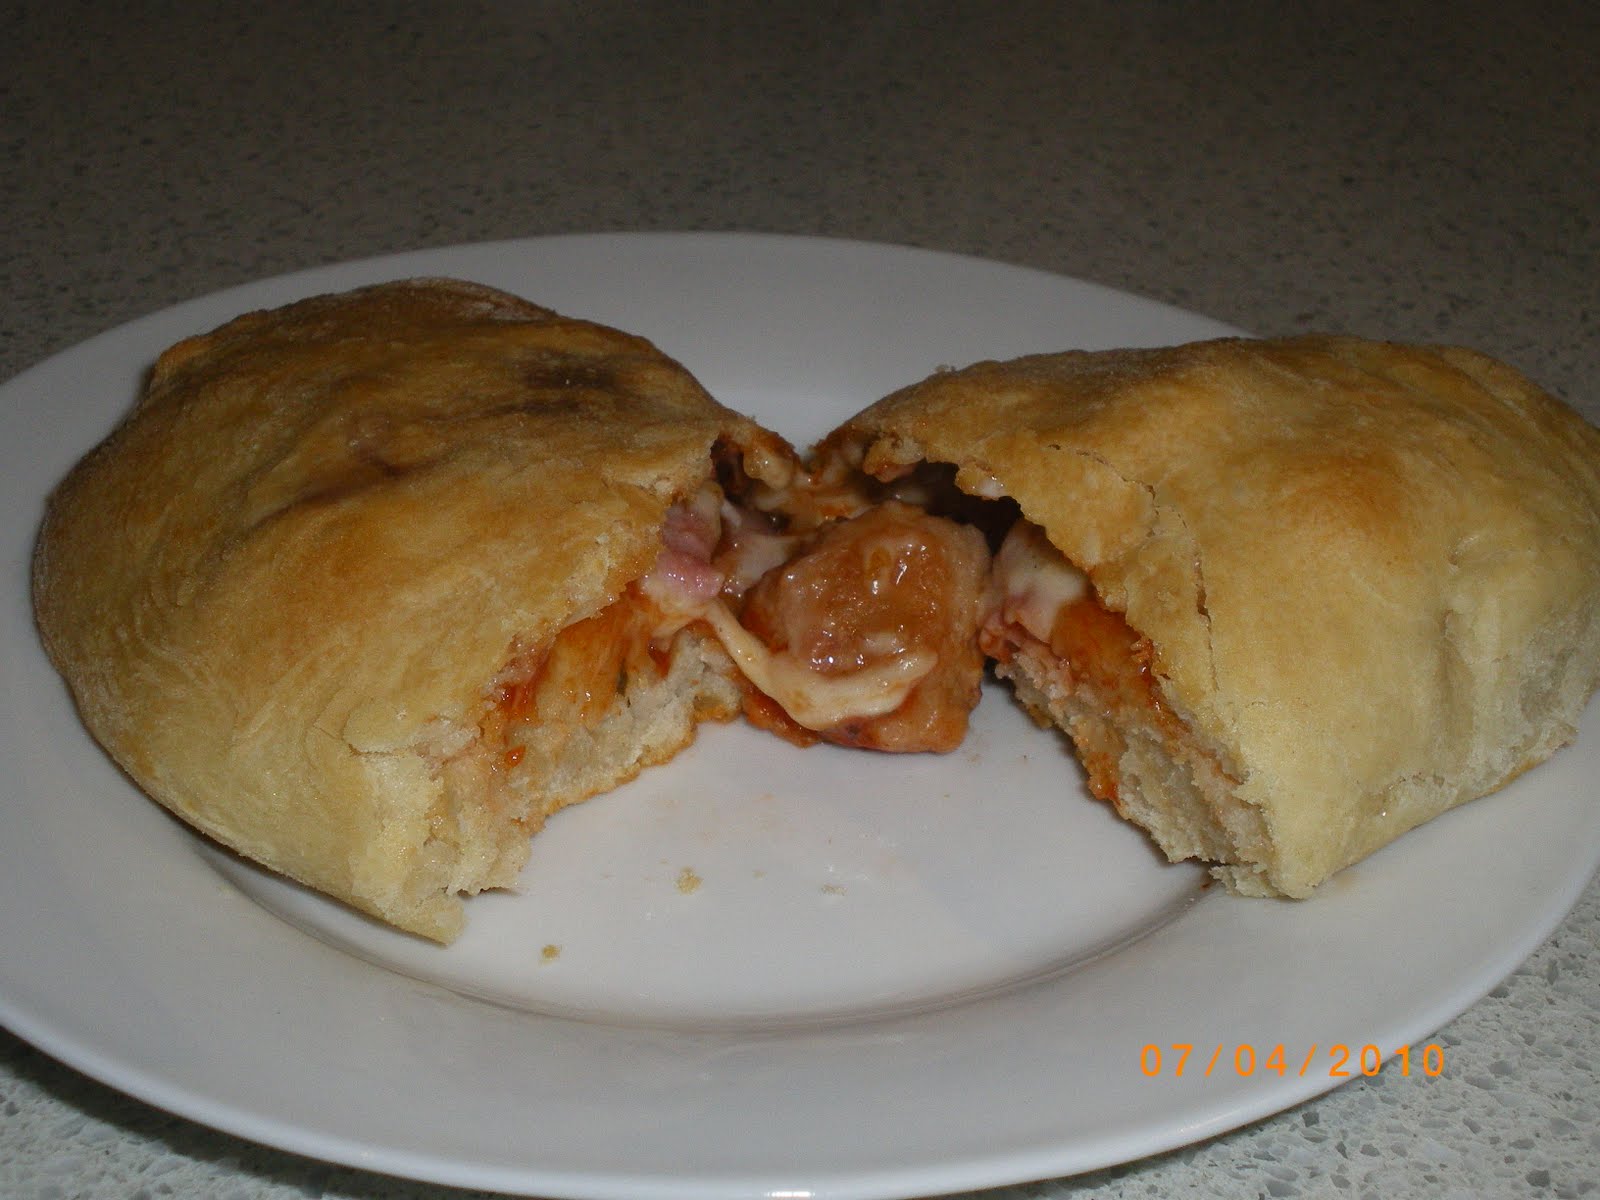
Our tasting plate consisted of some rustic bread, which we topped with the Buffalo Mozzarella, Artichokes, Bruscetta, caramelised tomatoes, and dolmades (yes, I know they are not Italian, but we do like them!!).

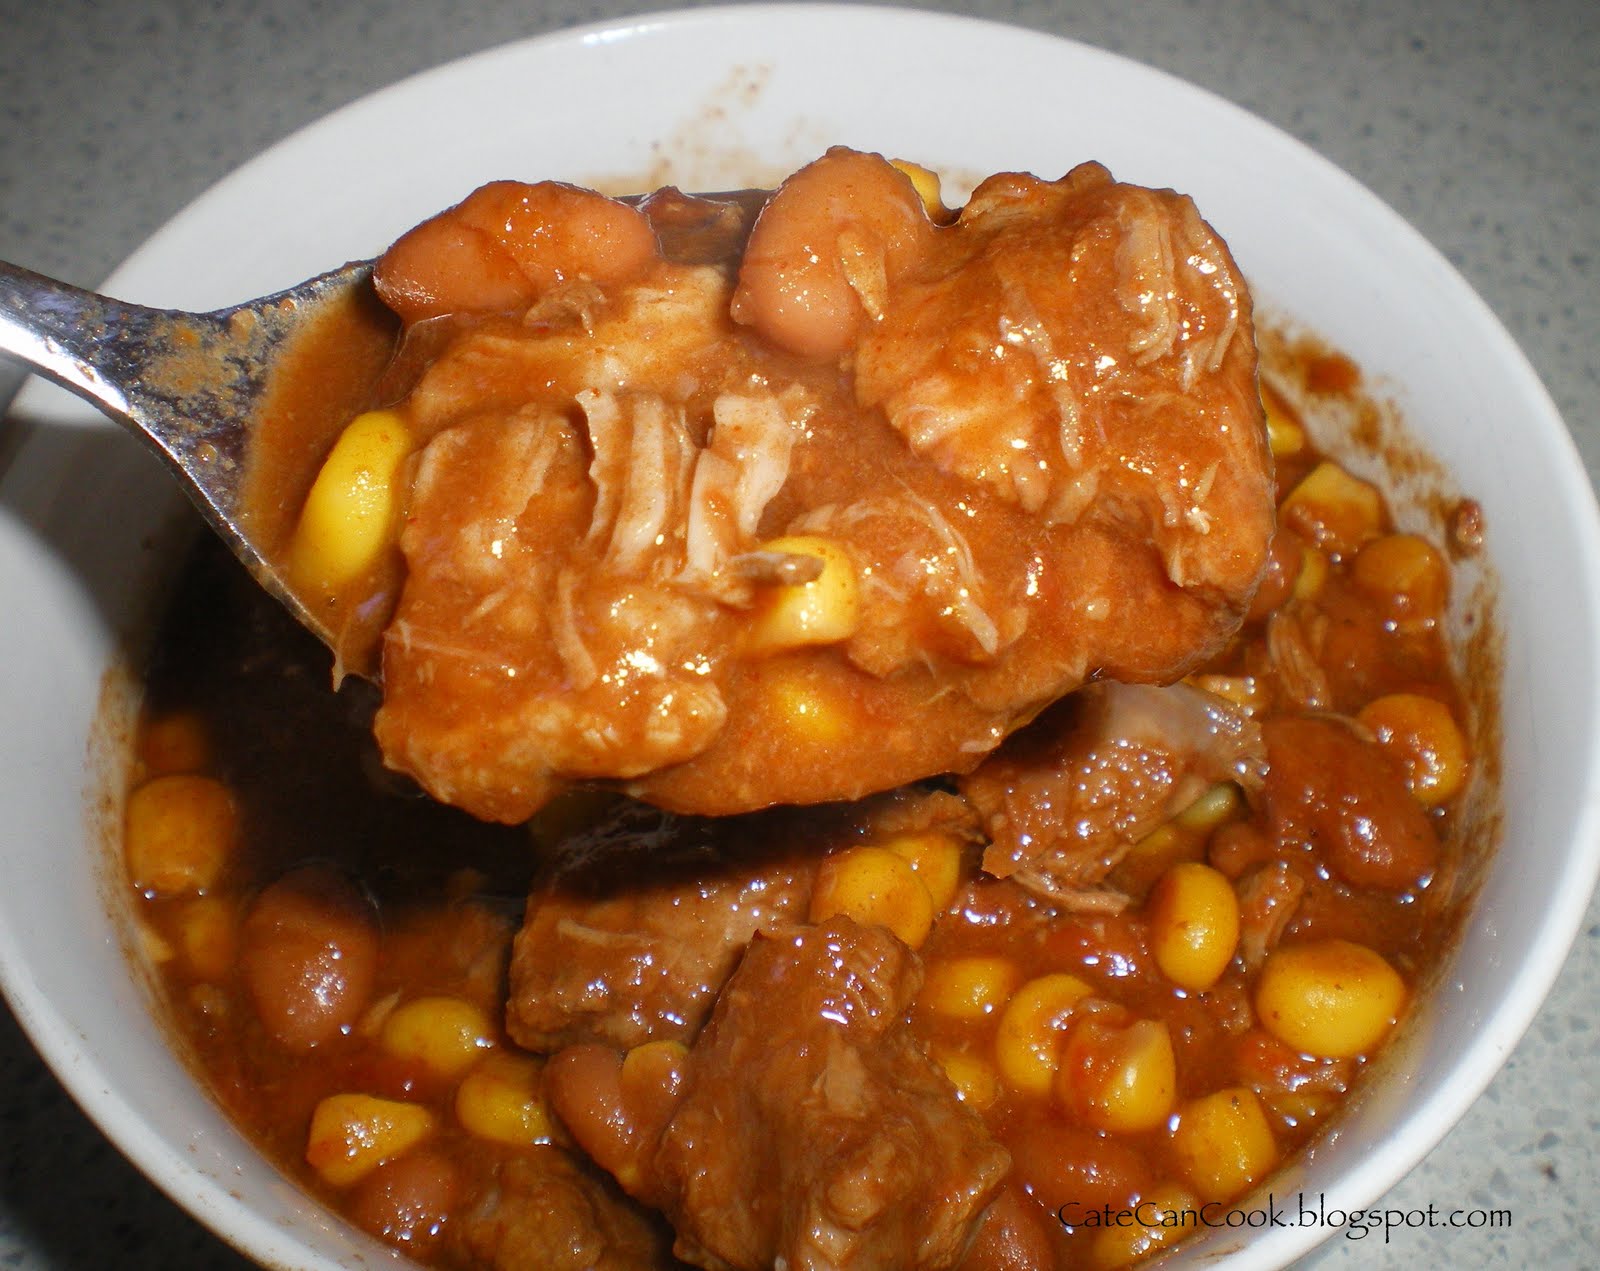
After being at a night game of rugby we really needed to warm ourselves up - so some soup was in order.  Remember the Tuscan Cabbage?


I just had to make the recipe for Ribollita  from The Tuscan Sun Cookbook, that I recently won from the lovely Not Quite Nigella.  Thank you Lorraine!!!  There's a bowl waiting here for you in front of the fire!


Ribollita
From The Tuscan Sun Cookbook by Frances Mayes & Edward Mayes

Serves 15!

500g dried cannellini beans *
1 tsp salt
2 brown onions, diced
6 carrots, diced
2 tbs extra virgin olive oil
4 celery stalks, diced
4-5 garlic cloves, finely chopped
1 tsp pepper
1 bunch tuscan cabbage, finely chopped
8-10 tomatoes, or 1 x 800g can whole tomatoes, chopped
the heel of a wedge of parmigiano reggiano
2 litres of vegetable, chicken, or meat stock
2 cups cubed, day old bread
generous handful of combined flat leaf parsley,  torn basil and thyme leaves

grated parmigiano reggiano cheese and olive oil to serve


* you can use dried cannellini beans if you have the time, but you will need to soak them for 5 hours though! I used 2 x 400g cans of cannellini beans, drained.


In a large stockpot over low heat, sauté the onions and carrots in the olive oil. After 3-4 minutes, add the celery, garlic and the salt, pepper and the Tuscan Cabbage. Add more olive oil if needed. Cook,
for 10 minutes, or until the cabbage is wilted, then add the tomatoes, and the heel of the Parmesan. Add enough stock to cover. Bring to the boil, and then simmer, covered for 1 hour to blend the flavours.

Make sure you stir now and then.

After about 50 minutes add the drained cannellini beans. Cook for a further 10 minutes. Add the bread cubes and herbs. Heat through.

Serve with a drizzle of extra virgin olive oil and some grated Parmesan cheese.

Bellisimo!

This soup was sooooo good. The best part is that I now have a huge container left for lunches, and easy meals for the rest if the week!

This meal took me back to the night we arrived in Florence. My traveling buddy, Barb, had this as her starters (no we didn't follow protocol that night by having antipasti, primi, secondi and contorni!) We introduced ourselves to Florence that night, by eating at a little trattoria just off the Ponte Vecchio!


I don't know what her's was like that night, but mine last night really hit the spot!


 Ahhh.... Food memories... Don't you love them! So Dear Readers do you make meals to remind you of places you have visited?

Me, I'm on a bit of Italy revisited at the moment.... Osso Bucco tonight!!!!

Wednesday, June 22, 2011

Ham and Red Lentil Soup

In my never ending quest to keep "The Child Who Cannot be Filled" happy, I'm onto my I don't know how many it is pots of soup this winter???!!!  He seems to love it, and I must say it is pretty good for him - the only real hassle for me is getting up each morning and warming up the thermos and the soup for him.

The other big challenge of course is coming up with a new soup each week - especially ones that are not creamy, or if they are, making modifications to them.

I just love pea and ham soup, I have already made a batch of that so far in this quest, but this recipe took my eye.  It is Ham and Red Lentil Soup.  Using the red lentils as opposed to the peas makes it lower in GI - which is always a good thing. So this soup is great for those people out there that have diabetes, or are following a low GI diet.  Following a diet that is rich in foods with a low GI means that you will achieve a better blood sugar level control.  Foods that have a high GI rating give the blood sugar a rising spike in levels - rising quickly and then dropping just as quickly, leaving you craving more food.  The key to controlling food cravings lies in trying to eat foods that are lower in GI.


Ham and Red Lentil Soup
From Super Food Ideas Magazine - July issue

Serves 4

1 tbs olive oil
1 medium brown onion, finely chopped
2 medium carrots, peeled, chopped
3 celery stalks, finely chopped (use leaves too)
2 cloves garlic, crushed
2 litres chicken stock (salt reduced)
100g piece of leg ham *
1 cup red lentils
chopped flat leaf parsley to garnish

Heat oil in a large saucepan over medium heat.  Add the onion, carrots, celery and garlic.  Cook, stirring for 5 minutes or until the onion has softened.

Increase the heat to high.  Add the stock.  Bring to the boil.  Reduce the heat to medium.  Add the ham and lentils.  Simmer for 20 - 30 minutes, or until the lentils are tender.

Remove the ham from the pan and shred the meat using two forks.  Return the ham to the saucepan.

Season to taste with salt and freshly ground black pepper.

Served garnished with chopped parsley.

* check out your local deli or deli counter in the supermarket.  More often than not you can buy large chunks of off cuts of ham (and usually very cheaply).  These chunks are great for using on pizzas, in risottos and even in soups!!!

I did make the soup in the Thermomix - just chopped up all the vegetables and then proceeded to cook for 25 minutes at varoma temperature, speed 1.  There was a little too much liquid - so I had to remove the MC and place the basket over the hole to avoid the eruptions!!!!


Another lovely winter warmer!!  This soup was great - it still had all the lovely flavours of pea and ham soup - but it just wasn't as thick and stodgy as some pea and ham soups can be!!!

The boy was happy - so I was too!!

Sunday, June 5, 2011

Lentil Soup

If there was a link that I could add in here to let you smell the aromas wafting past me from the kitchen right now you guys would be drooling!!

I have just finished making my soup of the week.  Regular readers will know that I have embarked on an endeavour to fill up my "never to be filled up Prader Willi" child with soup for his lunch each day at school.  Must say it seems to be working (as much as it can!!!).

I have made Pumpkin Soup, Minestrone, Paste e Fagioli and Chilli Beef soup so far.  Today, another hearty vegetable based soup - Lentil Soup.  I'm starting to feel like I should apply for a job in a soup kitchen!!! Plenty of experience!

I found this recipe in the latest edition of Delicious Magazine - it is a recipe by Jill Dupleix.  I love Jill's recipes, they always work out, and they are always full of flavour.  This one is no exception!
Lentil Soup
From Delicious Magazine, June Edition - By Jill Dupleix

Serves 4-6

2 tbs extra virgin olive oil
1 leek (pale part only) thinly sliced
2 carrots, finely chopped
2 celery stalks (leaves included) finely chopped
2 tbs tomato paste
1 cup green or brown lentils (I used French Style Black)
2 litres (8 cups) vegetable stock *
400g can chopped tomatoes
400g can cannellini beans, rinsed and drained
2 tsp ground coriander
1 tsp smoked paprika

Crusty bread and chopped flat leaf parsley to serve

* I used 4 tbs of Thermomix Concentrated Vegetable Stock and 8 cups of water.

Heat the oil in a large saucepan over medium heat.  Add the leek, carrot and celery, then cook stirring, for 3-4 minutes until softened.  Add the tomato paste and cook for 1 minute.  Add the lentils and stock and bring to the boil.  Reduce the heat to medium low and simmer gently for 1 hour, or until the lentils are tender.  Make sure to skim the surface occasionally.

Add the tomato, cannellini beans, coriander, and paprika, Cook, stirring occasionally for an additional 20 minutes or until the soup is thick.  Season to taste with salt and freshly ground black pepper.

Ladle soup into a bowl, and top with chopped parsley and a drizzle of olive oil, with crusty bread on the side.


Now how's that for a good hearty (cheap) meal!!!  You know what would go great with this - the garlic and feta cheese bread I made the other night!!!!

Yes, I realise there are no garnishings on this bowl - I merely ladled out a bowl to take a photo for you Dear Readers - it has all been put into a large container to be dutifully heated up each morning before school.  (Is my halo shining?  Or am I just imagining that I am the PWS mum of the year???)

As for the other smells emanating from my kitchen - I decided to try my hand at making a massaman curry from scratch - but more about that another time!!!!  Oh the aromas - wish you were here to smell it!!!!  Shall we eat it tonight, or leave it for a day to mature in flavour????

If you ever want to drop by, Sunday is the day - there is usually something on the simmer in this house!!!

Wednesday, May 18, 2011

Chilli Bean Soup

Now that the winter cold has set it in, it is time to become best friends with your slow cooker.

A slow cooker saves so much time - of course there are those out there that will tell you that they use too much energy - but you have to make your own peace with that one.  For me, the slow cooker is an absolute godsend!

As you know I have a child with Prader Willi Syndrome.  Coupled with his insatiable appetite he is heading full bore into puberty!!!  Any of you that have pre-pubescent boys will know that filling them up is nigh on impossible.  I decided to take the tack that I would start sending a thermos of hot soup to school with him each day - not only would it keep him busier for longer each lunch time - but I was filling him with warm heartiness.

Last week I whipped up a batch of Pasta e Fagioli in the Thermomix - and that went down a treat.  Yesterday I decided to cook a batch of soup in the slow cooker.  The beauty of cooking the soup in  the slow cooker is that you don't need to add a lot of oil to the dish - I rarely brown my meat before adding it!!


Chilli Bean Soup
Adapted from Easy Slow Cooker Recipes

Serves 6 (at least)

1kg stewing steak *
1 400g can diced tomatoes
1 onion, diced
1 30g packet taco seasoning
2 cans Mexican Chilli Beans (1 drained)
1 400g can corn kernels, drained
1 tbs TM vegetable stock concentrate **

Cut the steak into cube sized pieces (don't have to be too technical - you are hoping they will all "melt down anyway!!).

Add the onion, the tomatoes, taco seasoning, one can of drained chilli beans, and the other can with the liquid, the corn and the stock concentrate.  Mix well.  Put the lid on the slow cooker and leave for 5-7 hours on low.


* I used gravy beef.  I am not sure if this was just incredibly tough meat, or if my beloved crock pot is on it's last legs - but after 7 hours it was still not as "falling apart" as I wanted.  I just continued to cook it for a few more hours.  Next time I will use chuck steak.

** If you do not have access to TM stock concentrate use either beef stock powder or a stock cube.


I am just about to go and load up my friend for tonight's meal - Beef with Mushroom Gravy.  I will serve this with Thermomix mashed potato (we have a long night tonight - and I want some hot food that I can throw on the table easily when I finally get in!)


Friday, February 25, 2011

Pasta to feed a small army and Pumpkin Soup

I know there are those of you out there (yet again - who won't leave comments here - but make their voices known!) that think that we are not eating.  Well let me set the record straight.  Yes, we are, but life is back into full swing, and what can I say, yes I often take short cuts - make meals that are going to provide the least resistance - meals that I can make in seconds flat - and you know what that means - UNBLOGGABLE!!!  Sorry!!

So in order to make amends,  I will share with you my day in the kitchen yesterday.

A dear friend of mine was having surgery, and I wanted to make life a little easier on her family while she tried (if that is at all possible in a hospital!) get a bit of a rest.  So I set about making a meal for them, and some soup for her for when she got home.  Oh, and I did think I would also make our family's dinner in there as well (sadly misguided I know - always attempting more than is actually achievable!!) - better not tell you that I also wanted to make a cake, and a slice to send to my friend's as well - (you guessed it - ran out of time!!!  As I am starting to make the dinner I decide why not just increase the amounts and feed two families at one - and hence the name Pasta to Feed a Small Army!!!

This is just a variation on my my 4 ingredient pasta - but there was a definite thumbs up from both camps after sampling!


Pasta to feed a small army!

750g dried macaroni pasta
800g can chopped tomatoes
2 x 400g tomato soup
approx 1 - 1.5kg sausages (around 36 sausages)
2 x red capsicums
250g cherry tomatoes
6 cloves garlic crushed
2 onions, finely diced
250g cheddar cheese, grated
100g parmesan cheese, grated

Cut the red capsicums in half.  Lay on a baking tray that has been lined with foil.  Place the cherry tomatoes on the tray as well.  Spray liberally with olive oil spray.  Grill under a hot grill for 10-15 minutes, or until skin blisters and blackens.  Allow to cool.  When cool enough to handle remove the blackened skin from the capsicum, chop into small pieces.  Leave the cherry tomatoes - they will do their own stuff!!

Cook macaroni according to package directions.  Drain and reserve.

Cut a small hole in the end of the sausages, squeeze small amounts (mini meatballs size) into a heated frying pan.  Cook in batches until all sausages (meatballs are cooked).  Drain on paper towels.

Remove the fat from the sausages from the pan with paper towels.  Add a small amount of olive oil and cook the onions and garlic for 5 minutes, or until softened.

In a large saucepan combine the macaroni, meatballs, canned tomatoes, tomato soup, chopped capsicums, roasted cherry tomatoes, onion, and garlic (everything except the cheese!!)

Place the combined mixture into baking trays (disposable ones if you are giving the meal away, or freezing for later!!)  Top with the combined cheddar cheese and parmesan cheese.

Now if you are cooking right away - heat the oven to 180C.  Cook for 15-30 minutes - or until the top is golden, and the cheese melted.  Serve with additional grated parmesan cheese.


There were lots of happy faces around the place after this one!!!  Now you might like to vary it slightly - alter the sausages - use spicy, or chicken - you may like to add some chilli to the mix - but this is a great base that pleases everyone - and is also very thrifty on the budget!!!  Give it a go - it will become a dinner winner!

So in addition to the pasta I made a Pumpkin Soup, as Miss Twinkles was having surgery to her throat, and needed to eat soft food for a while.  Of course the Thermomix came in very handy for this!  I did alter the recipe slightly though.....


Pumpkin Soup
adapted from EDC - Thermomix Cookbook

1 onion, peeled and quartered
1 tbs oil
500g butternut pumpkin, peeled, roughly cubed
1 carrot, peeled, roughly chopped
1 granny smith apple, peeled, core removed
1 tbs TM Stock concentrate (or 500ml chicken stock)
freshly ground black pepper
2 tbs greek style yoghurt
2 tbs sour cream (this was because this was all I had!!!)
coriander

Place the onion into the TM bowl and chop for 5 seconds on speed 7.

Add the oil and saute for 3 minutes at 100 degrees on speed 1.

Add the pumpkin, carrot and apple.  Chop for 15 seconds on speed 7.

Add the stock and cook for 20 minutes at 100 degrees on speed 1.

Blend for 20 seconds by slowly going from speed 1 to speed 9.

Scrape down the bowl, and repeat.

Add the sour cream, and yoghurt, season to taste, and combine for 10 seconds on speed 5.

So there you have it Dear Readers - I have been cooking - and as you can see - very simple, easy to please meals!!!

I must go now ..... off to a Thermomix Cooking Class - will tell all about it later.

Have a good weekend!!

Monday, July 5, 2010

Tomato Soup with Spaghetti and Chicken Meatballs & Calzones

Last night I got "The Darlings" to eat soup!!!   That might not seem like such a big deal to you - but believe me it is.  To say they are "food challenged" is probably an understatement.  I take little steps, and try to encourage them to try more.

I looked at this recipe - all the components were things they would eat - and the best part - sooo easy to make!!!


Tomato Soup with Spaghetti and Chicken Meatballs


Serve 4-6


1 tbs olive oil
1 onion, thinly sliced
2 cloves crushed garlic
1 tbs tomato paste
2 x 400g cans chopped tomatoes
1.25L (5 cups) chicken stock
500g thin chicken sausages
200g thin spaghetti, broken into 5cm lengths


Heat the oil in a large saucepan over medium high heat.  Add the onion and cook for 2-3 minutes, stirring, until softened.  Add the garlic and the tomato paste and cook, stirring, for a further 1 minute.  Add the tomatoes and 2 1/2 cups of chicken stock.  Bring to the boil, then reduce the heat to low and simmer for 20 minutes, while you are making the meatballs.


Place the remaining 2 /12 cups of chicken stock into a large saucepan.  For the meatballs,  make a cut in the end of the sausages, and gently squeeze off small balls of sausage meat into the stock.  Should make approximately 30 small meatballs.  Bring the stock to the boil and, then simmer gently for approximately 10 minutes, or until the meatballs are cooked through.  With a slotted spoon, remove the meatballs to a plate.  Return the stock to the boil, and then add the spaghetti.  Cook until the spaghetti is al dente (approximately 10 minutes).  I found that there was not really too much liquid left at this point so I didn't bother draining the spaghetti.


At this point use a stick blender to puree the tomato mixture until smooth.  Add the meatballs and the spaghetti to the tomato mixture and bring back to the boil.


Serve garnished with chopped basil and parmesan cheese.


It took a little convincing but they all ate it!!!

To go with the soup there was home made Calzones.  It was the first time I have made them - they were a little rustic - and the dough was quite gooey and so it tended to break open in places - but they were pretty good.

Chicken Meatball and Ham Calzone


Serves 4


250ml warm water
2 tsp (7g / 1 sachet) dried yeast
1 tsp caster sugar
2 1/2 cups plain flour (I used the Italian 00 flour)
pinch of salt
1 tbs olive oil, plus extra to grease
400g chicken sausages - make meatballs like we did for the soup, gently fry them to cook
100g shredded ham
1/2 red capsicum, thinly sliced and then dry pan fried until very soft and slightly "charred"
pizza sauce
mozzarella cheese
garlic olive oil to spray


Combine the water, yeast and sugar in a jug - leave in a warm place for 5 minutes, or until frothy.


Combine the flour and salt in a large bowl.  Make a well in the centre.  Add the yeast mixture and oil.  Use a spoon to stir until well combined.  Turn out onto a lightly floured surface and knead for 10 minutes, or until smooth and elastic.


Brush the bowl with a little oil, place the dough in the bowl.  Cover and leave in a warm place until doubled in size (1-2 hours).


Divide the dough into 4 equal portions.


Preheat the oven to 230C.  Line a large baking try with non stick baking paper.


Roll the dough out into circles - place pizza sauce, meatballs, ham and mozzarella cheese over half of the dough, then fold over and to enclose the filling.  Transfer to the baking tray.  Lightly spray with the olive oil spray.  Repeat with the remaining dough.


Bake for 15-20 minutes, or until golden.

Monday, June 28, 2010

Roast Potato, Cauliflower and Parmesan Soup with Almond & Blueberry Crumble Muffins

I saw this recipe in the latest edition of the MasterChef magazine and decided to give it a go.  The concept seemed good, roast the vegetables as opposed to boiling them in water, and diluting the flavour.

On tasting the soup last night I was a bit disappointed with it - I felt it lacked something.  I am eating it again now as I type and it does actually taste better today - perhaps the flavours have developed a little more.  I will say this though, it does have a strong cumin taste - so if cumin isn't your cup of tea - I wouldn't recommend this soup for you.

I am going to give you the recipe as it appears in the magazine - but at the end I will tell you what I would do differently next time.


Roast Potato, Cauliflower and Parmesan Soup


Serve 4-6


1.5kg (or 1 head of cauliflower), cut into florets
200g desiree or sebago potatoes, peeled, roughly chopped
1 large onion, thinly sliced
6 cloves of garlic, unpeeled
1 1/2 tsp cumin seeds
1/4 cup extra virgin olive oil
1/2 cup milk
1 1/2 cups grated parmesan cheese


Preheat the oven to 220 degrees C.


Place the cauliflower, potatoes, onion, garlic and cumin in a roasting pan.  Drizzle with the olive oil, and toss to combine.  Bake in the oven for 25-30 minutes, or until the vegetables are tender.


Remove approximately 3/4 cup of the cauliflower florets from the mixture (reserve these for garnishing).  Peel the garlic, then place all the vegetables in a food processor.  Add 2 cups of water and puree until smooth.


Transfer the pureed mixture to a large saucepan, add the milk and another 2 cups of water and bring to the boil.


Stir in the parmesan cheese until well combined.


Season with salt and pepper.


Ladle the soup into warmed bowls.  Top with the reserved cauliflower.  Drizzle with some olive oil and extra parmesan cheese.

Now here is what I would do differently:

Don't add the 2nd batch (2 cups) of water - I actually think it needs milk - saying that though ,I don't know if I would add 2 cups of milk - perhaps only one - I guess it depends on how thick you like your soup.

It definitely needs a lot of seasoning - you are really relying on the parmesan to give it flavour - which if you are watching your fat/calorie content is perhaps not a great thing.  What you could do is instead of the 2 cups of water that is added during the pureeing stage you could add chicken stock.

All that aside though, it is a nice soup.  Try it and see what you think.  For the purists that love cauliflower - it may be just what you love.  For me though, it needed a little bit more seasoning.

I you give this a try I would love to hear what you think.

Now to go along with the soup I made these lovely muffins.  They make fabulous dessert muffins!


Almond and Blueberry Crumble Muffins


Makes 12 - Texas Size muffins


2 1/2 cups self raising flour
3/4 cup (firmly packed) brown sugar
150g butter, melted
1/3 cup milk
1 tsp vanilla extract
2 eggs, lightly whisked
220g frozen blueberries, thawed


Crumble


3/4 cup plain flour
90g chilled butter, diced into small pieces
1/2 cup (firmly packed) brown sugar
1/2 cup slivered almonds 


Preheat oven to 180 degrees C (non fan forced)


Lightly spray or grease your muffin tin.


To make the crumble topping, place the butter, brown sugar and flour in a bowl, use your fingertips to rub the butter into the flour and sugar.  The mixture should resemble coarse breadcrumbs.  Add the almonds.  Set to one side.


Place the flour and sugar in a large bowl.  Add the melted butter, milk, eggs, and vanilla, stir until well combined.


Spoon the mixture evenly into the muffin tins (the mixture will be quite stiff - using 2 spoons works well).  Divide the blueberries evenly on the top of the mixture.  Then sprinkle the tops of the muffins with the crumble mixture.


Bake for 20-25 minutes or until a skewer inserted into the centre comes out clean (make sure you don't get a blueberry!)


Cool in the pan for 15 minutes.

These are great served either warm or cold.  If serving as a dessert serve with warmed vanilla custard, or ice cream.  Yum!!

Note:  I did not use Texas muffin tins - I had recently won a 12 cup  Loose Base Dessert Pan.  This actually makes making muffins so easy - it has a removable base that you simply push up and the muffin pops out!!  So clever.  Worth looking into if you are a dessert of muffin baker!!!

Monday, June 7, 2010

Lentil, Barley and Mushroom Soup & "Leftovers"

Dear Readers it was a raining sunday afternoon,  - the house was quiet, The M.O.T.H. and "the Darlings" were out playing rugby (in the rain??) what should I do?

Do some general tidying up, the ironing, read a book???  No...... cook of course!!!  So I put on Julie and Julia and set to in the kitchen!!!  I am in the zone now - channeling Julia or I think perhaps Julie (I don't think I could ever cook like Julia Child - far too buttery for me - no Julie is more me - she set me off on this little blogging adventure!)

Mmmm what could I make?  I had made another batch of Double Chocolate Chip Cookies yesterday - so we didn't need anything sweet.  I wasn't "cooking" dinner tonight - we were having what is lovingly referred to in this house as "scraps" for dinner.  I was tired of making pizzas - or so I told them, but that was just a ruse to get them into action - I think they are all lulled into this we don't have to cook - you know the old "why buy milk when you have a cow mentality".  So what shall I make????

I know soup!!  Always handy to have some soup in the fridge - lunches during the week etc..

So off I went, pots and pans start coming out - all the while listening to the movie.  I think to myself will this ever amount to anything more than me rambling along??

Anyway I digress the reason you come to visit is to hear about the food so here is the recipe for a lovely healthy (cheap - probably around $10 to make) soup.

Lentil, Barley and Mushroom Soup


Serves 4


1 tbs olive oil
2 medium leeks, trimmed (whites only) - halved, thinly sliced and washed
250g button mushrooms, thinly sliced
2 x 410g cans chopped tomatoes with basil & garlic
3/4 red lentils
1/3 pearl barley


Heat the oil in a large saucepan over medium high heat.  Add the mushrooms and leeks, and cook stirring for around 4 minutes, or until softened.


Add the canned tomatoes, lentils, barley and 5 cups of cold water.


Cover and bring to the boil.  Reduce heat to low and simmer for around 40 minutes, or until the barley is tender.  Make sure you stir occasionally to prevent the lentils and barley from sticking to the bottom of the pan.


Season to taste with salt and freshly ground black pepper.  The soup will thicken on standing.


As you know Sunday night is the night to use up the "scraps" - we had some of the seasoned yoghurt left over from the Salmon on Friday night  - so a dollop of that was added to the soup!!


Now there was only one problem - "The Darlings" had come home by now, and were chanting "Pizza Night, Pizza Night" - well I hate to be the one to rain on their parade - but I gently told them - no Pizza tonight - yummy vegetable soup instead!!!  If looks could kill!!!  Unbeknownst to me they had invited the neighbour to dinner - for the legendary Pizza Night!!! oops - no pizza makings to be had in the house - what is the next best thing???

Quesadillas!!!  The old Mexican Toasted Cheese Sandwich!!  I had plenty of tortillas, I had some left over meat from the Red Enchiladas the other night, a BBQ chook, sour cream, avocado and salsa.  Quesadillas it was!!

This is my version of a quesadilla (by the way you pronounce it "case a dee a" not how Matt Moran was pronouncing the other night - he may be a chef but he doesn't know how to say it!!!

For each quesadilla you need 2 flour tortillas.  Lay one as the base - top with the meat, then cover it with grated cheese, then top with the second tortilla.  I have a pizza oven so I just press it down hard on the stone, then flip it over.  The conventional way is to pan fry it, then flip it over.

Once cooked, cut into quarters and garnish with sour cream, avocado and salsa.  

The kids loved it, there were no more rumbling about no pizzas!!!  Mexican pizzas instead!

In fact, I heard our little neighbour say yum (they were quite cute actually they were all giving me scores out of 10!!) - and so this is how we introduced our Japanese neighbour to Mexican Pizzas!!  He apparently went home to ask his mum to make Mexican!!!


Maybe I should send her my blog address???

Speaking of sending out my blog address, a friend of mine introduced me today to a friend of hers as "this is CateCanCook" - she had given my address to her friend, her friend now loves the site, and cooks meals from it regularly!!  Thank you, thank you, thank you!!!  Now I really know there is someone out there reading me!!

You never know, I may just go "viral" one day after all!!!

Wednesday, May 12, 2010

Corn Chowder

Baby it's cold outside!

Faced with the prospect of coming in tonight after sport and feeling quite chilled to the bone I decided that some soup was in order - nothing warms you like a bowl of steaming soup!!

I have been making this recipe for more years than I care to mention - but I have "tweaked" it a little today - I have taken out the butter that you soften the vegetables in, and cooked them in chicken stock instead. A much healthier option than adding the unnecessary saturated fat!

Corn Chowder

4 x cobs of corn
2 x carrots, diced
1 x onion, finely diced
4 x potatoes, diced
2 x rashers of bacon, chopped into small pieces
1 x can Cream of Chicken Soup
2 cups Chicken Stock
1/2 cup milk

Place the cobs of corn in a saucepan of water and bring to the boil. Boil for a few minutes, just to take the crispness off them. Drain and cool slightly. When they are cool enough to handle slice the individual kernels from the cobs. The original recipe called for canned corn - but why would you when fresh corn is so lovely and sweet??

Into the pan add the diced onions and the chopped bacon and fry over medium high heat until the onion softens. There is no need to add any oil - the small amount of the fat in the bacon is all you need. Cook until the onion and bacon run out of their own juices - you will see - it will start to stick to the pan.

Add to the pan the remaining diced vegetables and pour in just enough chicken stock to cover them. Cook the vegetables for approximately 2-3 minutes or until they start to soften, stirring constantly.

Add the can of chicken soup and the remaining chicken stock. Simmer gently until the vegetables are soft, around 10-15 minutes. Make sure you stir regularly as the vegetables tend to stick to the bottom of the pan.

Season to taste with salt and some freshly ground pepper. Add the milk and heat through.

So tell me Dear Readers, is there a favourite recipe that you have "tweaked" over the years to make it a little "healthier"?

You know nothing makes me feel happier than to hear from one of you that you have tried one of my recipes, or that you are about to try one.

The best compliment I have received was today when one of my Dear Readers told me that I had inspired her!! Sometimes all we need is a little bit of "inspiration" to change the mundane boring job of producing a meal each night into... well, maybe an "adventure". To be enticed to try something a little bit different, something that we may not have thought about trying before. Or perhaps it is being told about something that is just so easy to prepare that it makes your life a whole lot easier.

So thank you Dear Reader - I love you!!!! I do sooo love to hear when I have helped make your meal preparations a little easier.