WELCOME TO MY KITCHEN


WELCOME TO MY KITCHEN!!
I hope you enjoy the food!!!
Showing posts with label Desserts. Show all posts

Tuesday, December 27, 2011

Christmas Ham and Dessert

OMG!

A friend told me yesterday that she doesn't glaze her Christmas ham!!! Has never had a glazed ham in fact! How can this be? I would never dream of an unglazed ham - an unglazed ham seems almost naked in my mind.  If there is one thing that typifies Christmas to me, it is that lovely, sweetly glazed ham. So moist, and sweet, and the smell of if it the oven just makes my mouth salivate. So to think of Christmas with a ham straight out of the fridge - well it just seems Un-christmas to me!

I know that last year I gave you my recipe for the best ham glaze ever, but just in case you weren't around last year, here it is again, and also a photo so you will see just how lovely our ham looked on the big day!

I really think I got it right this year. Slowly basted it, every 15 minutes or so. Did not add the chopped macadamias until the ham was nice and sticky - that way they didn't all end up in the bottom of the pan, going to waste!

The Best Ham Glaze Ever!!


1 x 365g jar of ginger, lemon and lime marmalade (I used Buderim brand)
2 tbs sweet chili sauce
2/2 cup of brown sugar
2 tbs Dijon mustard
100g chopped roasted salted macadamia nuts


Preheat oven to 150C.

Position oven shelf to lowest position in the oven.

Use a large disposable roasting pan.  Line with 2 sheets of baking paper.  Remove the rind from the ham.

Use a sharp knife to score the ham fat into a diamond pattern.  Make sure that you don't cut any deeper than about 5mm.  Place the ham into the roasting pan.


Combine the marmalade, sweet chilli sauce, brown sugar, and Dijon mustard in a bowl.

Baste the ham with a thin layer of the glaze. You want to build up the layers of sweet goodness - so take it slow, and baste frequently. Once you have a good amount of stickiness, start adding small amounts of the chopped macadamias.

Total baking time will be around 1 - 1/2 hours, don't go too long though, or you may dry out the ham.

Cover and allow to rest while you make the other components of your Christmas feast!


How lovely does that ham look???

Of course that was just one component of the meal.  Roast pork and roasted vegetables sat alongside that magnificent ham!

For dessert I decided to do a tropical version of my dacquoise.  Same base - used white chocolate instead of dark, and used different fruit.  This one had sliced fresh mango, passionfruit, chopped white chocolate and some of the chopped salted macadamias from the ham!!  To add a little zing I added dollops of home made lemon butter to the middle layer along with the whipped cream!


The dacquois certainly is a great little dessert to add to your repertoire - very versatile.  You can make the "meringue" the day before, and assemble it several hours ahead of time (this allows the meringue to soften with the cream).  Change the chocolate, change the fruit, and you have a totally new dessert!!!

I like to think of the dacquoise as the "sophisticated pavlova!!"


So there you have snippets from our Christmas dinner.  I hope you all had a lovely day with your family and friends, and most of all I hope you all had good food!!!

Saturday, December 3, 2011

A Birthday Feast!

My good friend Madam T had been left high and dry by her hubby for her birthday. Sometimes the ones we love just don't realize that even after many years together we still appreciate a little bit of love and attention on our birthiday.

After I found out that she had been stood up, and had to cancel out her reservation for dinner at Marque Restaurant, I knew I had better come up with something pretty decent for her birthday feast.

A thousand menus started rolling through my brain. I was really starting to stress myself out with this meal. I mean I am no Mark Best! Saying that though, all I could do was do my "best".  I had mentioned to her something about salmon, so when I asked her in a moment of sheer panic "what do you want?" her reply was I thought we were having salmon? Ok, focus, just pick something, and go with it!

For starters I chose a simple dip.

Roasted beetroot hummus with dukkah. This of course was a little risky, because as Thermomix consultants we make hummus pretty much on a weekly basis, if not almost daily!! So you often can be a little tired of the sight of it. My version though was a beautiful pink colour, and of course hard to resist.

Roasted Beetroot Hommus

1 large Beetroot, roasted at 200 degrees for 30-40 minutes, or until tender
1 clove garlic
1 can chick peas, drained
Juice of 1 lemon
Salt and freshly ground black pepper to taste
2 tbs tahini

Place the garlic in the TM process on speed 7 for 3 seconds. Add remaining. Ingredients and process on speed 6 for 10 seconds, or until the texture is to your liking.

Sprinkle with some dukkah, and voila, a beautiful pink dip!


So now onto the main. We are supposed to be in summer now, but I think that someone in the weather department has forgotten to set the thermostat to summer heat! Unfortunately I had decided to have a cool salad type meal, too late now - it will just have to do.


Baked Salmon with Tahini and Herb Salad
From Delicious Magazine, December/January edition

Serves 3-4

Side of salmon, skinned and pin boned (mine was approx 600g)
1 tbs extra virgin olive oil
1 tbs tahini
1/2 cup thick Greek style yoghurt
1 tbs lemon juice
2 tsp sumac
2 preserved lemon quarters, flesh and pith removed and discarded, rind finely chopped
1 bunch coriander, leaves finely chopped
1 bunch flat leaf parsley, leaves finely chopped
50g toasted pine nuts

Preheat oven to 140 degrees. Line a large baking tray with baking paper. Place the salmon on the tray, sprinkle with the olive oil. Season well with sea salt and freshly ground black pepper. Bake for 20 minutes. Remove from the oven, cool completely.

Meanwhile, combine yoghurt, tahini, lemon juice and 1 tsp sumac, and season well with salt and freshly ground black pepper.

In a separate bowl, combine the preserved lemon, herbs, pine nuts, and the remaining 1 teaspoon of sumac together.


To serve place the fish on a large platter, spread the yoghurt and tahini mixture over the fish, and then scatter the herb mixture over the top of the yoghurt mixture.

So now what to serve with that - the recipe suggested roasted potatoes, but on the next page of the magazine there was a recipe for quail with a broad bean and tomato salad it looked really nice, so I decided to pair it with the salmon.

Broad Bean and Tomato Salad


400g tomato medley
1 clove garlic, crushed
1 tbs olive oil
1/2 red onion, finely sliced
1 tbs honey
1/2 tsp ground cumin
1/4 tsp ground cinnamon
200g broad beans, prodded, blanched, refreshed
1 bunch miniature asparagus

Preheat the oven to 200 degrees. Line a baking trade with baking paper. Place the tomatoes, garlic and onion, and asparagus on the tray, drizzle with the honey and oil. Scatter with the spices, then roast for 30 minutes, or until the tomatoes have softened. Allow to cool. Toss the cooled roasted tomato mixture with the broad beans. Season.


Arrange the vegetable salad around the fish.


But wait, there's more.....

I wake up every morning and read my emails, and drool over the latest food porn awaiting me in my mail box (via Food Buzz). One particular morning this led me to a food blog called Manu's Menu. What a lovely site. It certainly got my interest, because as you know I am heading off to Italy next year, and here on her blog Manu had some lovely Italian cuisine.  One recipe that caught my eye was one for Foccacia di Recco.  Manu went on to say that the foccacia that we usually eat (the fluffy kind) is not traditional. Her photos convinced me that I had to try this type of Foccacia - and let me tell you after eating her version - I am converted. It was absolutely delicious!  Oops - I forgot to take a photo - but Manu has some lovely photos on her site!

I urge you to visit her blog and try the recipe!!!

Right that was the main course over with - but it's a birthday, and what is a birthday without a sweet treat!!!

I had recently made some home made lemon curd, so I was keen to incorporate this somehow into a dessert.  Here is what eventuated!


Hazelnut and Chocolate Dacquois with Lemon Curd and Fresh Berries

4 egg whites
1 tsp white vinegar
200g caster sugar
50g hazelnuts, toasted, finely crushed
100g dark chocolate, finely grated

Vanilla Bean Whipped Cream
Lemon Curd
Blueberries
Strawberries

Preheat oven to 150 degrees.

Lightly grease and place baking paper in the base of muffin pan (with removable bases) or grease egg rings, and place on a baking tray.

Make sure that your bowl and blades are completely clean, or the egg whites will not whip up.

Place egg whites and vinegar in to the TM bowl (or electric mixer).  Whip until the egg whites have soft peaks.  Gradually add the sugar, beating well after each addition.  When the mixture is thick and shiny. gently fold in the nuts and chocolate.

Place the mixture into the prepared pans (rings).

Cook the meringue for 10-15 minutes, or until firm to the touch.  Allow to cool in the oven, with the door slightly ajar.

To serve slice the meringue in half horizontally, using 3 pieces for each dessert stack.

Place on section on serving plate, top with a dollop of whipped cream.  Place second meringue disc on top of the cream.  Place a dollop of lemon curd on the meringue, along with another dollop of whipped cream. Top with another meringue disc.  Top with a little whipped cream, and then add several blueberries.  Place some sliced strawberries and a dollop of whipped cream on the side.  Dust with a little icing sugar.


I am pretty sure, that even though this meal was not up to par with Marque, Madam T was pretty pleased with her birthday feast.  Happy Birthday my friend!!!

To team up with the birthday celebrations, I was lucky enough to receive this week, The Editor's Pick, Fantastic Foodie award!!!

Friday, July 22, 2011

Rhubarb, Strawberry and Hazelnut Cake with Vanilla Bean Whipped Cream

I was on dessert duty the other day.  Actually I was on more than that, but I was coming down with the dreaded "lurgie" and I couldn't think, let alone contemplate what I was going to make.  In fact, I was not even sure I was going to attend the event - but you know, sometimes you have just got to go the extra mile!!  Especially when there are birthdays (and death anniversaries) involved!

I had about a million ideas running through my head of what I thought I was going to make for dessert - but as for motivation.... zipo, zilch!!!  I unfortunately or fortunately depending on how you look at it,  had to make a mad dash to the local fruit and vegie shop, and it was there that I found the recipe for a Rhubarb and Hazelnut Cake.  It looked interesting.  I had all the necessary ingredients.  I also had some strawberries, that I was going to do something else with, but had just never got around to it.  Perhaps we can combine them all???

So here is what eventuated.....


Rhubarb, Strawberry and Hazelnut Cake with Vanilla Bean Whipped Cream
Adapted from a recipe found on a card produced by Sydney Markets

Serves 8

125g butter, softened
1 cup caster sugar
2 eggs
2 cups self raising flour
1/2 cup milk
100g roasted hazelnuts, roughly chopped
1 bunch of rhubarb, trimmed, washed, cut into 2cm lengths
1 x 250g punnet strawberries, hulled and quartered
2 tbs icing sugar

Preheat oven to 160 degrees C.  Grease and line a 22cm round springform pan with baking paper.

Either with electric beaters (or in the Thermomix) beat the butter and caster sugar until light and fluffy (in TM speed 5 for approximately 1 minute - scrape down bowl and repeat if necessary).  Add eggs one at a time, beating well after each addition.  (TM - still on speed 5 - for approximately 15-20 seconds).

Gently fold in flour, milk and half of the hazelnuts (speed 2-3 - 10-20 seconds).

Spoon mixture in to prepared pan.

Evenly top the cake batter with the rhubarb and strawberries.  Sprinkle with the remaining hazelnuts.  Gently press the mixture into the cake batter.


Bake for 1 hour or until the cake is cooked when tested with a skewer.

Cool for 5 minutes in the pan, then turn out onto a wire rack.  Dust with icing sugar.


Serve warm with Vanilla Bean Whipped Cream (or Thermomix Vanilla Bean Custard!!!)


Vanilla Bean Whipped Cream

500ml Whipping cream
1 tsp vanilla bean paste
2-3 tbs icing sugar

Whip cream until soft peaks form.  Add the vanilla bean paste and icing sugar.  Continue whipping until stiff peaks form (dont't go too far - or you will have vanilla cream butter!!!!)

Enjoy!!

So tell me Dear Readers do you have times when you just can't get your head around what you are going to make, and wander aimlessly until an idea lands literally right in front of you!  Please tell me it isn't only me?!

Monday, January 24, 2011

Cashew Crusted Lamb Racks with Nashi Pear Salad

Now before you all comment that this is not diet food, let me say this in my defence.  Taking into consideration what I had eaten (or should I say not eaten) yesterday I felt an little indulgence was in order - besides this rack of lamb had been sitting in my freezer for several weeks, calling out to me each time I  opened the freezer.  It constantly beckoned me with it's sweet dulcet tones.... "You know I am going to be sweet and succulent and beautiful - please eat me, eat me!!"  Who could resist it any longer??


Cashew Crusted Lamb Racks


Serves 2

2 x 3 chop each racks of lamb *
150g savoury honey cashews **
2 tbs Buderim ginger marmalade (150g) **
2 x green shallots

Preheat oven to 180C.

Place the cashews, marmalade and shallots in the food processor/TM bowl.  (Process speed 7 for 10 seconds, scrape down bowl, then another 10 seconds), or in a food processor simply process until it forms a thick paste.


Spread over the lamb.  Bake on a baking tray for 25-30 minutes for medium/rare, or until the crust is golden and the lamb is cooked to your liking. * Keeping the rack whole will result in a "pinker" piece of meat - if you like it cooked a little more I suggest you cut into serving sizes and cover each piece in the crust and cook individually.  I like my meat with a lot of pink - so this amount of cooking was perfect for me.


Nashi Pear Salad

baby spinach leaves
2 x nashi pears, sliced
fresh mint leaves, roughly torn
shaved parmesan cheese

Nashi Pears

With the left over cashew paste in the food processor bowl - add a small amount of white balsamic vinegar, and a splash of olive oil to make your salad dressing.  Process for a few seconds until combined.  Reserve.


Mix together the spinach with the mint leaves, then add the sliced nashi pear.  Top with parmesan shavings, and a small amount of dressing.


** Often I am asked for particular brands of ingredients that I use - these are the "crust" ingredients".  If you are unable to find these particular brands, substitute regular cashews, and whatever type of marmalade suits your fancy.


Serve the lamb racks with nashi pear salad and some smashed potatoes (click here for recipe).


Was it worth the sacrifice of only carrot sticks and hummos for lunch?  OMG yes!!! It was beautiful - sweet, juicy, and oh so tasty!

Now you know that after a lovely meal like that you are going to want some dessert don't you?

The beauty of owning a Thermomix is that you can whip up lovely little sweet treats in seconds - whether it be a custard, or a sorbet.  Now there is not much in a fruit sorbet so I decided a little "Blueberry Fruity Dream" was in order (I only had a small amount - just enough to satisfy that craving for sweetness).

I think it will actually take me longer to tell you about the Fruity Dream than it took to make it!!


Fruity Dream
From Everyday Cooking for Every Family Cookbook

45g raw sugar
300g frozen fruit of choice (blueberries)
1 egg white

Place sugar into TM bowl


Pulverise for 20 seconds on speed 9.


Add fruit and chop for 10 seconds on speed 8.  Scrape down sides of bowl with spatula.

Insert Butterfly and add egg white and mix for 45 seconds on speed 4, or until you have a soft consistency.


This is a lovely soft serve dessert.  Great to whip up for the kids on a hot afternoon as a treat too!  (I should know, I made a batch up for mine and a few of the neighbourhoods kids - it got the thumbs up!!!)

So Dear Readers, even though I look like I truly indulged, I still managed to loose weight this day!!!

Saturday, December 11, 2010

Thai Chicken Meatballs and Caesar Salad with Dukkah Prawns

It's beginning to feel a lot like Christmas!!!

I managed to get all the kids in one place this week for the annual Santa photo - yes of course there was lots of protests - but we finally got it done!  That makes 22 years of Santa photos now - it's so lovely to see how they have all grown over the years.  There are many protests that this tradition should stop - but I hope that it won't for a little while yet.

In the lead up to Christmas, Madame T and I decided that it was time to get together for a girls night in and a drink or two to celebrate "The Silly Season".  I fed "The Darlings" earlier and we settled in for a nice meal and a glass or two of white together.

We started off the night with.....


Thai Chicken Meatballs with Chilli Lime Dipping Sauce
Adapted from a recipe in Super Food Ideas December Issue

Makes 32

2 x 375g packets chicken sausages with lime and spices *
1 cup sesame seeds
3tbs finely chopped fresh coriander leaves
1 double kaffir lime leaf, finely shredded
Juice of 1 lime
1/2 cup sweet chilli sauce

Squeeze the meat from the sausages into a bowl.  Add 2 tbs of chopped coriander and the kaffir lime leaf.  Mix well.

Place the sesame seeds onto a plate.

Using 2 teaspoons make little meatballs out of the chicken mixture.  Drop into the sesame seeds.  Roll to coat well.  Repeat until all meat is used up.  Place on a plate and cover with plastic wrap, and refrigerate for 20 minutes.

To make the dipping sauce combine the lime juice, remaining tablespoon of coriander and sweet chilli sauce in a small bowl.

To cook the meatballs you can either shallow fry them in a little oil, or you can do what I did and bake them in the oven.  Preheat the oven to 180 degrees.  Cover a baking tray with baking paper - spray the paper with garlic infused olive oil spray.  Place the meatballs on the tray and spray them liberally with the garlic spray.  Bake for approximately 10-15 minutes, or until golden and cooked through.

Serve with the Chilli Lime Dipping Sauce.


Very yummy, and incredibly easy - so if you are asked to take a "plate" somewhere this is a really easy one.

* These sausage are prepacked with Lime and spices, (Peppercorn Ridge brand) but if you are unable to find them simply use plain chicken sausages and to the meat add some chilli, a little more chopped coriander and zest the rind of the lime into the mix and you will have a pretty fair approximation.

After the meatballs had gone down it was time for my salad.  I made this recipe last year and remembered it to be really good - but do you think I could find the recipe.  I searched high and low, even googled prawn caser salad - but still could not find it!!  Eventually it turned up - and the reason I couldn't find it was that it was called Caesar Salad with a Twist - well the "twist" today was going to be my own personal modifications to the recipe.


Caesar Salad with Dukkah Prawns
Adapted from a recipe in Woolworths' Fresh Magazine August 2009

Serves 4


Dukkah Mix

100g slivered almonds
70g sesame seeds
2 tsp ground cumin
2 tsp ground coriander
1 tsp sea salt
freshly ground black pepper

Toast the almonds in a frypan over medium heat for approximately 5 minutes, or until golden.  Remove from pan and allow to cool.  Add the sesame seeds and toast for 3-5 minutes, or until golden.  Add the cumin and coriander and stir for approximately 1 minute, or until fragrant.  Remove from the pan.

Place the almonds in a food processor and "pulse" chop until they are cut up into small pieces - do not go too far - you don't want them as small as "meal".  Add the sesame seed mixture, salt and pepper, then "pulse" to combine.

Place in a shallow plate.


Now for the Salad...

800g green banana prawns, peeled and deveined, tails intact
1 cup greek style yoghurt
100g sliced prosciutto
2 x baby cos hearts, washed and torn
1/2 cup shaved parmesan cheese

Caesar Dressing

1 cup whole egg mayonnaise
1-2 anchovy fillets, finely diced
2 tsp worcestershire sauce
2 tbs lemon juice
1 clove crushed garlic
1 1/2 tsp very finely grated parmesan cheese
salt and freshly ground black pepper

Combine all the above ingredients in a small bowl, refrigerate until needed.

Place the prosciutto onto a paper lined plate and cook in the microwave, in 1-2 minute intervals, until the prosciutto is crisp.  Allow to cool, then tear into small pieces.

Place the torn up cos leaves in a large salad bowl.

Dip each prawn into the yoghurt, then press into the dukkah mix.  Place the prawns on a plate until all are coated in dukkah.  You can prepare these in advance and leave in the fridge until you are ready to cook them.

Heat a large frypan and approximately 1cm of canola oil in a large frypan over medium high heat.  Cook the prawns several at a time in the oil for 2-3 minutes, or until the prawns are golden and cooked through.  The secret here is to have sufficient oil that they are going to cook quickly - if you don't have enough the coating will start to fall off.  Drain the prawns on a paper towel and continue until all prawns are cooked.

Place the cooled torn up pieces of prosciutto into the bowl with the lettuce, add enough dressing to coat the lettuce and toss to combine, add the prawns, toss lightly again, and then sprinkle the salad with the shaved parmesan cheese.


Now I can hear you asking how did we finish off this meal - with a little Mango Ice cream of course!!!  I still had some of the Mango and Toffee Macadamia Ice cream in the fridge so we treated ourselves to small helping of this just to round off our pleasant evening together.  (You will find the Mango Ice Cream recipe in the desserts section).

It was so pleasant to just sit and chat and enjoy a girls night in together, away from all the hustle and bustle that it out there at the moment in the lead up to Christmas.

So Dear Readers do you love to be out there in the thick of all the celebrations - or do you like to have a quite little get together at home where you can relax and let your hair down?

Sunday, November 28, 2010

Mango & Toffee Macadamia Ice Cream

I saw this recipe in the December issue of Good Food and just knew that I had to make it.

It had all my favourite things in it - mangoes - white chocolate and scorched macadamias!!! Yum!!  I did cheat a little - eliminated a step from the recipe (I bought the scorched macadamias rather than making them myself - but I will give you the recipe in it's entirety just in case you are not near a nut shop that sells the macadamias already done!!)


Mango and Toffee Macadamia Ice Cream
Recipe from Good Food Magazine - December issue

Serves 8

40g butter
200g salted roasted macadamia nuts
100g (1/2 cup) caster sugar
2 litres good quality vanillla ice cream
200g (I used 250G - why waste the rest of the block!!) white chocolate, finely chopped
2 mangoes, cheeks removed, peeled, finely chopped.

Line a baking tray with non stick baking paper.   Melt the butter in a large frypan over medium high heat.  Add the nuts and sugar.  Cook, stirring often, for 4-5 minutes or until the sugar dissolves and is golden.  Spread over the prepared tray.  Set aside for 30 minutes or until set.  Chop coarsley.

Line a 20 x 10cm loaf tin with plastic wrap  - allowing the sides to overhang.(I actually used a 23x27cm tin - and it was perfect - filled to perfection!!).

Transfer the ice cream to a large bowl.  Set aside for 10 minutes to soften.

Stir in the chocolate, and half the nut mixture.  Stir in the mango.  Spoon the ice cream mixture into the prepared pan and smooth the surface.  Fold over the overhanging plastic wrap.  Place in the freezer overnight, or until firm.


Turn onto a chopping board.  Unwrap and cut into slices.  Divide among serving plates.  Top with remaining nut mixture.


If you have ever had a Weis Mango bar - this is just like it - only better!!!

As I went to serve this last night Mr. CCC told me he didn't like mangoes - oh well, all the more for me!!!!  Funny how you can live with someone for years and assume that just because you love something they do too!  Is there something that you have discovered after many years that your partner did not like???

Tuesday, September 14, 2010

Gnocchi with Meatballs and Brown Bread Ice Cream

We had a bit of a disjointed weekend this weekend - or should I say hectic.  I was watching one of "The Darlings" compete at an athletics carnival all day Friday and then we flew to Byron Bay for the weekend to celebrate a milestone birthday in the family.  So, not a lot was prepared in the food department this weekend, and not a lot of preparation (read grocery shopping) was done either!

Needless to say yesterday, although feeling a little wiped out from the weekend, I decided that a little time in the kitchen would fix that.  I had one of "The Dalrings" home yesterday - he too was wiped out!!  I asked him what he would like for dinner, and the response was gnocchi!!  What should I do - the usual spag bol type thing, or something creamy????  I had the gnocchi already, and most of the things to add whichever way I went - just needed to decide on the meat.  After wandering aimlessly in the meat department I stumbled upon these..


They were on special too - 2 packs for $8.00!!  Bargain.  So it was decided Gnocchi with meatballs.

This is the quantity that I made - it made a lot - enough for 6 with leftovers!!

Gnocchi with Meatballs


Serves 6


2 x 500g packets of sausages of choice 
1 x 500g bottle of good quality pasta sauce
1 x 400g can chopped tomatoes
1 x onion, finely chopped
2 cloves crushed garlic
150g bacon, diced
1 large zucchini, quartered, then cut into chunks
3/4 cup of frozen peas
2 x 500g packets gnocchi (shelf kind or fresh)
150g grated cheese
100g grated parmesan cheese


Preheat oven to 180 C.


Make a small cut in the end of the sausages, and squeeze out small amounts to make little meatballs.  Gently fry in a non stick frying pan over medium heat for approximately 5 minutes, or until cooked.  Remove from pan, and place on a plate that has been lined with a paper towel to remove any excess fat.  Repeat with remaining sausages, until all cooked.


Now cook the onion, bacon, garlic for approximately 3 minutes, or until the onion starts to soften, now add the zucchini and peas and cook for a further 3-4 minutes, or until the zucchini starts to soften, and the peas are no longer frozen.


Add the pasta sauce, tomatoes, and the sausages.  Season to taste with freshly ground black pepper, and any salt if needed.


Cook the gnocchi according to directions on the packet.  Drain.


Place the sausage, tomato mixture into a large ovenproof dish.  Cover with the gnocchi, then top with the grated cheeses.  Bake in the oven for approximately 15-20 minutes, or until the golden on top.


There you have it a really easy meal.  Of course "The Darlings" picked out the green things - but oh well, such is life!!!  I am resigned to the fact that they will never eat a green thing!!!

And for dessert ........

Brown Bread Ice Cream


2 litres of good quality vanilla ice cream 
150g fresh brown/wholemeal bread (approx 3 slices)
150g brown sugar
50g caster sugar


Leave the ice cream out of the freezer for approximately 30 minutes, depending on weather - or until/ soft enough to incorporate mixture with a spoon.


Preheat oven to 200 C.


Line a baking sheet with baking paper.


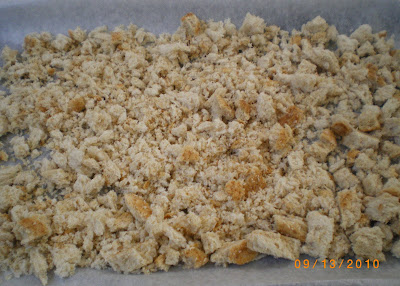
Process the bread into breadcrumbs.  Lay out on the baking paper.  Sprinkle the sugar over the top of the breadcrumbs, making sure that there is sugar all over the crumbs.


Bake in the oven for 8-10 minutes, or until the sugar starts to caramelise.  Now be very careful here - it may take a little longer - but once the sugar starts to caramelise it turns very fast.  Mine actually "caught" around the edges - but that's ok - just take the middle bits - there are heaps of crumbs!


Allow the crumbs to cool.  Break apart into small chunks.  Place the ice cream into a large bowl, and carefully incorporate the crumbs into the ice cream, working fast so that you don't end up with a sloppy milk mixture!!


Put the ice cream back into the container, and freeze for several hours (at least 6).


Serve with fresh strawberries.


You really must try this.  It doesn't taste anything like what you think it will.  The brown bread turns into crunchy toffee - and unless you are told, you would probably never guess it was actually bread in there!!

Sunday, August 15, 2010

Slow Roasted Pork Belly and Rhubarb and Strawberry Crumble

Don't you just love pork belly?  It seems that now matter how you cook it, it is always good.  The males in this house start drooling as soon as I even say the word pork belly!!

I found a recipe in August's Good Food Magazine - it looked really easy - just took a little bit of prep and a lot of cooking.  Now this is definitely a weekend dish - you need to rub the spices into the skin and leave it for several hours, plus it takes around 3 hours in the oven - so it's not a dish you can whip up on quickly a weeknight!!


Slow Roasted Pork Belly


Serves 6


1 tsp cumin seeds
3 star anise
1 tsp fennel seeds
1 1/2 tbs sea salt
1.5kg piece pork belly, skin on, scored
12 eschalots, peeled
12 cloves garlic, whole


Coarsely grind the cumin seeds, star anise, fennel seeds and the salt in a mortar and pestle.  Rub the spice mixture into the skin of the pork.  If possible do this several hours ahead of time - leave in the fridge.  This helps draw out excess moisture and produces a really crisp crackling.


When you are ready to bake.  Preheat the oven to 140C (fan).  Place the pork, skin side down in a heavy based roasting pan.  Roast for 2 hours.  


After the 2 hours, increase the oven temperature to 220C (fan).  Turn the pork over so that the skin is facing up.   Add the eschalots and garlic to the roasting pan.  Roast, basting regularly with the pan juices for another 30 minutes, or until the skin is lovely and crispy. **


Remove from the oven and rest for 10 minutes.


While the meat is resting make the gravy.


Gravy


1/3 cup white wine
1 cup chicken stock


To make the gravy, heat the baking dish over medium heat.  Add the white wine, scraping the sediment from the bottom of the pan.  Simmer until reduced by two thirds.  Crush the eschalots and garlic and pour in the chicken stock.  Bring to the boil and cook for 5 minutes, or until reduced by half.


** At this time if you are making roast potatoes add them to the oven.  Roasted Kipfler potatoes are really good.  Kipfler potatoes are lovely golden fleshed, waxy potatoes.  Simply peel, toss in a little olive oil and crushed garlic, then roast for 30 minutes.  


Another good addition is some baked apples.  Peel and core 3 granny smith apples, make 3 individual squares of foil place an apple in each square.  To the apple add several knobs of butter, and 1 dessertspoon of brown sugar and a small handful of sultanas.  Wrap tightly and bake in the oven for 30 minutes.

Now after this lovely roast dinner you just have to have dessert right?  What could be better than a Rhubarb Crumble??

Rhubarb and Strawberry Crumble


Serves 6


1 bunch of rhubarb, leaves removed, cut into small segments
1/3 cup caster sugar
1 punnet of strawberries, hulled and cut in half
2tbs caster sugar, extra


Crumble


150g butter, chilled, cut into small pieces
1 cup rolled oats
1 cup plain flour
1/3 brown sugar
pinch of cinnamon


Place the rhubarb pieces in an ovenproof dish, sprinkle over the sugar and leave for an hour.


Preheat the oven to 180C (fan).  Cover the rhubarb and bake for 20 minutes, or until he rhubarb starts to soften slightly.  Add the strawberries and extra caster sugar, mix well and bake for a further 10 minutes.


While the rhubarb and strawberries are cooking make the crumble mixture.


Add all crumble ingredients to a bowl.  Using your fingertips gently rub the butter between the tips of your thumbs and fingers, so that the butter flattens and combines with the flour.  While rubbing, lift your fingers above the bowl to allow air to cool the butter.  Make sure you work quickly to prevent the butter from melting too much.


Place the crumble mixture on top of the cooked fruit.  Bake for 15 minutes, or until the crumble is lovely and golden.

Serve with vanilla ice cream.


Baking the rhubarb as opposed to stewing it results in a lovely rich rhubarb flavour.

ps - I think I am going to have to sack my food stylists - they didn't style this dish too well did they???

Monday, July 5, 2010

Sticky Date Pudding

Saturday night's dinner was a bit ordinary.  Crumbed pork cutlets - nothing to write home about!  But dessert  was Sticky Date Pudding - who doesn't love a Sticky Date Pudding??

I found this recipe in the latest edition of Good Food - it is a really easy recipe.  I must say I am also in love with my new individual dessert pans - they make it sooo easy!!


Sticky Date Pudding 


Makes 1 large dessert - or 10 individual desserts 


1 1/4 cups chopped pitted dates (200g)
1 tsp bicarbonate of soda
60g butter, at room temperature
3/4 cup caster sugar
2 eggs
1 cup self raising flour, sifted


Butterscotch Sauce
3/4 cup (185ml) light cream
3/4 cup firmly packed brown sugar
150g butter, chopped


Vanilla Ice Cream to serve


Preheat oven to 180C or 160C fan forced.  Grease and line the base of a 20cm round cake pan.  Or if using individual pans (1/3 cup capacity) - spray lightly with non stick spray.


Heat the dates and 1 1/4 cups of water in a saucepan on high.  When starting to boil, add the bicarb soda and remove from the heat.  Stand for 5 minutes, then blend until smooth. (I just stirred with a spoon - I like chunky bits of dates in my pud!!)


Using an electric mixer, beat the butter and sugar until light and fluffy.  Add the eggs one at a time, beating well after each addition.  Fold in the flour and date mixture until just combined.


Pour into the prepared pan/s.  If baking as one large pudding bake for 40-50 mins.  If baking as individuals bake for 15-20 minutes - or until a skewer inserted comes out clean.


Stand for 5 minutes, then turn out onto a wire rack to cool slightly.


Meanwhile, stir the butterscotch sauce ingredients in a pan on medium heat for 5 minutes, or until sugar dissolves and the sauce is smooth and heated through.


Serve the pudding topped with ice cream and drizzled with sauce.

Heaven on a cold winter's night!!!  I had mine by the fire!!!

Monday, June 14, 2010

A Special Treat - No Cooking for Cate!!

Yesterday I was lucky enough to have the day off from cooking.  We had been invited out for lunch!!  What a glorious day it was too - and if you picked the right place in the sun you almost forgot it was winter!

My Brother, quite the experimental chef, was doing all the hard work - I didn't have to lift a finger!  So what did we have for lunch - a lovely BBQ'd shoulder of lamb, his version of my smashed potatoes, and another interesting dish "buggered beans"!?  Here are his recipes that he would like to share.


BBQ Shoulder of Lamb
This recipe was one that has been advertised in the Masterchef magazine, Julie's Fountain recipes.

Prep time: 10 minutes (plus marinating time - I marinated overnight and was happy with the results)
Cooking time: if BBQ'ing 30-45 minutes, I roasted then finished off bbqing.
Serves:- below serves 6 nicely


1 Tablespoon of fennel seeds
1 Tablespoon of coriander seeds
1 Tablespoon of cumin seeds
3 cloves of garlic, crushed ( I finely chopped, my preference as it chars off it becomes little nutty chunks)
1 Tablespoon of hot chilli sauce
2 Tablespoons of mustard sauce
1.5-2kg of deboned shoulder of lamb. (yesterday we had about 3kg). (So I went 1.5 times the amounts stated of the ingredients).

Place the spices into a dry frying pan and cook over medium heat for about a minute, until 
spices start to smell. Cool, then grind in mortar and pestle or processor. I went for a medium 
grind consistency. Combine with garlic, chilli sauce and mustard sauce and mix thoroughly.


Score meat and smear the marinade all over the meat, then place in a sealable plastic bag 
and refrigerate for desired time. a few hours is ok, but if you want the meat to fully infuxe the 
flavours, then overnight I reckon is best.  


Remove meat from the refrigerator about an hour before you want to cook, this allows the meat to   
normalise to room temperature. Preheat a covered BBQ to ~180C. Place meat on the grill and close the 
lid. I actually trussed the meat up, roasted it slowly for a couple of hours, then cut the strings and 
splayed it out to finish the centre (just to satisfy those who don't like their lamb still Baa'ing at them). 
The outside surface of the meat should have a nice dark colour to it almost like a crust. Abvously 
cooking time varies depending on how you like your meat and the technique you use. I cooked this 
way in total for 2.5 hours, but if I had BBQ'd only, time would hve been reduced to probably around 
an hour for the size of the meat I was cooking. Rest the meat for 10 minutes before carving into nice generous slices.


Cate's Smashed Potatoes - Stuart's Style Follow Cate's recipe, then: - 


Finely chop a few cloves of Garlic. nice and small 


Finely chop fresh thyme about 1 sprig, nice and fine is best (possibly dried would be ok?) 


Grated fresh parmesan cheese 


Spray potatoes with olive oil spray, sprinkle the garlic and thyme generously on spuds. 


I also placed in the tray some Grape Tomatoes and roasted these slowly, beautiful. towards the end, I 
sprinkled the parmesan to melt stlightly. 


Buggered Bean's why buggered beans? buggered if I can think of another name? 


1kg green beans, topped and tailed, cut into 5cm lengths roughly
1 tablespoon sesame oil
500g sliced mushrooms
200g unsalted cashews
pinch dried chilli flakes - fresh would be fine, but regulate for how much heat you like
2 cloves garlic finely chopped
1 teaspoon finely chopped Thyme


Blanch beans in boiling water for 3 minutes, just to soften slightly - drain and cool. 


Heat sesame oil in wok, and soften the mushrooms, keep them moving.


Add the garlic, chilli and thyme and heat through the mix before adding the beans. Keep the mix    
moving 3 minutes to heat through nicely. You want it all to be still slightly crunchy to the mouth when 
you eat.


Add the cashews and toss through to roast off the cashews slightly. Cashews should start to colour 
from pale to light honey colour, they just soften at this stage, but cruch to the bite. 


Serve, sit, pour a glass of your favourite wine or Ale. Relax and eat. Then.....


Stu's Apple Crumble (serves 4) 6 Granny Smith Apples
3/4 cup brown sugar
1 teaspoon ground cinnamon
1/2 cup sultanas
splash of cointreau (to your liking and taste)


Crumble Topping
1 cup plain flour
1/2 cup white sugar
100g butter, softened


Preheat oven to 200C, slice the apples into thin wedges and place in a bowl with the sultanas, brown 
sugar and cinnamon. toss to combine evenly. 


Place apple mix into a 4 cup capacity baking dish, splash your preferred quantity of the cointreau over 
the mix, then cover with foil and bake for 40 minutes. 


For the topping, place the flour, white sugar and butter in a bowl and rub together with your fingertips 
until the mixture resembels a course breadcrumb texture. 


Remove the foil from the dish and spread your crumble evenly over the apple mix. 


Bake for a further 20-25 minutes or until golden. Serve with ice cream or cream. 


And there you have it - a meal fit for a King or Queen!!  I tell you there wasn't much left over!!  Well done Bro, another success!!  Must run in the family....... 


Cate Can Cook, But So Can Stu!!!  


ps - I'm not changing the blog name - you can get your own and we can duel it out over a hot stove!!!
xxoo