Tuesday, August 30, 2011

Cocobella Coconut Water

I recently signed up to be part of a taste test for a new range of drinks called Cocobella.

I do drink sports drinks after a session at the gym, and one of my favourites is NutrientWater, so I was pleased when I learnt that Cocoabella is made by the same people.

Luke Brad and Matt, three 20 something year old school mates began their career back in 2005 by launching NutrientWater, and along their hydration drink journey their discovered the wonderful properties of young coconut water, and hence a new journey began for them.

Since reading their website I have found out much about coconut water.


So what is Cocobella, and why would you drink this drink as opposed to regular sports drinks?

It is the clear fluid that is found in young coconuts (before they turn brown and the fluid turns to coconut milk).  It is high in five essential electrolytes - potassium, magnesium, calcium, sodium and phosphorous, which are important when replenishing the body after strenuous activity.  It in fact has 3 times the amount of essential electrolytes that are found in other sports drinks on the market, and has been dubbed "Natures Own Sport's Drink".  Not only that but it is also low in calories, and has zero fat, cholesterol or preservatives.   If you are a fan of the "Coconut" flavour, then this is definitely a product you should give a try.

Cocobella is produced in Indonesia and the plantation is fully sustainable.  It is packaged in tetra paks which not only protects the product, but is environmentally friendly in many ways.  So as we replenish our body we can feel good about the product we are consuming as well.

So what about the actual drink?

In all fairness I am not a huge fan of coconut flavoured drinks - so I was very keen to try these products.

There are three flavours - Pink Guava, Mango and Pineapple and then there is the "straight up" version.  The Mango was my favourite flavour.  There was a lightness of coconut flavour, with a hint of the mango flavour.  The strongest flavour I thought was the Pineapple one - and to me it did not seem as thirst quenching as the others.

Would I go out of my way to buy these products?  I think I in all honesty I would have to say no.

Not only was the flavour not a clincher for me, but the drinks come in 250ml packs and cost $3 - which puts them at the pricy end of the spectrum for me.

While I was not a huge fan of these drinks, I am sure that there will be many out there who will love these drinks, and that they will be a good addition to the drink market come Summer.

I thank Nuffnang for the opportunity to taste test these products as part of their Product Talk program.


Friday, August 26, 2011

Salmon with Sweet Pea Puree

The other night just as I was preparing dinner "The Darlings" came and told me that they have been invited next door for dinner!!!

At first I was a little miffed - I had just been to the market that day and had bought their favourite - salmon for dinner!  I'm thinking to myself that's a few dollars worth of salmon going to waste.

Calm down, and take a breath.  Think about this logically - there are now an additional 2 pieces of salmon that can go in the freezer for another night, and you now only have to cook one version of dinner instead of two!  Which when I started getting my head around the recipe that I had chosen, was possibly for the best.

Once again I had been suckered in with a beautiful photo - it looked so good - lovely spring inspired colours.  In my usual way I had only looked over the ingredients, and then looked at the photo.  No need to bother with the method (well not yet anyway).  It's not that the method was tricky, it's just that there were several elements involved (as you would expect in MasterChef the Finale magazine!!!).

The recipe is a Shinichi Maeda dish from Shaun Presland's Sake restaurant in Brisbane.  I know that I definitely didn't nail the dish exactly - but as usual I gave it my own interpretation.  One major difference being that I used Salmon instead of Ocean Trout!!!


Salmon with Sweet Pea Puree
Adapted from Shinichi Maeda's Recipe - found in MasterChef Magazine - September edition

Serves 4

2 tbs peanut oil
4 x 150g pieces salmon(ocean trout) pin boned, skinned
100g enoki mushrooms, trimmed, separated
100g oyster mushrooms, halved
100g shitake mushrooms, stalks trimmed, thinly sliced
snow pea tendrils, or watercress to serve (I used baby spinach)

Soy Butter
125g butter at room temperature, roughly chopped
1 bunch chives, finely chopped
80ml (1/3 cup) Japanese Soy Sauce or tamari

Sweet Pea Puree
10g bonito flakes
1 rasher short cut bacon
1tbs peanut oil
200g frozen peas or podded soybeans (edamame), thawed (I used edamame)
50g butter, finely chopped

Steamed rice to serve


To make the soy butter use an electric mixer, and beat butter for 5 minutes, or until pale and doubled in volume,  Add the chives, reduce speed to low, then gradually add soy sauce and beat until well combined. Place butter in a 10cm long line on a sheet of foil and roll into a log.  Twist ends tightly to enclose, then freeze for 20 minutes or until firm.  Refrigerate until needed.

Meanwhile, to make the dashi stock for the sweet pea puree, place 180ml (3/4 cup0 of water in a small saucepan and bring to the boil over high heat.  Remove from the heat, add bonito flakes, then stand for 5 minutes to infuse.

To make the sweet pea puree, heat oil in a small saucepan over high heat.  Add bacon and cook for 1 minute each side or until golden.  Drain on a paper towel.

Strain the dashi stock through a fine sieve into a bowl.  Wipe pan clean.  Return stock to pan, then bring to the boil over high heat.  Add peas and bacon, and cook for 3 minutes or until peas are warmed through.

Strain pea mixture through a fine sieve, reserving 2 tbs dashi stock.  Discard bacon.  Process peas, reserved stock and butter in a food processor to a puree.  Season.  Cover to keep warm.

To cook fish, heat oil in a large frying pan over high heat.  Add fish, skin side up, and cook for 2 minutes or until light golden.  Turn over and cook for a further 2 minutes for medium , or until cooked to your liking.  Transfer fish to a plate, season then rest until needed.  Wipe pan clean and reserve.

To cook mushrooms, heat reserved pan over high heat.  Add a 2cm thick slice of soy butter and cook until butter starts to foam.  Reserve remaining soy butter to serve.  Add the mushrooms and cook, tossing occasionally, for 2 minutes, or until tender.  Season.

Divide sweet pea puree among bowls, then top with fish, mushrooms and a 1cm thick slice of soy butter.  Scatter with greens to serve.


As you see there are many steps to this recipe.  It was however, a lovely dish.  I did add a scoop of steamed rice, and I am glad that I did.  I found that the dashi flavouring was a little too overpowering for my liking, and the rice helped diffuse the flavours a little.  All in all though I loved the dish and would certainly make it again.


So you can see why now I was not too perturbed that I didn't have to make a second version of dinner for "The Darlings"?  In the end everything turned out for the best!!!

Tuesday, August 23, 2011

Sweet and Sour Sesame Pork

Sweet and Sour Pork - it's one of those perennial favourites that you get when you go the local Chinese Restaurant for dinner.  Well it is with our family!

I don't tend to make it that much at home as I tend to shy away from anything  that I need to fry in batches - I find that by the last batch the first has gone soggy!!!  So don't ask my why I was tempted in anyway to make this dish - perhaps the "inspiration fairy" had deserted me this week - I don't know - but somehow Sweet and Sour Pork made it onto the menu at our house!  I must say I was pleasantly surprised with the results too!  This is a lovely fresh Sweet and Sour - I think the addition of cherry tomatoes makes all the difference.


Sweet and Sour Sesame Pork
Adapted From MasterChef Magazine- June Edition

Serves 4-6

1.2kg pork scotch fillet (neck) steaks
1/2 cup cornflour
1 tsp garam masala
1 egg
2tbs soy sauce
2tsp sesame oil
4 cloves garlic, crushed
5cm piece of ginger, cut into matchstick size pieces
2 tbs tomato paste
1/2 cup rice wine vinegar
1/3 cup caster sugar
1/4 cup Shaoxing cooking wine
400g pineapple, cut into 3cm pieces
250g grape or cherry tomatoes, halved
1 red capsicum, cut into 3cm pieces
2 tbs sesame seeds
2 spring (green) onions, thinly sliced
rice bran oil to shallow fry
1/4 cup plain flour

Steamed rice to serve

Cut the pork into 3cm pieces.  Place 2 tbs cornflour and garam masala in a bowl.  Whisk in egg, soy sauce and sesame oil until combined.  Add the pork and toss to coat.

To make the sweet and sour sauce, place the garlic and ginger in a pan.  Add the tomato paste, vinegar, sugar and rice wine.  Combine.  Add the pineapple pieces, cherry tomatoes, and capsicum.  Bring to a simmer over medium heat, stirring occasionally to dissolve sugar, then cook for 20 minutes, or until the capsicum is tender, but the tomatoes are still holding their shape.  Keep warm.

Meanwhile heat the sesame seeds in a pan over medium heat for 2 minutes, or golden (stirring).  Transfer to a bowl.  Add the sliced spring onions along with 1 tsp salt.  Reserve.

Fill a frying pan or wok with 3 cm of oil.  Heat over medium heat.  Add the remaining cornflour, the plain flour and 2tsp water to the pork mixture.  Toss the pork to coat.  Fry the pork in batches for 3 minutes each side, until golden and cooked through.  Drain on paper towel.

Combine the pork and the sauce.  Scatter the pork mixture with the sesame seed mixture.  Serve with rice.


This was really lovely, much better than I expected.  I think choosing the right cut of pork made a big difference as well.  The pork scotch fillet made for a nice tender piece of meat.  The flavours in the sauce were also excellent.  I Will definitely make this one again!!!

So Dear Readers what is your favourite dish when head on out the the local Chinese Restaurant with the family?

Saturday, August 20, 2011

A Quick and Easy Risotto Variation

My new Thermomix customers are asking me for recipes that I have made using Thermie that are quick and easy.  So I hope that my regular readers will not be offended if I post a few recipes that are TM specific.

This recipe is just a new slant on the basic risotto, that as we know Thermie is so good at making.  This is just the basic risotto mix with a few additions.


Salmon and Artichoke Risotto
Adapted from EDC - Thermomix Cookbook

Serves 4-6

100g Parmesan Cheese
1 brown onion
2 cloves garlic
25g olive oil
350g arborio rice
100g white wine
2 tbs TM vegetable stock concentrate
1000g water
200g salmon pieces
400g can artichoke hearts, drained, and quartered
100g baby spinach leaves

Place the parmesan cheese in TM bowl and grate for 10 seconds on speed 9.  Set aside.

Place te onion and garlic in the TM bowl and chop for 2 seconds on speed 6.

Add the oil and saute for 2 minutes at 100 degrees on speed 1 (with the MC off).

Insert the butterfly.  Add the rice and wine into the TM bowl and saute for 2 minutes at 100 degrees on Reverse and Speed Soft.

Add the stock concentrate and water and cook for 17 minutes at 100 degrees on Reverse and Speed Soft.

Season with freshly ground black pepper.


In the Thermoserver place the baby spinach, artichoke hearts, half of the parmesan cheese and the salmon pieces.  Top with the risotto mixture.  Allow to rest in the Thermoserver for 10 minutes before serving.


Risottos really are only limited by your imagination.  Try a "Spring" version using baby asparagus, peas and broad beans.  Pumpkin and Basil is another nice variation - simply add the pumpkin cubes into the TM while the rice is cooking - make some pumpkin cubes slightly larger than others, that way some will "melt down" and others will stay whole.  Place the basil leaves in the Thermoserver for the final resting stage.

So Dear Readers do you have a favourite risotto recipe that you make all the time, that you would like to share with us?


Friday, August 19, 2011

My new Shortbread Recipe

Thirty years of tradition came to an abrupt halt the other day when I decided to try the Thermomix version of shortbread.

I have been making this one chocolate chip shortbread cookie recipe now since I was in my early twenties.  The recipe was lovely, but kind of laborious.  It involved melted butter and cornflour, and mixing until it thickened - which depending on the weather, often took a little time to achieve.

I have attended several meetings where the "Thermomix Shortbread" had been served, so I decided to give the recipe my slant - and add chocolate chips and cook them in the mini muffin pans like I usually do.


Choc Chip Mini Shortbread
Adapted from EDC Thermomix Cookbook

400g plain flour
200g rice
200g sugar
400g butter, cut into cubes
200g chocolate chips (or half choc and half white choc)
caster sugar, extra

Preheat oven to 180 degrees.

Place the rice in the TM bowl and mill for 1 minute on speed 9.

Place the flour, sugar and butter in the TM bowl and mix for 10 seconds on speed 6.

Set dial to closed lid position and mix for 20 seconds on interval speed.

Add the chocolate chips and put on closed lid position and mix for an additional 20 seconds on interval speed.  (the mixture will be quite crumbly).

Take spoonfuls of the mixture and lightly press into mini muffin pan moulds.  Gently smooth over with the back of a spoon.  Top the shortbread mixture with a little caster sugar.


Bake in preheated oven for approximately 10 minutes, moving around in the oven if needed, until golden around the edges.


Wow - I cannot believe it - this amount of mixture made around 60 shortbread cookies - and in less than 1 minute of mixing time.  God I love you Thermie!!!


So there you have it 30 years of tradition - now replaced with a Thermomix recipe that takes a fraction of the time to produce!!!!

It's a good thing too - I made a single batch last week, and it flew out the window so quickly that I had to produce another batch - so this week I decided to up the quantities (and that's how I ended up with 60!!) - Mind you they are just about gone too!!!  "The Darlings" love my shortbread and can often be seen walking around with several in their hand.  In fact one of them asked my to show him how to make it himself, and so adds another element to loving Thermie - it makes it so easy for the kids to cook now!!!

I just want to head a word of warning here - I think that really this may be an "overload" for the TM - I would actually advocate only making half this quantity - don't want to lock your blades now do you???

Thursday, August 18, 2011

Pork Schnitzel with Apple Salad

Things in this house have been a little crazy of late.  What with children with broken arms, dogs having strokes, and me setting off on the Thermomix Demonstrating journey, it has all been a bit hectic to say the least!  Shopping has sort of fallen by the wayside a few times, and meals have been flung together as and when I can.  I did plan a meal a while ago, but somehow I never got around to making it - some of the components got used in other meals, and when the time came to make this dish I found myself lacking a few ingredients.  It was late, I was frazzled - it was just going to have to be made with what I had on hand!

The dish was featured in an article called On the Mountain in the latest edition of Delicious Magazine.  It was another Valli Little recipe so I was sure it would be good.


Pork Schnitzel with Apple Salad
Adapted from Delicious Magazine - August Edition.  Recipe by Valli Little

6 x 100g pork schnitzels
250ml greek yoghurt
1 clove garlic, finely chopped
2 tsp german mustard
1 cup plain flour, seasoned
2 eggs, and small amount of milk
3 cups panko breadcrumbs

Apple Salad
juice of 1 lemon
splash extra virgin olive oil
salad leaves
1/3 cup walnut pieces
2 red apples, cored, and sliced into wedges

Place the garlic clove in the TM bowl and chop for 2 seconds on speed 7!  Why?? Because I can!!!

Combine the yoghurt, garlic and mustard in a large bowl.  Season with salt and freshly ground black pepper.  Add the pork schnitzels and allow to marinate for at least 30 minutes, longer if time permits.

Combine the eggs, and a small amount of milk in a large flat plate.  Gently whisk to combine.

Place the seasoned flour on a large flat plate.

Place the panko crumb on a large flat plate.

You know the routine.

Remove the pork from the yoghurt mixture - allowing the excess to drip off.

Place in the flour, lightly coat.  Shake off excess.  Place in the egg mixture, and then into the breadcrumbs.

Cover and chill until ready to cook.

For the salad.  Combine the lemon juice with a good splash of olive oil.  Season well.  Add the apple and toss to combine.

To cook the pork, heat 1cm of oil in a large heavy based fry pan over medium heat.  Cook the schnitzels in batches for 3 minutes each side, or until golden and cooked through.  Drain on paper towels.

Just before serving add the salad leaves to the apple mixture.  Toss gently.

Serve the pork schnitzel with apple salad, topped with walnut pieces, and fries.


Now while this meal was not as Valli Little intended - I must say - it was very tasty indeed.  The recipe stated the yoghurt should be buttermilk and have the addition of sage leaves.  I was also supposed to marinate the meat in this mixture for up to 4 hours.  Try it that way if you like - but I think the way I did it worked out very well.


Wednesday, August 17, 2011

A Flourless Chocolate Cake with a Twist!

A good friend of mine recently had a birthday, and joined "Club 50!"  In honour of this auspicious occasion I decided to try something a little different.  In a recent edition of Good Taste Magazine (The Italy Edition) there was a recipe for a Torta Caprese al Limone.  It looked fabulous - however when push came to shove I didn't think I was going to be able to produce this cake in the limited amount of time that I had to make it in!

I searched through cookbooks to try and find something similar that I could produce in the given time (it was almost like a MasterChef time challenge really!!)  I found 3 different recipes - all slightly different from each other.   Mmmm what was I to do??? What any aspiring cook would do - combine all the elements that I liked into one cake, that I could produce in the time frame given!!!

Here is my take.


Torta Caprese al Limone

250g white chocolate, broken into pieces
250g almonds
250g sugar
rind from 2 lemons (yellow part only)
150g butter, at room temperature
1 tsp vanilla extract
6 eggs
1 tsp baking powder

Lightly grease, and line base of a springform pan with baking paper.

Preheat oven to 180 degrees (non fan).

Place the chocolate into the TM bowl and grate for 6 seconds on speed 8.  Set aside.

Place the almonds in the TM bowl and mill for 4 seconds on speed 6.  Add to the chocolate.

Place the sugar and lemon peel in the TM bowl and mill for 20 seconds on speed 9.

Add the butter, eggs, vanilla, and baking powder to the bowl and mix for 20 seconds on speed 7.

Add the chocolate and almond mixture and mix for 30 seconds on speed 6.

Put mixture into the prepared cake pan.  Bake in preheated oven for 50-60 minutes, or until a skewer when inserted in the middle comes out clean (it is ok to have a little bit of moisture on the skewer - this means the cake won't be too dry!)

Well I made the time challenge (almost!!) - I had to dash out, and wasn't 100% convinced the cake was cooked - so I turned the oven off and left the oven door ajar.  Did it turn out OK?

As they say - the proof of the pudding is in the eating!!!


This cake was delicious - and will definitely be on my "make again list" - in fact  Mr. CCC has a birthday coming up and I just may make this one again for him  (if he behaves himself that is!!)

So Dear Readers tell me - do you often experiment and combine several recipes to make a new one - and are you successful?

Just as a post script - and for those that are following - Buster has made incredible inroads - yesterday I managed to get him to walk 2 metres (6 feet) or more!!!!!  Mind you I was holding one of his favourite treats in front of his nose - but how else do you do it???  I may need to seek employment in dog rehabilitation after this!!!!!

Monday, August 15, 2011

Garlic Overload!

When you are a child all you dream about is the time when you are old enough to make your own decisions - to be an adult!  These last two weeks all I have wanted is to be a child again, and not have to make the hard decisions.

How can I make that ultimate decision that takes my child's best friend away from him forever??

Every day as I grumble about the extra washing that I have to do, and as I carry the dog outside to hopefully relieve me of a little extra washing I wish him far.  But when the decision time came, and we had set a deadline, (which the vet helped counsel us on) I could not follow through.  I just could not do it.  From somewhere I heard the words come from my mouth - "let's give Buster another week - let's just see if we get a sign that he is getting better" (god I am such a wimp!!!) - but lo and behold Buster rallied today (d'day!!) and sent me a sign - he sat up - he attempted to stand, and I even cajoled him to walk (if only but a step).  My faith in life was restored!  So Buster lives to see another week, and hopefully a few more on top of that.

This is a food blog, and I know that is why you have come here - so even thought the posts have been few and far between of late - here is a meal I whipped up in the Thermomix the other night.  Garlic Bread, and Creamy Garlic Prawns with Rice.  Can you ever have too much garlic????  I think not!!!

I found the recipe for the Creamy Garlic Prawns here.  The only comment I can make about this recipe is that I felt that there was a little too much sauce (and I had increased the amount of prawns to 1kg).  What I would do next time is reduce the amount of chicken stock to perhaps 1/2 cup.  I would also probably reduce the cooking time to 5 minutes, and check - adding extra time if needed.  (I felt the prawns were a little tough - I tend to err on the undercooked, and then add extra time rather than go too far overboard!)  Other than that I thought it was a fabulous recipe - and that the flavour was great -  I also loved the fact that I could "saute" my prawns in the Thermomix - something that I have done again to get prawns ready for a pizza!!!

Of course prior to making the Garlic Prawns I cooked my rice in the TM - and placed it in the Thermoserver while making the Creamy Garlic Prawns - making this a complete meal cooked in the Thermomix!!!!


To go with the Garlic Prawns one must have Garlic Bread!!!! (there will be no vampires in this household that's for sure!!!)


Wholemeal Garlic Bread

1 whole head of garlic
100g whole wheat grain
300g lukewarm water
15g dry yeast
1 tsp salt
420g bakers flour
150g grated tasty cheese, plus extra for garnish
20g olive oil

Preheat oven to 200 degrees.  Lightly wrap garlic head in foil.  Bake in preheated oven for 15-20 minutes, or until the garlic is soft and slightly caramelised.  Allow to cool for 5-10 minutes, or until cool enough to handle.

Place the whole wheat grain into the TM bowl.  Mill for 1 minute on speed 9.

Add the water, then the yeast, salt and flour and oil.  Mix for 5 seconds on speed 7 to combine. Gently squeeze the garlic from their skins, and add the garlic and grated cheese to the TM bowl.

Set dial to closed lid position.  Knead the dough for 1 minute 30 seconds on Interval speed.

Place the dough in a lightly oiled bowl, in a warm position to prove for 20-30 minutes, or until dough has doubled in size.

Once the dough has risen, divide into three equal portions.  Plait the dough, and place on baking paper.  Sprinkle extra grated cheese on top and bake in preheated oven for 20-25 minutes, or until golden.


As you can imagine - we were all given wide berth the next day (due to severe garlic breath!!!).

Just another little handy tip - this garlic bread makes a fantastic toast to serve your poached eggs on the next morning (just in case you have not had enough garlic that is!!!!!)

So, Buster lives to see another week, and Jack has his best friend at his side still.  I hope and pray that Buster can continue to improve because I can't bear to break Jack's heart!


Wednesday, August 10, 2011

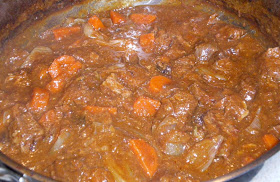
Slow Cooked Beef in Stout

In between dog duties and kid duties yesterday I managed to set myself up with a lovely warming stew to have once we all got in from our various after school activities.

Of course one of "The Darings" is down for the count with a broken arm - but the other one still needs to get to and from Rugby practice.  It's kind of like a convalescent hospital here at the moment - a child with a broken arm and the dog recuperating from a stroke - I think I might have to go and find myself a Florence Nightingale outfit to wear!!!!

This recipe was featured in the latest edition of Delicious Magazine, and is one of Matt Preston's.  It appealed to me as it took several hours to cook, so that meant I could start it, go to sport and then finish it off before the rest of the hungry hoards arrived home!


Slow Cooked Beef in Stout
Adapted from Delicious Magazine - August edition - Recipe by Matt Preston

Serves 6

1.2kg blade or chick steak, trimmed, cut into 3cm cubes
1/4 cup flour, seasoned
1/4 cup olive oil
2 celery stalks, finely chopped*
4 garlic cloves, fined chopped*
250g bacon rashers, finely chopped*
2 tbs tomato paste
375ml Guinness
2 tbs concentrated TM vegetable stock **
2 cups water **
1 bay leaf
3/4 cup pitted prunes, chopped
1 tbs unsalted butter
400g small eschalots, peeled
4 carrots cut into chunks

* place the vegetables and the bacon in the TM bowl and put in closed lid position, press turbo 2-3 times until chopped to desired consistency.
** can substitute 2 cups beef stock

Garlic Paris Mash and Peas to serve

Preheat oven to 150 degrees.

Lightly dust the meat in the flour, shake off excess (reserving excess).

Heat 2 tbs of oil over medium high heat in a large flameproof casserole dish.  In batches, cook the beef, turning, for 3-4, minutes or until browned.  Remove from the pan and set aside.
Reduce the heat to medium, add remaining tablespoon of oil, add the celery, garlic and bacon.  Cook, stirring for 3-4 minutes or until tender.  Return the beef to the pan and add the tomato paste and reserved flour (don't worry if you don't have any - I didn't).  Stir for 1 minute.  Add the stour, stock, bay leaf and prunes and stir to combine.  Make sure you get all those lovely crispy bits off the bottom of the pan - they add great flavour to the dish!!!  Use a spoon to scrape then gently into the mixture.  Bring to a simmer, cover and cook in the oven for 1 1/2 hours.


Heat the butter in a small frypan over medium heat.  Cook the eschalots, stirring for 3-4 minutes, or until/ the outside layer starts to soften.  Add the eschalots and carrots to the casserole, cover and return to the oven for a further 1 hour, or until the meat is tender.


Garlic Paris Mash
1.2 kg potatoes, cut into chunks
2 cloves garlic
250g milk
salt
30g butter

Place the potatoes and garlic in the TM bowl  Season with salt.  Add the milk.  Cook for 20 minutes at 100 degrees on speed 1.

Insert the butterfly.  Season to taste with salt and pepper.  Add the butter and mash for 20 seconds on speed 3.

Place in Thermoserver until ready to serve.

Now it might seem a weird thing to add prunes to a beef casserole, but let me tell you it added a lovely richness to the sauce.  It didn't make it sweet, and I think you would be hard pushed to identify them in there - but it did a lovely depth to the gravy.  Well worth trying next time you make a stew!!


Sunday, August 7, 2011

A Taste of Veneto (A Taste of Venice)

OMG!!!! 


What a week it has been!  I have been so busy that I haven't had time to scratch myself, let alone write a post.

The week started off badly last Saturday when one of "The Darlings" broke his arm at rugby - that of course has meant several trips to the doctor during the week - getting the X-rays, then the temporary plaster on, then the fibreglass cast, and then of course the check up to check the cast!!!!     ..... But wait, that's not all..... the dog had a stroke on Sunday/Monday - so that has meant many, many trips to the vet during the week (having  a "special needs" child that is very attached to an animal confounds, and confuses the issue so much - what is the right and moral thing to do by both the child and the animal - it has been an incredibly emotional week - for all of us).  We have brought the dog home today, but I am still in a quandary as to what is the right thing to do.  So being unable to make a decision, I now find myself the nursemaid to an invalid animal - what a joy that is, as I am sure you can imagine!

In that mix there has also been the fact that my Thermomix business has taken off with a flying start - I have demos booked left right and centre - which is great - but - wow - I need a little time to breathe to take it all in.  Several people have bought, and that has meant that I need to go and spend time with them, making sure that they are confident and happy with their new little buddy in the kitchen.  That is not hard though, as I love Thermie and I want them to love theirs as much as I love mine!!!

So you see, life as we know it has sort of ground to a halt in this house this week.  Food has come and gone - some meals has been microwaved frozen leftovers, others have been - well, just fling something on the plate and hope for the best.

It seems a lifetime ago, but last weekend I made a lovely Italian Style Roast Chicken Dinner.  In the current edition of Good Taste Magazine Guy Grossi has a  segment called "Taste of Veneto"  - it is basically a whole Italian Feast - I simply took the components that I wanted, to produce our meal. I made the roast chicken with a "bread" sauce and a side dish of peas.


Pollo Arrosto with Salsa Veronese Peara
Adapted from Good Taste Magazine - Recipe by Guy Grossi - August Edition

Serves 5-6

1 1.2kg whole chicken
1 x drumsticks
1kg kipfler potatoes, peeled thickly sliced
1 brown onion, coarsely chopped
1 celery stick, trimmed, coarsely chopped
9 cloves garlic, unpeeled
4 sprigs fresh rosemary
10 fresh sage leaves
80ml (1/3 cup) olive oil
1-2 tsp dried chilli flakes
1 lemon, quartered
500ml (2 cups) white wine

Salsa Veronese Peara
300ml chicken stock
90g (1 1/4 cups) fresh breadcrumbs - made from day old bread
1 tbs extra virgin olive oil
20g butter

Preheat oven to 200 degrees C.  Rinse the chicken (inside and out) and drumsticks under cold running water.  Pat dry with paper towels.  Place the potato, onion, celery and 6 of the garlic cloves in a large roasting pan.

Remove the leaves from 2 rosemary springs.  Finely chop the rosemary leaves and half the sage leaves.  Peel and finely chop the remaining garlic.  Combine the rosemary, sage and garlic with the oil and chilli in a bowl.  (Or place all ingredients in the Thermomix and pulse on Turbo until chopped to desired consistency).  Rub the oil mixture over the chicken.  Place the chicken on top of the potato mixture in the baking dish.  Season with salt and freshly ground black pepper.  Insert the lemon, remaining rosemary and sage in the chicken cavity.  Pour the wine into the roasting pan.


Roast, basting occasionally, for 1 1/4 hours, or until the juices run clear when the thigh is pierced with a skewer.

Meanwhile, to make the salsa, place the chicken stock in a saucepan over medium-high heat.  Bring to the boil.  Add the breadcrumbs, oil and butter and stir to combine.  Season with salt and pepper.  Reduce the heat to low.  Simmer, stirring often, for 30 minutes, or until thick.  (you may need to add a little of the liquid from the peas to the salsa to make the mixture a less stodgy consistency).

Serve the chicken with the roasted vegetables,  peas,  and the salsa.


Piselli con Pancetta
(Peas with Pancetta)

1tbs olive oil
1 brown onion, finely chopped
100g pancetta, finely chopped
2 cloves garlic, finely chopped
4 cups frozen peas
250ml (1 cup) chicken stock
8 fresh sage leaves, chopped
4 fresh mint leaves, chopped
sea salt flakes

Heat the oil in a saucepan over medium heat.  Cook the pancetta, onion ans garlic, stirring for 3 minutes, or until the onion is soft.

Add the peas, stock, sage and mint.  Cook for 10 minutes or until the peas are heated through.

Season with the sea salt flakes and freshly ground black pepper.


I really loved this dish, it seemed to add a whole new slant on the usual roast chicken.  The salsa veronese peara was quite a nice change from the traditional gravy that we usually have.  Although I did find that it was quite thick, so I added most of the liquid from the peas to thin it down a little.

I really liked the peas - I make my "Italian style peas" in a similar way - with chicken stock, onions and mushrooms - but adding the pancetta made them a little more special.   I highly recommend trying this next time you are thinking of making a roast chicken dinner!

So now we head off into another new week.  What will this week bring??  Let's hope it is not as hectic as last week!!!  I am counting the fact that my washing machine died a week or so ago into the equation, so I figure the series of three things happening, has happened to me and that I should be home free now!!!

So tell me Dear Readers do you find that when one thing happens to you, that you have a series of misadventures?  Or is it just me????  Please tell me it is not just me!!!!