WELCOME TO MY KITCHEN


WELCOME TO MY KITCHEN!!
I hope you enjoy the food!!!

Tuesday, November 30, 2010

Citrus Dill Basa with Apple Coleslaw

When I was demonstrating seafood recipes at the local fish market this recipe was always very popular.  It was also quite controversial.  

There were those that would argue with you that we shouldn't eat imported fish, and especially fish that has come from Vietnam - I actually had someone spit it out right in front of me one time after they found out where it came from!!  

There are cases for both sides of this story - some tell us that Australia's consumption of seafood is exceeding what we can produce, and that in order for us to maintain seafood in our diet we need to look to imports - and fish that is produced via acquaculture.  Then there are those that say we should only eat Australian produce, and not support the overseas market.  

There are those that will argue that surely fish coming from Vietnam has to be contaminated - as the Mekong is one of the dirtiest rivers in the world.  While others will tell you that the import procedures ensure that the quality of the product we are receiving is as good, if not better than what we are producing here in this country.

For me, I find basa to be a good quality, price point friendly fish for the whole family.  I have been eating it for several years, and have found that it is a great fish to serve to the children.  While it doesn't have a great deal of flavour for the adults (hence a good marinade is essential) - that is the reason that the kids love it (that and it has no bones!!)  It also holds up well during cooking - and retains it's shape!


Citrus Dill Basa


Serves 4

3 tbs dill, chopped
zest of 2 lemons *
1/4 cup olive oil
3 cloves crushed garlic
salt and freshly ground black pepper

4 x basa fillets ** or other white fish

In a large bowl combine all ingredients.  Add fish, mix well, and allow to marinade for at least 1 hour, longer if time permits.


* you can change the flavour of this marinade by using different combinations of citrus zest.  Try lemon/lime, or orange zest for a different taste sensation.

Apple Coleslaw

1/4 cup whole egg mayonnaise
1 tbs white wine vinegar
1 tsp dijon mustard
salt and freshly ground black pepper
1/2 red cabbage shredded
1 large carrot, julienned
1 granny smith apple, julienned

In a small bowl combine the mayonnaise, vinegar, mustard and seasonings.  Place the cabbage, carrot and apple in a large bowl.  Add the mayonnaise mixture, toss to combine.


Heat a large frypan over medium high heat.  Add the fish fillets, and fry from 2 -3 minutes each side, or until cooked through.  (There is no need to add any olive oil as there is sufficient in the marinade).


Serve fish with Apple coleslaw, and steamed potatoes.


If you decide that basa isn't for you, I urge you to try this marinade with another firm white fish.  It is very versatile.  I have made it many different ways - using all lime, all lemon, or a combination of the two and also with orange rind - it is a great marinade whichever way you try it!!!!


** for more information about Basa visit Seafood Importers Association of Australasia.

Monday, November 29, 2010

Kofta Style Pizzas

Now I know on the surface this looks a lot like the pizza I made last week - The Middle Eastern Meatball one - but there is a difference!  Last week's pizza was a receptacle for leftovers - this week's is purpose built!!!

While I was flicking through the latest edition of the MasterChef Magazine I saw in the Masterclass section, a recipe for George's Open Beef Koftas.  They looked really good so I decided I would make them this weekend instead of the usual "leftovers" pizza.  There was only one problem - when I went out to buy the ingredients I was unable to find the spices the recipe called for (my usual little Asian shop had closed down!! - I looked in all the other usual places - but couldn't get cumin or coriander seeds!!).  So while I set off to make the original recipe I have as usual, deviated and turned it into something else (but in a good way I think).


Kofta Style Pizza
Adapted from a recipe in MasterChef Magazine December issue

Makes 2-3 pizzas

2 french eschalots, finely diced
2 cloves crushed garlic
2 tsp ground cumin
2 tsp ground coriander seeds
the roots of 1 bunch of coriander, washed, finely chopped
salt and freshly ground black pepper
rind of 1 lemon
1 red chilli, finely chopped
500g lean beef mince

Lebanese bread
marinated bocconcini cheese
hommus
tabbouli
BBQ sauce
avocado
sour cream or greek style yoghurt
chilli sauce

Firstly to make the beef mixture.  Heat a frypan over medium high heat, add a small amount of olive oil.  Cook the eschalots and garlic, stirring for 2-3 minutes, or until the eschalots start to soften.  Add the mince, and cook quickly, breaking up any lumps.  Once all the mince has browned add the spices, lemon zest and chilli.  Keep warm.

Spread hommus over the lebanese bread, then drizzle with BBQ sauce.  Top with the mince mixture.  Place a few ripped up bocconcini on top of the mince (not too much - this pizza is not about the cheese!!)

Cook for 5 minutes - or until the base is crispy, the cheese is melted, and it is nice and hot.

Top with pieces of avocado, dollops of sour cream, and tabbouli.  Add chilli sauce if desired.


So while it looks nothing like George's Open Koftas - his recipe was the inspiration for these little beauties!!

So Dear Readers do you deviate and turn a recipe into something else somewhere along the way?

Sunday, November 28, 2010

I've Been tagged!!


Gosh Thanks Julie.  This should be interesting - I have never really gone in for this sort of thing before - so I hope my answers are OK!!

My hardest thing is going to be thinking who to get involved in the game next, and what questions to ask them!!

Here goes with my answers -


1. List five foods you could you never bring yourself to eat?

Kidneys
Tripe
Liver
Brains
Blood Sausage

2. Share your happiest food memory.

A candlelight dinner on the beach in Sri Lanka with Mr CCC.  It was our first holiday away without the children – it was bliss!!

3. What would be your most embarrassing fashion moment?


Gosh, how to choose – any 80’s outfit has to be in there!!  Though there was one that comes to mind – sort of a Madonna’esq outfit – short white boots, frilly ankle socks, skirt with braces – and of course the big hair!!!

4. Finish this sentence, “It drives me mental when….” The kids come in from school and throw their crap everywhere – shoes, crumbs, bags, clothes – you name it – you would never know that I had spent the day cleaning up the house!

5. Finish this sentence, “There is nothing better in life than…” ICE CREAM

6. You find a magic lantern and are granted one wish from the Genie of the lamp, what would your wish be?

A holiday to Italy without the kids next year for my 50th birthday!

7. If you had one hour of invisibility what would you do?

Find somewhere quiet and read a book (they wouldn’t be able to find me!!!!)

8. What made you decide to share your life with the world via a blog?

If I have to be completely truthful I think a little part of me wanted to be discovered – kind of like Julie in Julie and Julia!!!


So who to include???  I nominate -

Jo from A Dash of Flavour
Peggy from My Fiance Likes it so it must be good!
Susan from My Food Obsession
Melba Toast from The Adventures of Miss Piggy

..... and the questions are:

What would be your most defining culinary achievement?

If you could change your profession to something using your culinary skills what would you do?

What is the worst thing you have cooked - and why?

Finish this sentence "In my next life I want to come back as......."

If you could visit anywhere in the world where would you go and why?

What is your favourite dessert?

Are you a summer or a winter person?  And is it because of food?

Can't wait to hear your answers!!!!!

Guinness Marinade for Steak

I think I was suffering a little from heat exhaustion yesterday.  You see "The Darlings" were competing in a very large athletics event and I was the designated parent helper!  Lucky me!!  It meant I had to be out on the track, in the sun.  My "replacement" parent helper never turned up and let's just say I was out there escorting kids around the track for a VERY long time!!!

That didn't deter me though when I got home from setting to and making dinner.  Unfortunately I was so tired and SO hungry (no lunch break) that I completely forgot about taking photos!!  So please forgive me.

I had a spare bottle of Guinness that has been sitting on the kitchen bench since I made the ribs a while back, so I was keen to find a way to use it up.  I have never really thought to add tarragon to a steak marinade before so I decided it was worth giving a go, and it was a great flavour to compliment the steak!!

Guinness Steak Marinade

1 cup Guinness
2 cloves crushed garlic
1 onion, finely minced in the food processor
1 french shallot, finely minced in the food processor
2 tbs soy sauce
1 tbs worcestershire sauce
1 tbs dijon mustard
2 tbs tarragon, finely chopped
2 tbs continental parsley, finely chopped
salt and freshly ground black pepper

Combine all the above ingredients in a large ziploc bag.  Add Steaks and marinade for at least 1 hour.

Barbecue steaks to your liking.

After a hard day in the sun a BBQ'd steak was just what the doctor ordered (that and a nice cold beer!!!)

Mango & Toffee Macadamia Ice Cream

I saw this recipe in the December issue of Good Food and just knew that I had to make it.

It had all my favourite things in it - mangoes - white chocolate and scorched macadamias!!! Yum!!  I did cheat a little - eliminated a step from the recipe (I bought the scorched macadamias rather than making them myself - but I will give you the recipe in it's entirety just in case you are not near a nut shop that sells the macadamias already done!!)


Mango and Toffee Macadamia Ice Cream
Recipe from Good Food Magazine - December issue

Serves 8

40g butter
200g salted roasted macadamia nuts
100g (1/2 cup) caster sugar
2 litres good quality vanillla ice cream
200g (I used 250G - why waste the rest of the block!!) white chocolate, finely chopped
2 mangoes, cheeks removed, peeled, finely chopped.

Line a baking tray with non stick baking paper.   Melt the butter in a large frypan over medium high heat.  Add the nuts and sugar.  Cook, stirring often, for 4-5 minutes or until the sugar dissolves and is golden.  Spread over the prepared tray.  Set aside for 30 minutes or until set.  Chop coarsley.

Line a 20 x 10cm loaf tin with plastic wrap  - allowing the sides to overhang.(I actually used a 23x27cm tin - and it was perfect - filled to perfection!!).

Transfer the ice cream to a large bowl.  Set aside for 10 minutes to soften.

Stir in the chocolate, and half the nut mixture.  Stir in the mango.  Spoon the ice cream mixture into the prepared pan and smooth the surface.  Fold over the overhanging plastic wrap.  Place in the freezer overnight, or until firm.


Turn onto a chopping board.  Unwrap and cut into slices.  Divide among serving plates.  Top with remaining nut mixture.


If you have ever had a Weis Mango bar - this is just like it - only better!!!

As I went to serve this last night Mr. CCC told me he didn't like mangoes - oh well, all the more for me!!!!  Funny how you can live with someone for years and assume that just because you love something they do too!  Is there something that you have discovered after many years that your partner did not like???

Saturday, November 27, 2010

Prawn Saganaki

Have you seen the Christmas edition of MasterChef Magazine - doesn't George look so cute with his little ice cream???

On the cover is also a very good looking dish - called George and Gary's barbecued prawns.  Anytime prawns are mentioned you have my attention.  Quick turn to the recipe - and before you know it I'm shopping for the ingredients.  I did modify the recipe slightly - sorry, but I just don't think 5 prawns is enough for me - besides this was the only dish we were having!

Traditionally Prawns Saganaki are baked in the oven with tomatoes, and this is the way I usually make it - so I was very interested to see how this barbecued version would turn out.


Prawns Saganaki
Adapted from Recipe in MasterChef Magazine - December edition

Serves 4 (but hey this is prawns we are talking about - adjust accordingly!!)

1.2kg green king prawns
4 cloves crushed garlic
2 long red chillies, seeded, finley chopped
1/4 cup coriander, chopped
extra virgin olive oil
*125g yellow and red cherry tomatoes
*125g baby roma tomatoes
* 125g kumatoes
1/4 cup flat leaf parsley, chopped
200g feta cheese, crumbled
** 1 bunch of asparagus (optional - not in the recipe)

Crusty bread to serve.

To butterfly the prawns, using kitchen scissors cut through the underside of each prawn, working from the head to the tail.  Using a small, sharp knife cut halfway into the flesh where it is exposed.  To remove the digestive (poop shute) tract carefully pull the "vein" through the opening at the head and discard.  (This is actually a lot harder than it sounds - so if you like - remove the head, cut through the legs, and remove the poop shute - still not easy - but that is how I did it!!).  If you are looking to make it a "cleaner" meal - I suggest you remove all the shell and just leave on the tail (but are your removing some of the flavour??).

To marinate the prawns, place the prawns cut side up on a tray.  Scatter with the chilli, garlic and coriander, drizzle with olive oil and season with salt.  (I added all the above to a large bowl and mixed well!!)  Cover and refrigerate for 1 hour.


Preheat the BBQ to high.  Place a heavy based frypan at one end.  Add the tomatoes, drizzle with olive oil and season with salt and pepper.  Cook turning occasionally for 4 minutes, or until blistered.  Transfer to a platter.

Meanwhile cook prawns at the other end of the BBQ, flesh side down, for 2 minutes.  Turn and cook for a further minute.  Place the cooked prawns over the tomatoes.

Scatter with parsley and feta, drizzle with olive oil and serve with crusty bread.


* I added a whole punnet (400g of mixed tomatoes) - this gave it a lovely "sauce"!


** While I was shopping I found some beautiful looking fresh thin asparagus - so I decided to add these to the grill as well.

The verdict - with a glass of chilled white wine and some crunchy sourdough bread this was "summer on a plate"!!!  Will definitely add this to the menu again!!!

PS: Make sure you add some waterbowls - as this is a very "messy fingers" dish!!!!

So Dear Readers what is "Summer on a Plate" to you???  Seafood?  Chicken?? Do tell.

Friday, November 26, 2010

Moroccan Style Chicken with Citrus Couscous and Roasted Beetroot

Last night's dinner was a lovely blend of lots of different flavours.

There was the Moroccan Chicken with undertones of cinnamon and honey.  The couscous that had pistachios and coriander and an orange zest to it, and then to top it off was the roasted beetroot.

I had seen a recipe in the current edition of Super Food Ideas for Moroccan Chicken with Beetroot Couscous, but they were using a prepackaged Moroccan marinade.  I didn't want to do this so I started searching for one I could make myself.  So by combining portions of their recipe with other ideas this is what I came up with.

I am very lucky that the chicken shop near me sells 1/2 chickens for the very low price of 4 halves for $6.95 - so I actually marinated 8 halves with the amount of marinade that I made.  It was cheaper for me to buy the eight pieces - so I am keeping the leftovers to make - you guessed it Moroccan Chicken Pizzas!!  Adjust the amounts according to how much chicken you use - or make the whole lot and put some marinated chicken away in the freezer for another time!


Moroccan Style Chicken
Recipe was adapted from a recipe in December issue of Super Food Ideas, and Taste.com.au

Chicken pieces/chicken halves

1 cup lemon juice
4 tbs olive oil
2 tbs honey
4 cloves crushed garlic
4 tsp ground cumin
4 tsp salt
2 tsp turmeric
1/2 tsp cayenne pepper (or to taste)
2 tsp cinnamon

Roasted Beetroot

4 beetroot


Citrus Couscous

1 cup of couscous
1/4 cup currants
1 cup of chicken stock
1/4 cup orange juice
1/3 cup pistachios, chopped
1/2 cup chopped coriander

Orange Dressing

grated rind of 1 orange
2 tbs orange juice
2 tbs olive oil


Place all the marinade ingredients into either two large ziploc bags, or one very large bowl.  Add the chicken and marinade for several hours.  (Be careful though - when you have sharp bones they can pierce the plastic - so be careful when mixing the marinade with the chicken!! I had a couple of holes - turmeric coloured bench now!!!)

Preheat the oven to 180C.

Scrub the beetroot, under running water.  Make 4 squares of foil.  Spray each square with garlic infused olive oil spray.  Spray the actual beetroot with spray, then wrap tightly in the foil.

After the chicken had marinaded for several hours place the chicken pieces and all the marinade in a large roasting pan.

If using halves, bake the chicken for 1 hour, or until tender and cooked through - turning over once during cooking.  Place the wrapped beetroot in the oven on a separate baking tray to bake along side the chicken.

Remove the beetroot from the oven, and unwrap to cool slightly.

When cool enough to touch, peel the skin from the beetroot, and dice into cubes.

To make the couscous, place the stock and orange juice in a saucepan, and heat over medium heat until boiling.  Remove from the heat.  Add the currants and the couscous.  Place the lid on the saucepan and allow to sit for 5 minutes.

Fluff the couscous with a fork to separate the grains, then add the pistachios, coriander and the orange dressing.

Serve the chicken on a bed of couscous, with a serving of beetroot on the side.


** You may like to add the beetroot to the couscous, but some people are not keen on beetroot, so having it as an option I think is a better way to go.  Me personally I love the taste of roasted beetroot!!


Sorry the photos are not great - I was stressed last night getting the meal out - was trying to do too many things at once.  The main thing though was that the meal tasted great!!!

So Dear Readers what are your favourite Moroccan flavours - do you love the combination of cinnamon and honey on chicken - or do you have another favourite combination?


Thursday, November 25, 2010

Steak with Soy Braised Mushrooms

Is there any better combination than steak and mushrooms?  Well not in my humble opinion.

Last night everyone was finally home for dinner at the same time so I thought it was a perfect opportunity to have some scotch fillets that I had recently purchased from one of those internet half price deals.  I had been burned one before with one of these deals, but I couldn't resist and purchased another one.  Thank goodness I did.  This steak was lovely - melt in your mouth tender (I hope the rest of what I bought is as good).

So, no history lessons here today, no trivia, just a recipe.


Steak and Soy Braised Mushrooms


Serves 4

1/3 cup light soy sauce
2 tbs mirin
200g enoki mushrooms, trimmed and separated
200g swiss brown mushrooms, quartered
4 x scotch fillet steaks
Salt and pepper
olive oil


In a frypan combine the soy sauce, mirin, and approx 1/3 cup of water.  Bring to a slow simmer.  Add the swiss brown mushrooms and simmer for 2-3 minutes, or until starting to become tender.   Add the enoki mushrooms and simmer for a further 2 minutes.  At this point you can leave it on a very low simmer.

Season your steaks with salt and freshly ground black pepper.

Heat a frypan to high heat.  Add a small amount of olive oil, and fry the steaks for 3-4 minutes each side for medium-rare, or until cooked to your liking.

I served the steaks topped with the mushrooms sauce, and with potato cubes and asparagus.


Garlic Potato Cubes ** 

4-5 potatoes, peeled, cut into cubes
3 cloves crushed garlic
olive oil


Preheat oven to 220C.

Place the potato cubes into a large bowl.  Splash a generous amount of olive oil and 2-3 cloves of crushed garlic over the potatoes, mix well, ensuring that all the potato has been covered in the olive oil.


Place the potato cubes onto a baking tray that has been lined with baking paper.  Place in an oven and bake for 25-30 minutes, or until lovely and golden.  Makes sure you turn them over at least once during baking.


** Make sure you start these before you start cooking the steak!!!!


This was a really lovely meal, the soy, mushroom combination was perfect for the steak.

Wednesday, November 24, 2010

Cheeseburgers!!!

It's Tuesday - that means people here, there and everywhere.  In and out, and a meal is just about impossible to prepare for all to eat at the same time.  So I have bowed to overwhelming requests and am making cheeseburgers for dinner.  I am making them from scratch, so I know exactly what is going in them.

When I started researching the history of the Hamburger I was actually quite surprised.  I thought, American - Fast Food - easy!!  Well not so.  Apparently the "hamburger" in many differing forms has been around for a very long time.

Ghengis Khan's army, it appears, travelled around with scrapings of raw meat, such as lamb and mutton, that was formed into patties, under their saddles (yum!).  When they stopped they ate the patties raw (it had been tenderised from all that riding!!) - The beginnings of Steak Tartar!!!  Perfect food to eat from the hand!!

Later during the 18th Century in the ports of Hamburg a "burger" which was salted and slightly smoked, and often "stretched" with breadcrumbs, onion and spices was being being offered to sailors as they visited port.  It's from here we see the migration of the Burger to America.

Early immigrants to America bought German concept of the Burger with them, and here is where the story starts to turn into a bit of a "I found it first".

There are the Menches brothers from Ohio who, in 1885, claim to have served the first burger at the Erie County Fair in Hamburg New York.  You can see where this is going can't you??

Apparently they ran out of pork for their pork patty sandwich, and the local butchers - always out for a quick sale, suggested that they use beef.  They then ground the beef with brown sugar, coffe, and other spices.... and served it between two pieces of bread!!!  The year was 1885!  They were unsure what to call this new invention - so they looked up at the banner advertising the fair -  -The Erie Fair in Hamburg - and the "Hamburger" was born!

The Mendes continued to serve their "hamburger", ..........but then there are others that say that in 1891 Oscar Weber Bilby was the first to serve the "hamburger" on a bun!! and that this was the real birth of the "hamburger"  Semantics!!!

It goes on and on ...... let's just suffice to say that though the origins may be murky.... the Americans refined it!!!

Which gets me to tonight's dinner.....

One of "The Darlings" came and spied the patties on a tray and proclaimed with indignation in his voice ...."Why didn't you make real burgers???"   "These are real burgers Darling, mummy made them herself!!" "But they have green stuff in it!!"  Really, good luck picking that out then!!!

I say this because the previous night's meal was a chicken rollup thingy - I thought it was pretty good - didn't add any vegies to theirs - so what did they find to pick out???? The onions of course!!!  So good luck with the parsley tonight boys!!!


Cheeseburgers

Makes 6

500g pork mince
500g veal mince
2 tbs chopped continental parsley
2 cloves crushed garlic
2 tbs dried minced onion flakes
2 tsp dijon mustard
2 tsp worcestershire sauce
salt and freshly ground black pepper


Place all the above ingredients into a bowl, and get in and get your hands dirty!!  Mix well, then form into 5-6 patties, depending on how many you have to feed.

Allow to rest in the fridge for approximately 20 minutes - or until you need them

Preheat the BBQ and cook those little puppies until they are done to your liking.

To those cooked burgers add:


sliced cheese (of choice) - I have some swiss and cheddar
baby rocket leaves
sliced cucumber pickles
sliced tomato
beetroot......
whatever you like on your burger


Serve on gourmet bread rolls - I am using pane de case rolls that I will crisp up in the oven for 5 minutes.

Got to love the burger!!!  Whatever it's origins - it's a meal you can eat from your hand!!!


So Dear Readers, what do you love on your burgers??  Do you love the works?  Pickles?  Beetroot?? (that's for the Aussies), Fancy Mustard???  Do tell.


Thank you to all my lovely readers who emailed me or made comments on my last post.

I did not write this post to elicit sympathy.  I hoped that by writing the post, if I could help but one person, in one small way, then I had done some good.  

I am just a person who is doing the best they can with a life they cannot change.


Hamburger facts from whatscookingamerica.net.

Tuesday, November 23, 2010

One of Life's Little Ironies

Dear Readers recently while telling some acquaintances about my blogging habit, and other aspects of my life, I was reminded none too bluntly, about what a bitter irony my life is.

Those of you that have read my blogs, and those of you that know me personally, will know that I love food!  I love cooking food, I love eating food,  and I love talking about food.

So here I divulge my little secret ...... just over 13 years ago I gave birth to my first son.  It ended up being a very traumatic time in my life - you see the birth was not easy - he was in a frank breach position, and the end result was a child that had the doctors baffled.

I spend an agonising two weeks with him in hospital while they tried to come to some conclusions (answers please, I need answers!) - in the end they couldn't determine what was wrong with him, and we were released, but only into the hands of the Children's Hospital - the local hospital had done all it could - it was time for the specialists! They too were baffled,  they ended up sending us home, only because they had no reason to keep us, but we were still none the wiser.

I spent the next 10 months of my life (and my son's) visiting several doctors per week.  Ultimately they ended up with a diagnosis, and here is where the bitter irony comes into my life!!

My child was diagnosed with Prader Willi Syndrome.  This is a relatively unheard of, sporadically occurring, genetic condition that affects approximately one in 10,000 births (lucky me!!).  It was 1997 and doctors had not run across that many children presenting with this condition - so it took time for someone to finally see the signs and call for a test - a test that takes many weeks for the results to come through (more agony).  The horrible part of Prader Willi Syndrome (PWS) is that it is ostensibly an eating disorder - I say this quite glibly as there are also many other serious underlying conditions that present with this syndrome.  Luckily we do not have a lot of the other issues to deal with.

The sad and horrible part of PWS is that people affected with this syndrome NEVER, and I repeat NEVER feel full. The section of their brain (the hypothalamus) that registers satiety is damaged and they are ALWAYS HUNGRY!  Nearly all people that live with this condition live with all food under lock and key.....

Do you see where the irony is now???  I love food!!!!

My baking was put on hold - I could not have food lying around the house - food that was tempting and calling out to my son.  In many ways a part of me died at this time.

I have now come to terms with this, and hence through this blog I am starting to relive my love of food.  We do not live under lock and key (but we do have a section of the house where some food is locked up).  Food is a constant struggle - I cannot allow him to eat a lot of the things that I bake and give so freely to "The Darlings" (they are skinny little bean poles that need fattening up - another irony - while I try to enforce a "Diet" on one - I try to "fatten up" the other two!).  Meal times are a constant negotiation - "why can they have seconds and I can't?"  "Why can they have whatever it is???? and I can't?"

You all, as food blogger readers, know what an integral part food plays in our lives.  What would you do if you were faced with a dilemma like this?  Food is everywhere - every social event we attend has food attached to it it in some way.  I actually dread Christmas - I love to bake and cook beautiful food - but all that temptation lying around - it's just not fair!

I try to be reasonable - I try my hardest to make meals that are healthy and appealing - hence posts like Healthy Fish and Chips!

So Dear Readers perhaps you now have a little insight into some of the whys behind my meals.  Perhaps you can see why this blog is so important to me - a way of letting the inner foodie in me out.

We all struggle to some degree with the impact that food has on our lives - if you are like me and have to occasionally undertake a diet, spare a thought for those that have Prader Willi Syndrome - their life is a constant diet.  They are constantly struggling with weight issues, and for many these issues become life threatening.   I am lucky my son is not obese - but that is because we have been very vigilant with him since the age of two.

The next time you offer food to a child, think twice.  (I am like a mother eagle swooping in for the kill any time someone hands my son food - although now he is older I cannot take food from him and placate him with something else - so please do not offer him any!!), and no, please don't say "surely one can't hurt" - in the big scheme of this condition it can!

Perhaps this blog will lead me somehow to writing a book about my experiences with PWS - perhaps that is to be my goal in life?

All I can say is be thankful of your life, enjoy food as only you can enjoy it,  There are others out there for whom this is not an option.

If there are any of you out there that would like more information on PWS - please feel free to email me. I am more than happy to share my experiences of living with this syndrome.

                                My son Jack - who just turned 13 last month!

PS. I promise my next blog to be "lighter" - this was just something I needed to get off my chest.  My fellow food blogger Tammi actually planted the seed in my head recently - and so I thought why not write a blog about this!!  So thanks Tammi.

Leftover Pizzas

As promised - the leftover Popcorn chicken returned in the form of Popcorn Chicken Pizza - this was a very simple pizza for "The Darlings" - just chicken and cheese......


.......and then those that wanted it added avocado.


The Middle Eastern Style Meatballs also made an encore appearance.  The pizza base was lebanese bread, then topped with tomato and BBQ sauces.  Sliced meatballs, that were then topped with cheese.  When it was cooked I added tabbouli, avocado and sour cream (and hot sauce for me!).


It was kind of like a flat crispy kebab!! Very yummy!

So Dear Readers what do you do with your leftovers????

Monday, November 22, 2010

Devil's Food Cake and Afghan Cookies

A while back I did a post on old recipes and recipe books.  In it I talked about my first recipe collection - the Women's Weekly Recipe Boxed Card Set - well I ventured back into that box this weekend and made my old favourite - the Devils Food Cake.  This was a cake that I made many a time for my poor unsuspecting family.  If you read my post the other day about reading the method in recipes you will understand more.  In those days I didn't even read the method - thought I knew it all - I had watched Mum a million times - it's just a cake!!  How hard can it be???  There were several successes and just as many, if not more failures.  Fortunately as time progressed my intuition got better.

I flinch now just thinking about some of the things I inflicted on my poor unsuspecting family - Junior MasterChef I was not!!

So this was a trip back down memory lane.......


Devils Food Cake

2 1/3 cusp self raising flour
1 3/4 cups castor sugar
1 tsp bi-carb soda
155g butter (at room temperature)
2/3cup cocoa 1 cup water
1 tsp vanilla extract
3 eggs

250ml thickened cream
1 tsp vanilla extract
2 tbs icing sugar

Chocolate Icing **
250g chocolate
2 cups icing sugar
50g butter
2-4 tbs milk

Preheat oven to 180C.  Grease and line with baking paper 2 x 20cm round cake tins.

Sift dry ingredients into the large bowl of an electric mixer.  Add butter, water and vanilla.  Beat on medium speed for 3 minutes.  Add the eggs, and increase the speed slightly, and beat for a further 3 minutes.

Divide mixture between the two pans.


Bake in oven for 35-40 minutes, or until a skewer inserted in the middle comes out clean.

Allow to cool in pans for 5 minutes, then turn out onto a rack to cool completely.

When completely cold whip the cream, adding the icing sugar and vanilla once you start getting soft peaks.  Continue whipping until you get stiff peaks.

Sandwich the two layers together with the whipped cream.

To make the chocolate icing - put the chocolate and the butter in a double pan, and gently heat, stirring constantly until the chocolate and the butter have melted.  Remove from the heat.  Add half of the icing sugar, and tablespoon at a time of the milk.  Beat until smooth - until you have added all the icing sugar.  Only add enough milk to make a smooth spreading consistency.

Top the cake with the chocolate icing.


** I made more than is needed for the cake because I also made Afghan Cookies.  I don't know what got into me - perhaps my body was being channelled with the ghost of Betty Crocker??


Here is a little bit of trivia for you.  There is no actual Betty Crocker!  Apparently back in the 1920's the Washburn Crosby Company (one of the six big milling companies that merged into General Mills) were receiving so many requests for answers to baking questions that they invented the personna "Betty Crocker".  Crocker from the last name of of a retired company executive  and "Betty" because they thought it sounded "warm and friendly".  Betty's signature came from a female secretary who won a competition - and it is still the same signature used today!!

Here you see the many "faces" of Betty Crocker over the years!!
They changed Betty's face many times over the years to reflect general appeal - she became more "professional" in the 80's and even acquired some "ethnic" appeal in the late 1990's.  Oh to be Betty!!!  All without plastic surgery too!!!  I hope I look as good as Betty when I am 90!

PS In case you are wondering Sara Lee is a real person!!!

Anyway, I digress..... yesterday was a very busy day in my kitchen - for reasons I know not why!!!


When I recently posted about my cornflake cookies - the lovely Lorraine - from Not Quite Nigella reminded me about a recipe that she had recently posted called Afghan Cookies.  Now looking back at her post I see that mine do not bear much resemblance to hers.  Not sure why - but as they say the "proof is in the pudding".  So hence I made double of the icing mixture above to put on the cookies.

Here is Lorraine's recipe, including her icing, for

Afghan Cookies


Makes approximately 24 cookies

170g butter, softened to room temperature
1/2 cup brown sugar
1 1/2 cups plain flour
3 tbs cocoa
1/2 tsp baking powder
2 cups crushed cornflakes

Icing

3 tbs water
3 tbs caster sugar
3 tbs (45g) butter
1 1/2 cups icing sugar
3 tbs cocoa powder
walnut halves to decorate

Preheat the oven to 180C.

Line 2 baking sheets with baking paper.

Cream the butter and the sugar until light and fluffy.  Sift the dry ingredients on top of this mixture, and mix together.  The batter will be quite lumpy.  Knead in the cornflakes, gathering a ball of the mix.  Shape approximately soup spoon amounts of the mixture into balls.  Place the balls onto the prepared pans.  Flatten them slightly.  They won't spread too much.


Bake for 12-14 minutes (if cooking time is too short, they will be too delicate to set.)  Cool on the baking trays.

Icing

Gently heat the water, caster sugar and butter until the butter is melted and simmer for 1 minute to form a syrup.  Sift the icing sugar and cocoa.

While constantly whisking with a balloon whisk, pour the syrup onto the sifted icing sugar and cocoa.  Add some hot water to thin out the icing, if needed.  You want the icing thick enough to hold it's shape and not run, but not thick enough so that any spoon marks hold (oops - mine was too thick!! - should have made Lorraine's icing!!).

Using a teaspoon place some icing on the centre of the cookie and then add a walnut half in the centre of each.  Allow to set.


Mine do not look anywhere near as lovely as Lorraine's - but they taste good - and they have "The Darlings" seal of approval!!!  That's good enough for me!  They also have a big thick slab of chocolate icing on top!!! Yum.

Betty Crocker info from Centre for History and New Media.

Sunday, November 21, 2010

KFC Popcorn Chicken Challenge

The secret recipe of eleven different herbs and spices is purportedly guarded almost as closely as the Crown Jewels, so who was I to think that with a few simple key strokes, and something called Google I could come up with the recipe?

What I did come up with a long the way was some interesting facts about Kentucky Fried Chicken.


Colonel Harland Sanders was born in Henryville, Indiana in 1890.  His father died when he was only five years old, and this resulted in his mother having to go to work, and his becoming the cook of the family. After his mother remarried he ran away from home (because his stepfather beat him) and he enlisted in the army (by falsifying his birthdate).

Over the years Sanders held many jobs but he sealed his fate when, at the age of 40, he started serving chicken dishes to customers from his service station in Corbin, Kentucky.  The year was 1930 and America was in the midst of The Great Depression.  This was the birth of Kentucky Fried Chicken!!!  His original recipe was prepared in an iron skillet and took over 30 minutes to make.  Even though it took time, it was very popular, and by 1936 he was granted the honorary title of "Kentucky Colonel" in recognition of his contribution to the state's cuisine.  The next year he expanded his restaurant, bought a motel, and the rest as they say is history.

By 1940 he had devised what we now know as the "secret recipe'.  He wrote this down on a piece of paper and signed his name to it!  It has been very heavily guarded all these years and even now, apparently, portions of the secret recipe are prepared in several locations so that no one group of people knows all the ingredients involved (very tricky).  The key element to this deliciously moist chicken is in the cooking method - pressure frying - something that I was not going to be able to replicate, even if I could crack the code of spices.

I found a website proclaiming to have the secret recipe KFC Chicken Recipe.  Here they had it for all to see.  It was actually a pretty complicated recipe - the quantities they gave were for 100g of chicken - so after many calculations this is what I did to try and replicate the recipe.  If you go to the secret recipe you will find that it calls for wild marjoram and sweet marjoram and kitchen sage - I wasn't sure what these were so I used regular marjoram and regular sage.  It also called for garlic salt and onion salt.  I used minced onion, and garlic powder.  Apparently analysts who have tested the spice mixture say that is mainly composed of salt, sugar and MSG.  Well there certainly were several salty components to the spice mixture!!


Secret Spice Mixture

1 tbs dried rosemary leaves
1 tbs + 1 tsp majoram leaves
1 tbs sage leaves (or powder if you can't find)
1 tsp dried ground ginger
1 1/2 tsp dried thyme leaves
3 tbs brown sugar
3 tbs dried parsley
1 tsp white pepper
1 tbs paprika powder (I used Hungarian)
2 tbs garlic powder
2 tbs onion flakes
1 tbs sea salt
2 tbs powdered chicken stock mix
40g dry tomato soup mix

Place all the ingredients in the bowl of your grinder/food processor, and grind until all ingredients are of the same texture.


Very pretty - almost like making one of those layered coloured sands in a bottle thing!!

Store this mixture in an airtight container - this is your base for the secret recipe!!!


Now comes the fun part.

You need to mix the secret herbs and spices with flour - they give the ratio of 30g of spice mixture to 100g of plain flour.

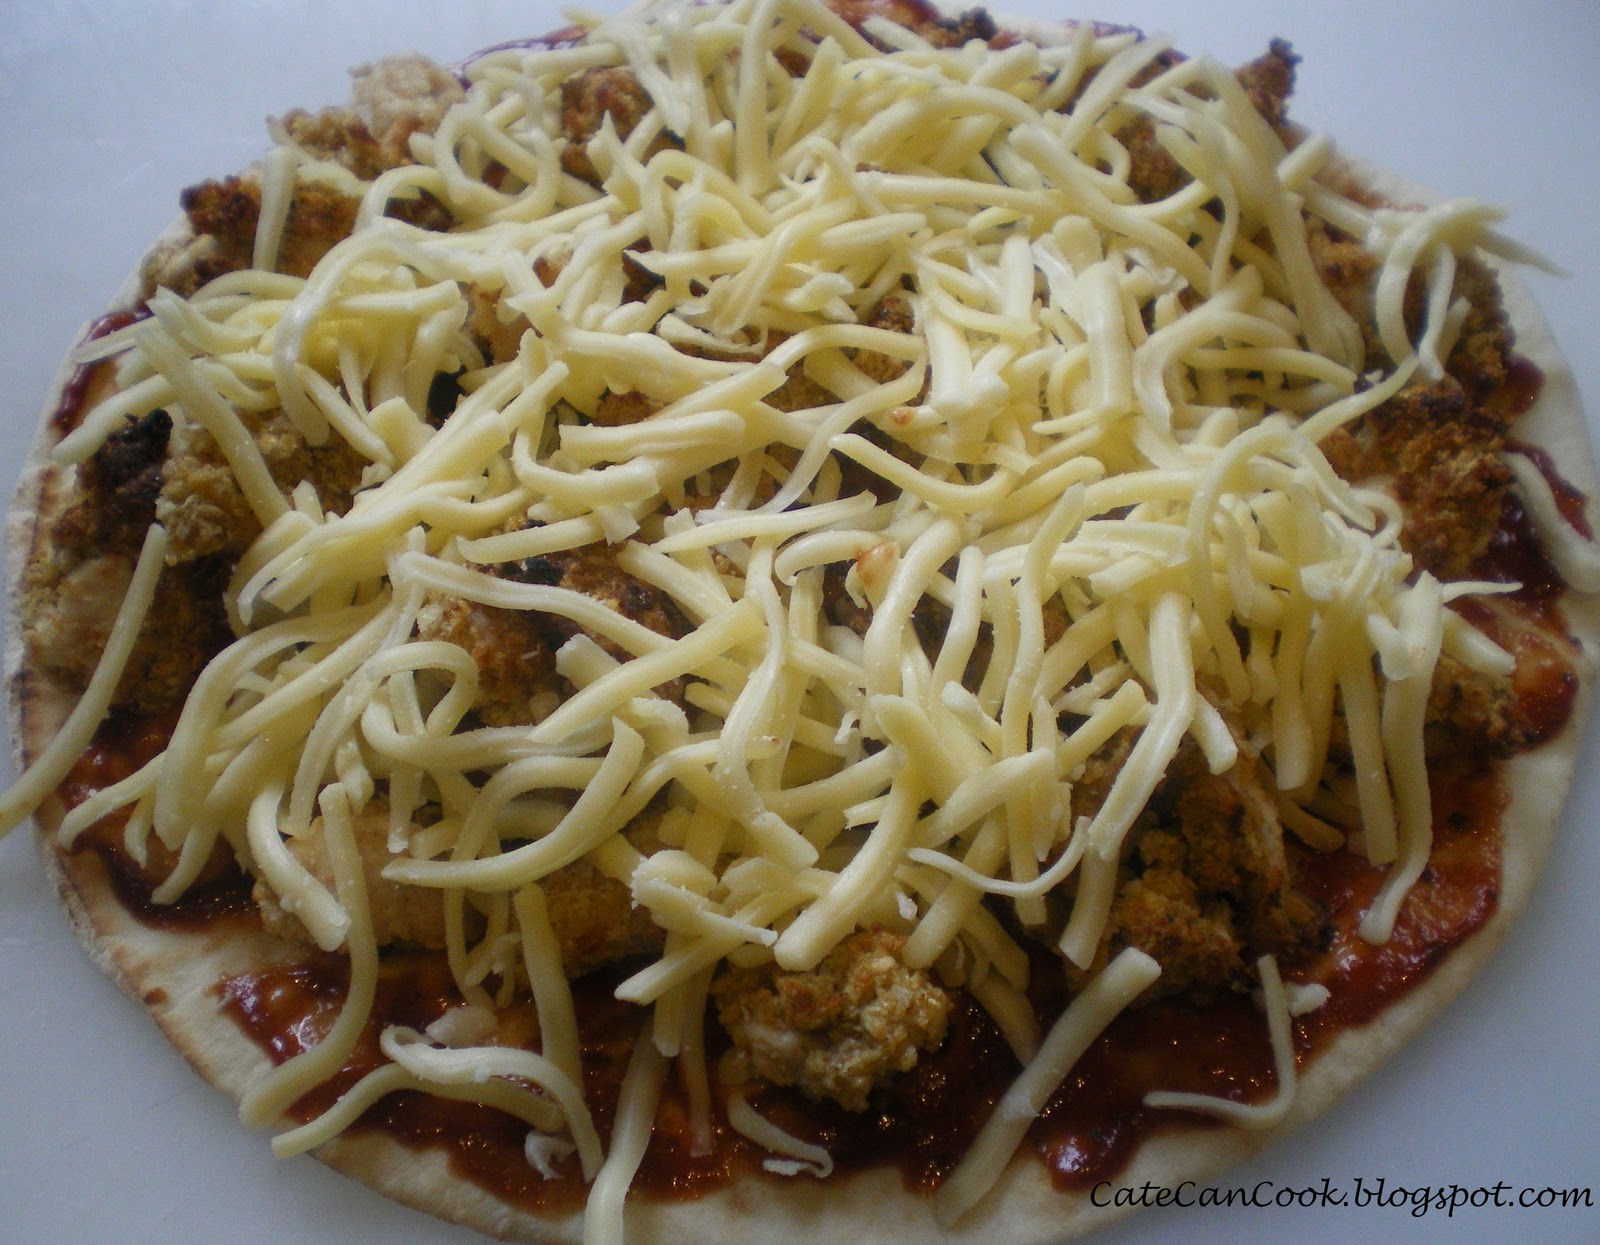
Now I am making a large quantity of popcorn chicken (I had 2kg - yes I know - way too much - but we have leftovers and they say they want a popcorn chicken pizza tonight!!)  So here is the ratio I used......

90g spice mix to 300g flour.

To your blended spice/flour mix you then add:

2 tsp powdered sugar
2 ground pepper
1 tsp salt
1/2 tsp onion powder

Mix these ingredients all together in a large bowl.  You will also need

500g panko crumbs

2kg chicken tenderloins

6 eggs
6 tbs milk

I have used chicken tenderloins - I thought that these would be nice and tender and would not require too much prep.

You need to make an egg wash - they said only egg whites - but I used whole eggs, and regular milk.  In another bowl mix the eggs and the milk.  Beat the mixture with a fork until it is a smooth consistency.

Place the panko crumbs on a large tray.

Add the chicken pieces to the flour mixture.  Coat well, then set aside.

Put the chicken pieces into the flour mixture, and coat each piece well.  Shake to remove any excess flour.

Taking one piece of chicken at a time, dip the flour coated chicken pieces into the egg/milk mixture making sure to coat the chicken completely.  Allow the excess liquuid to drip off.

Now dip the coated chicken into the panko crumbs - coat completely in the crumbs.

*** The recipe said to repeat this process - yes back into the egg-milk mixture, then back into the panko crumbs.

*** I did not do this - way too time consuming, plus we would have run out of panko crumbs!!

Place the coated chicken pieces onto a baking tray that has been lined with baking paper.  Spray the chicken pieces with olive oil spray.

Bake the chicken pieces in an oven that has been preheated to 200C.  Bake for 5 minutes, then turn the pieces over, spray again with the olive oil spray, and bake for another 5-7 minutes, or until golden.


Alternatively you can pressure fry them as KFC does it (if you know what pressure frying even is!!??)

Wow so many ingredients - I am sure I scared a lot of you off with all the laborious method too!!!

So how does it measure up??

The one good thing was that it was baked, not fried, but in the end I really think that the frying adds to that special flavour that is KFC.  The flavour was OK - but not really "KFC".  The kids liked it, but would I do it again???  I do have a lot of the "secret herbs and spices mix" left over so I guess I will do some rendition of it again in the near future.  To be honest though, I think next time I will just google KFC and find the nearest outlet near me!!!  Less mess, less stress!!!

A fun night was had by all though - many hands were used in the preparation of this meal.  I would like to thank my helper Miss Twinkles, and my unbiased taste tester Mr JD.

The true coup for the night was the Devils Food Cake that you will find posted later......

By the way .....the other KFC fact that I forgot to include was that Colonel Sanders sold his entire franchising operation in 1964 for the sum of $2 million USD - which in today's currency would be worth over $14 million!!!  His nephew attempted to cash in on the family's claim to fried chicken and turned his franchised store into a spin off called "Lees Famous Recipe Chicken".  Obviously not as famous as his uncle - well not outside the US anyway!!!

KFC facts found on Wikipedia